Thank you for purchasing SkyTechNG - Inventory & Point of Sale. If you have any questions that are beyond the scope of this help file, please feel free to send us an email or contact us here. Thanks so much!
Email: productsupport@skytechng.com
Introduction
SkyTechNG - Inventory & Point of Sale is a web application software user can track Items & Stock Items, Manage Suppliers, Manage Customers, Items Categories, Sales, Purchase, Manage users and get all the reports which are require to your office and many more features.
Instal / Update
Minimum System Requirments
- PHP Version 7.4
- MySQL Version 5.x or higher
Local Server Installation
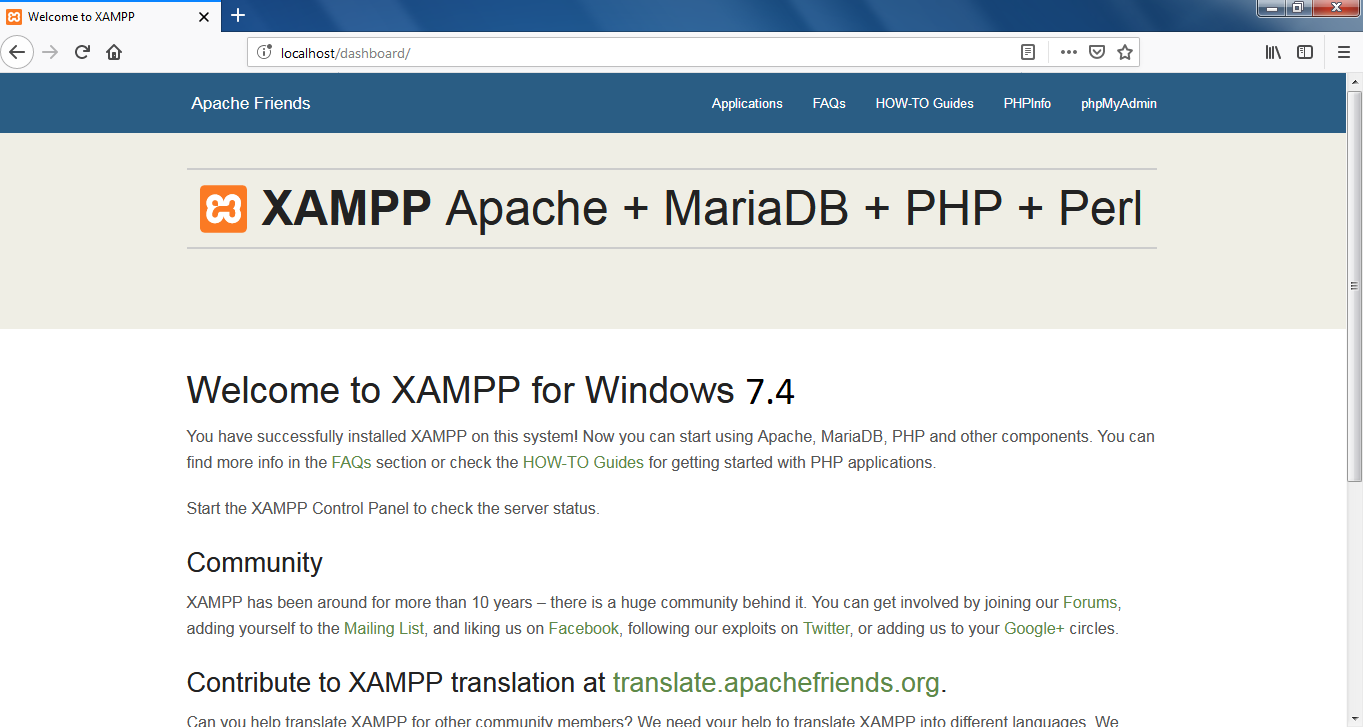
To run application you need to download web server, you can download it from for Windows/Linux/Mac. For Windows systems download MAMPP or XAMPP Server, for Macintosh systems download MAMPP server,for Linux systems download LAMPP or XAMPP server. For demonstration we are using here XAMPP server. In all the servers have MySQL extensions. No need to download third party MySQL.Run the Local Server
In Windows systems c:/xampp/xampp-control.exe -> Double click -> you will get XAMPP control panel -> find 'Apache' Click on start button -> find MySQL Click on start button. This much server setup is enough, to run application.Test the Local Server Installtion
- Open Browser type: http://localhost or http://localhost/dashboard
- It will show XAMPP Welcome Page
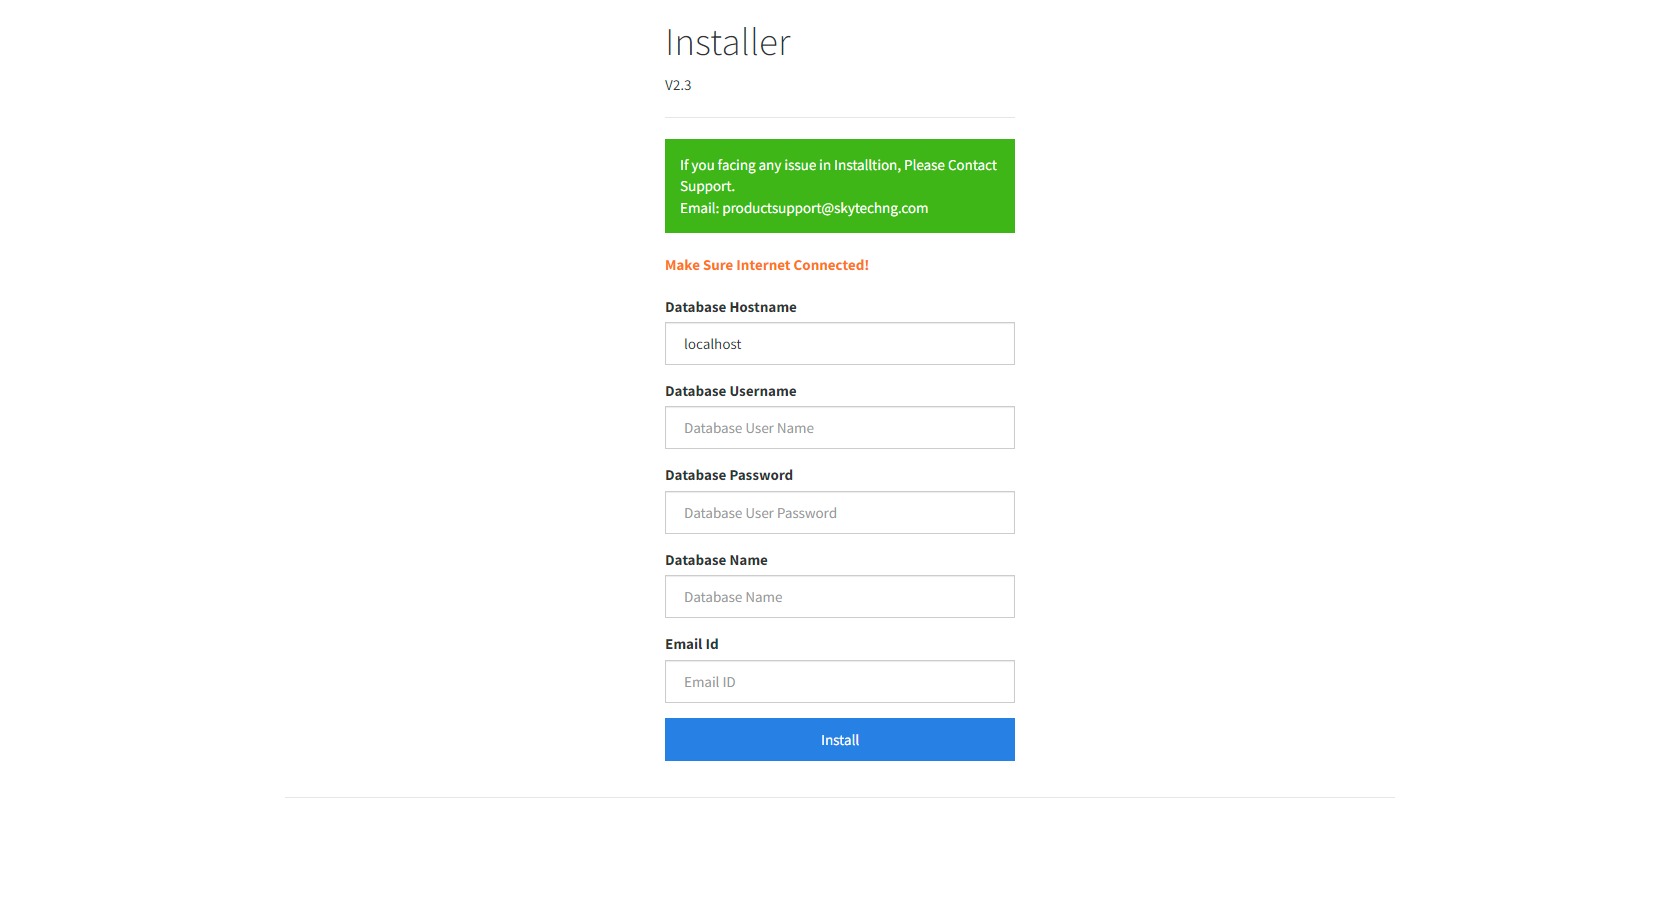
Application Installation in Local Server
#1 STEP-
- Unzip the application folder
- Copy source code into c:/xampp/htdocs/ or c:/wampp/www/
- We assume here your application folder name is 'inventory'. Location: c:/xampp/htdocs/inventory
- In source folder you will get 'setup' folder. Location: c:/xampp/htdocs/inventory/setup
- Open Browser type: http://localhost/inventory/setup or https://www.example.com/setup
- Please enter information in installer form.
-
- Hostname
- Username
- Password
- Database Name
- Valid Email ID
-
Note !
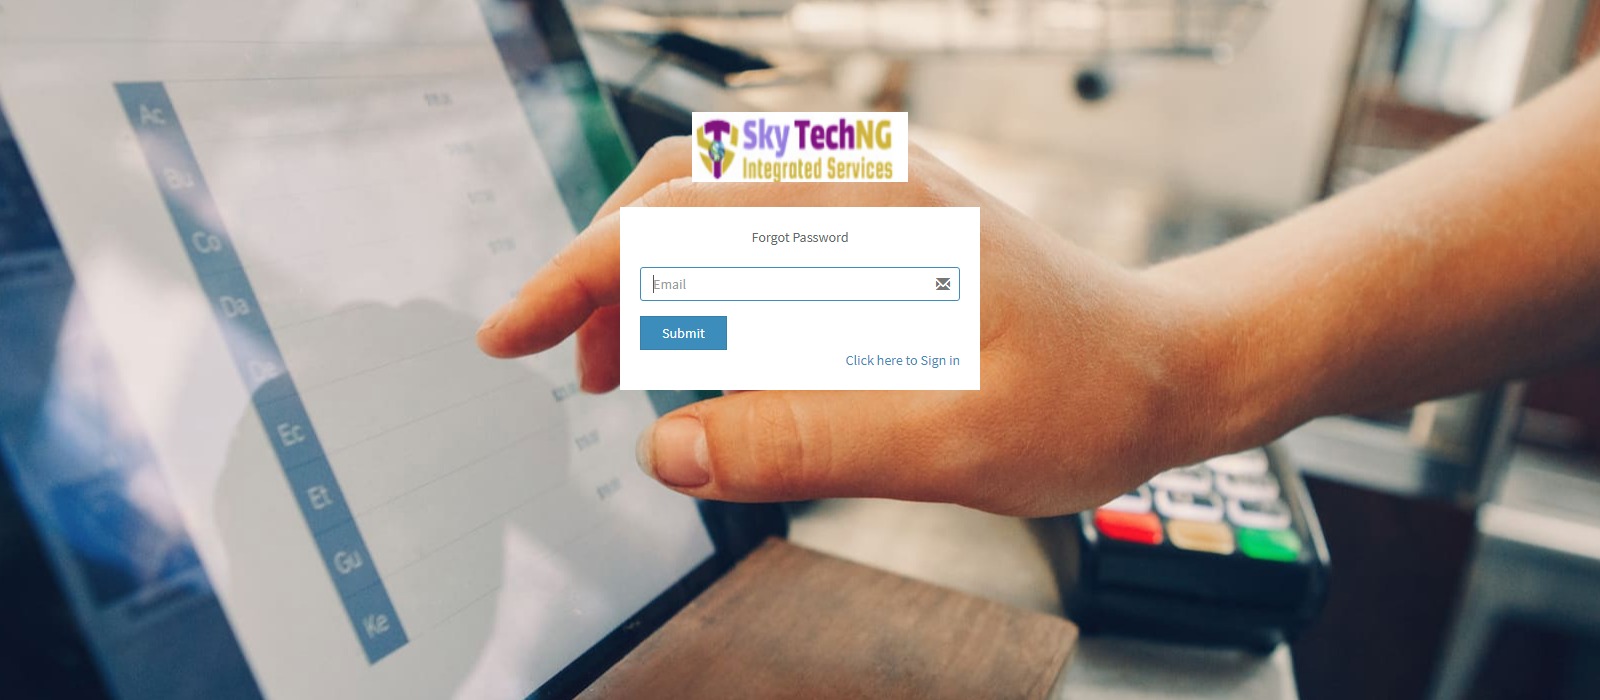
If you are Installing Application on the internet server you no need to worry about server like xampp or wamp, ensure your server must support with PHP & MySQL, now you need to create database, after that you need to upload & extract source file on server and follow the installation setup. That's it :)Login
Login Screen:| Username : | admin |
| Password : | 123456 |
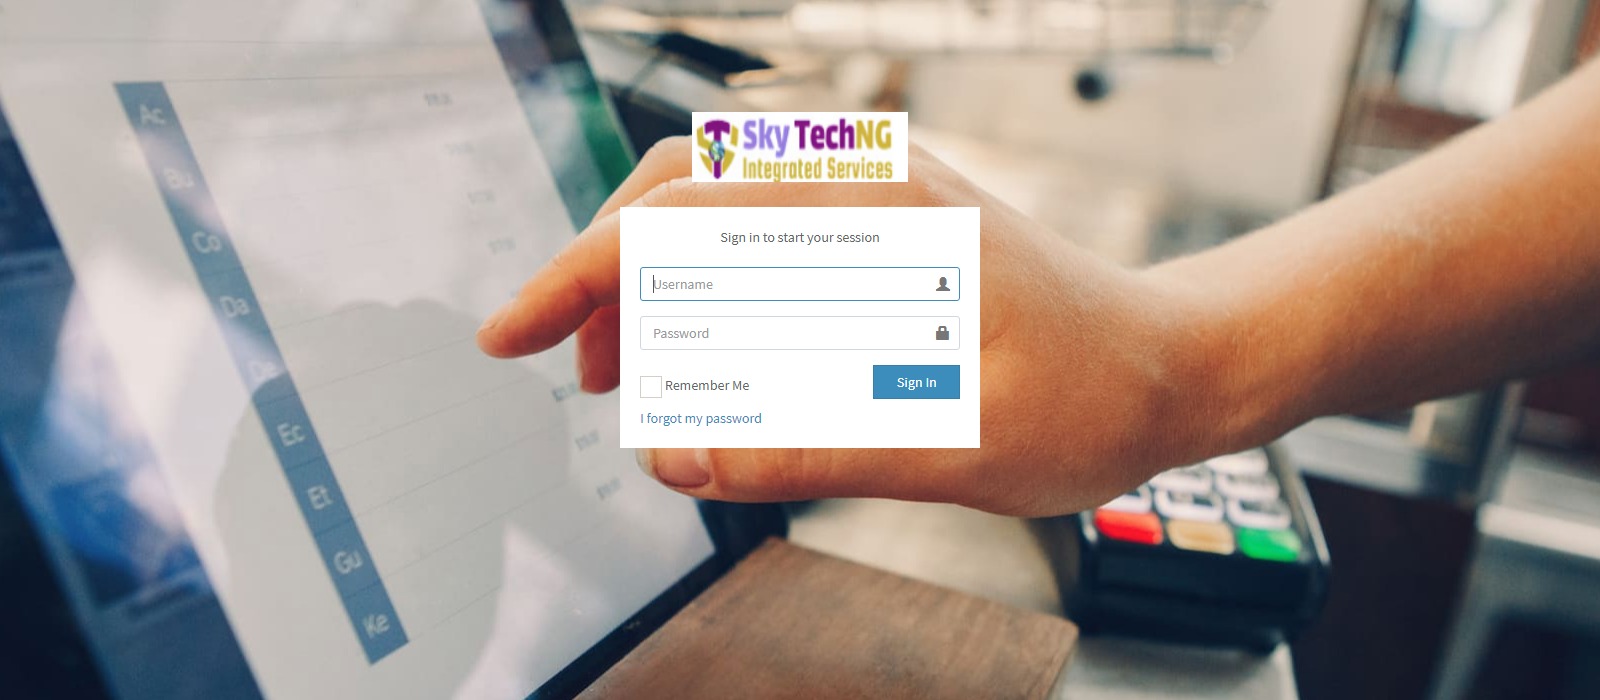
Alert !
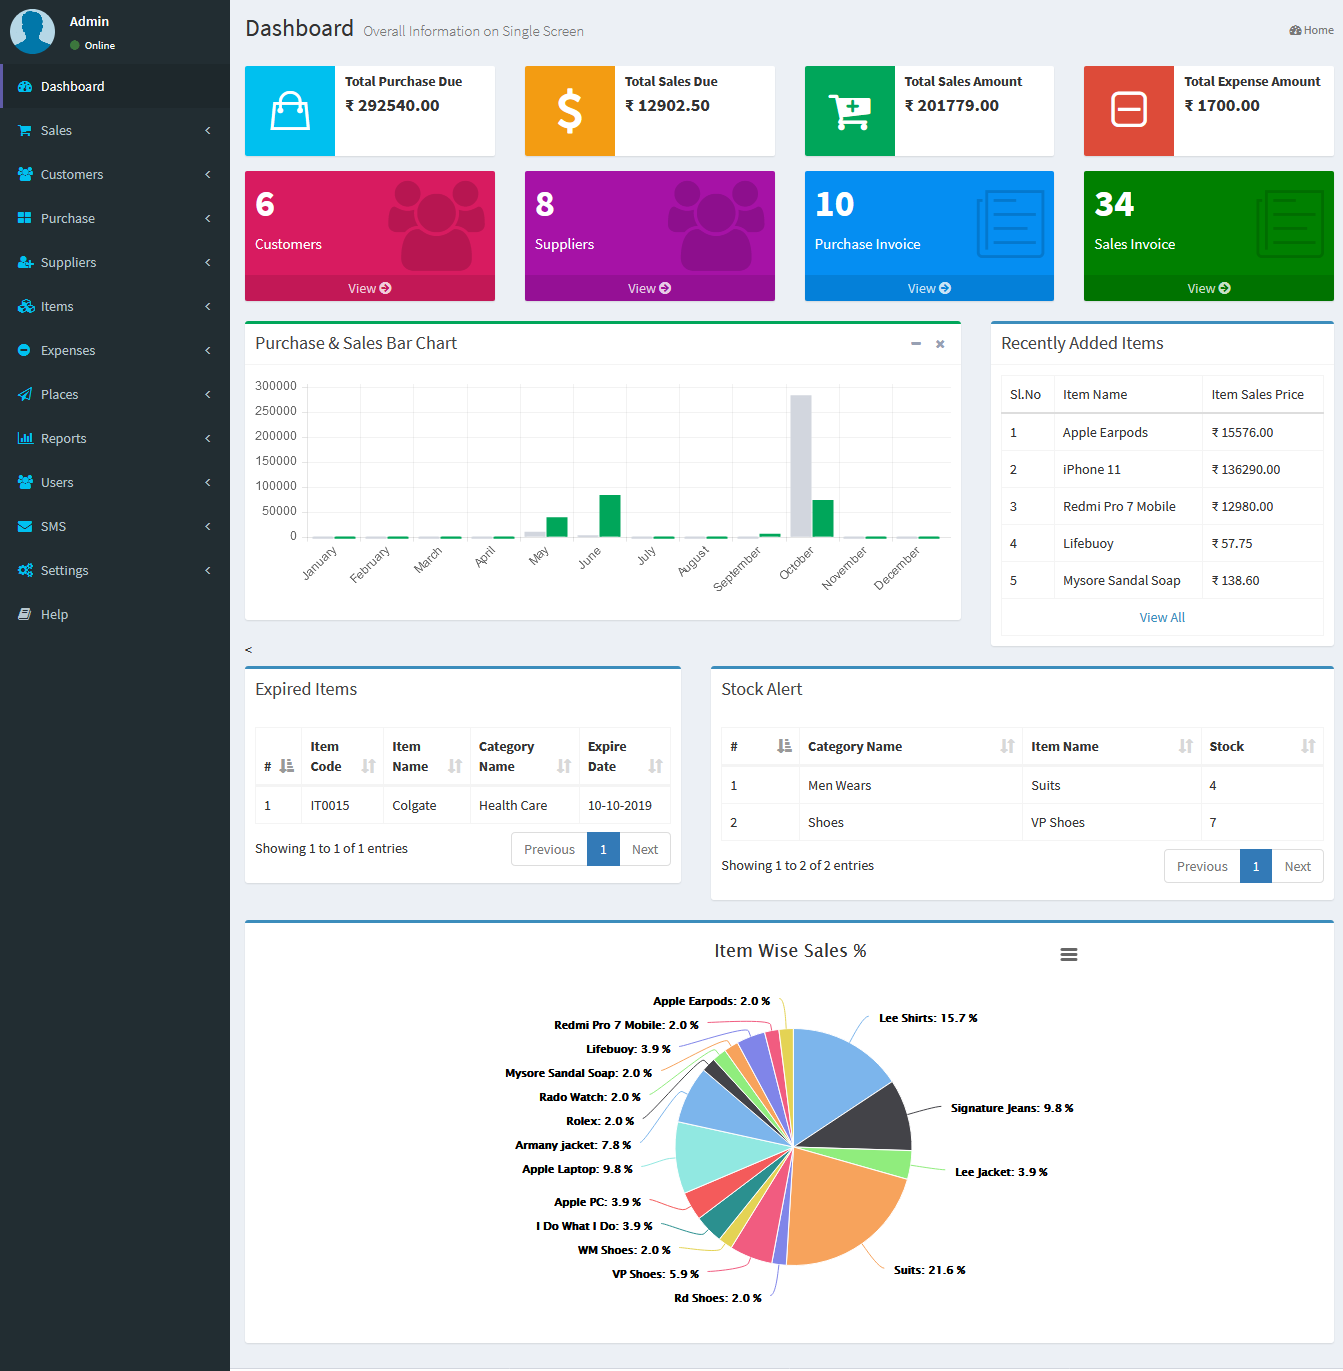
After login you need to change the admin password for security purpose.Dashboard
All in one desk.
- Attractive dashboard
- View Shortcut links of most usable links
- POS Shortcut Link
- New Category
- New Item
- New Supplier
- New Customer
- New Purchase
- New Sales
- View Total number of Suppliers
- View Total number of Customers
- View Total number of Purchases
- View Total number of Sales
- View Expired Items List
- View stock alert
- View recently added items list.
- Bar Chart of Sales and Purchase
- Pie Chart of Sales Items %
Categories
New Category: Category -> New Category Adding a Categorys it's a very easy task. Enter Category name, description(Optional field) and click on Save button. Categorys List: Categorys -> Categorys List You can view the all the added categorys list and you can manage categorys list by Delete & Edit actions. New Category :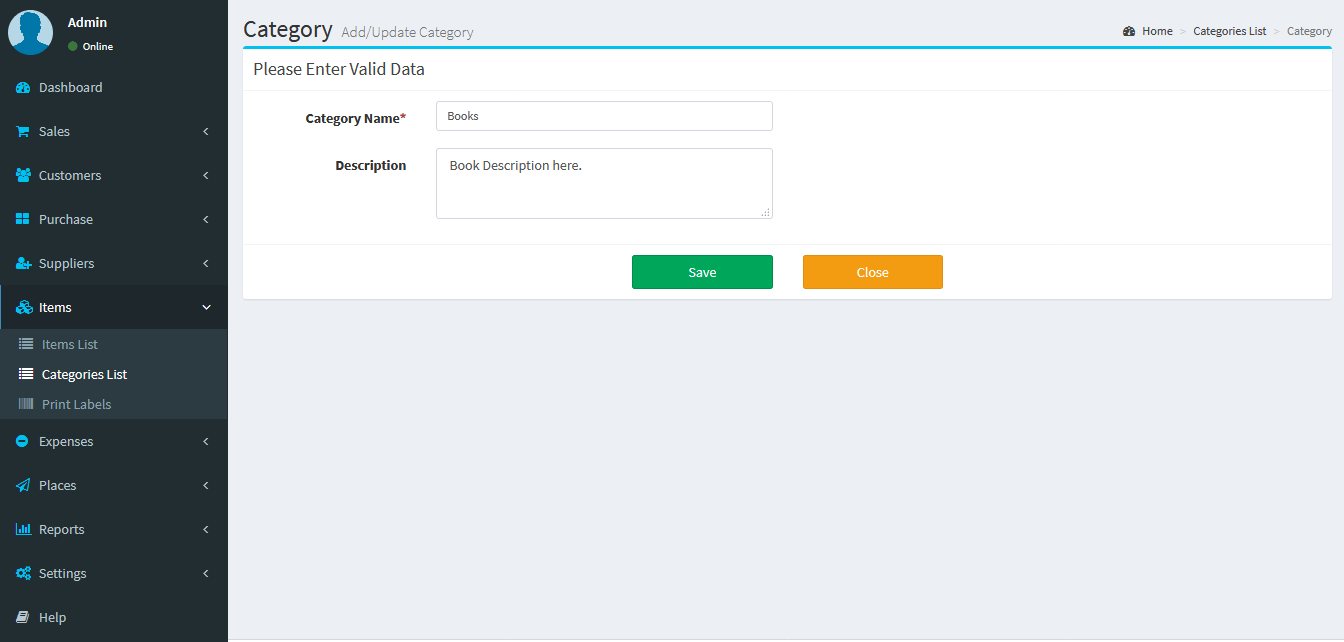 Categories List :
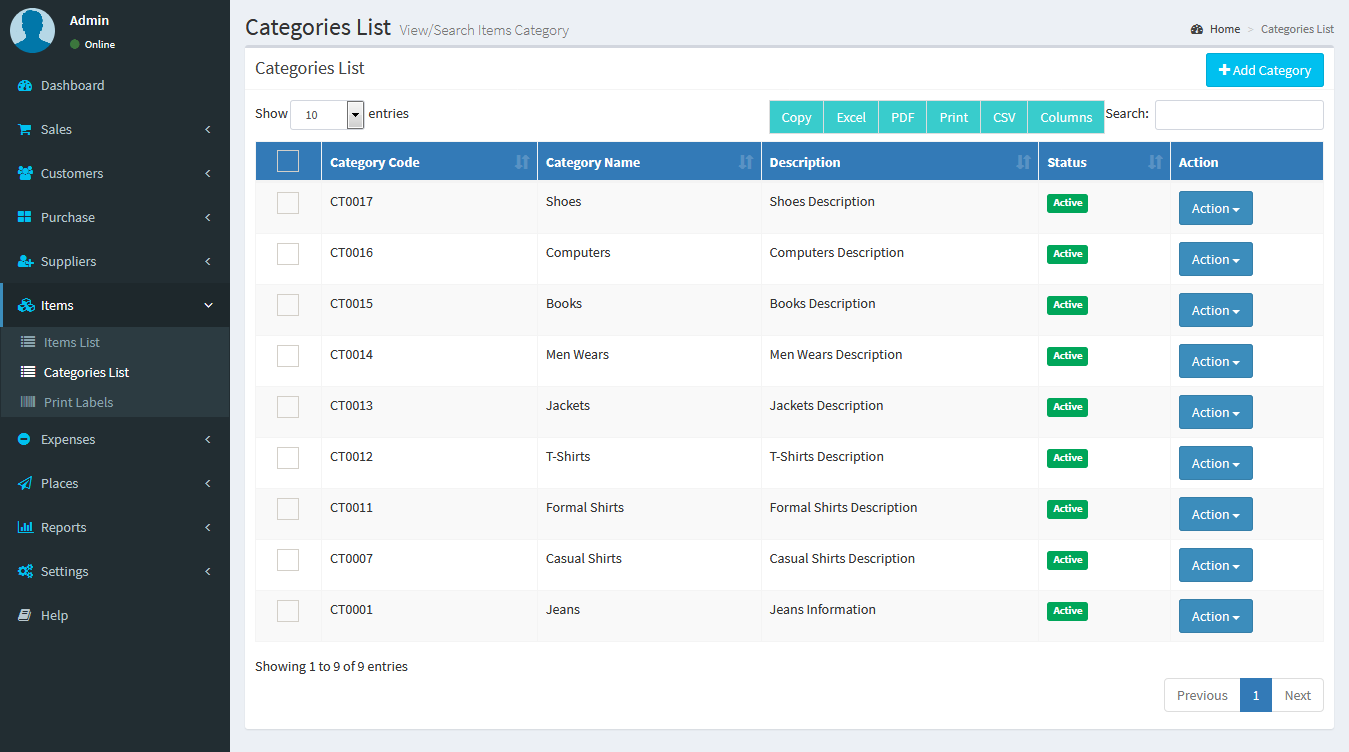
Brands
New Brand: Brand -> New Brand Adding a Brands it's a very easy task. Enter Brand name, description(Optional field) and click on Save button. Brands List: Brands -> Brands List You can view the all the added Brands list and you can manage Brands list by Delete & Edit actions. New Brand :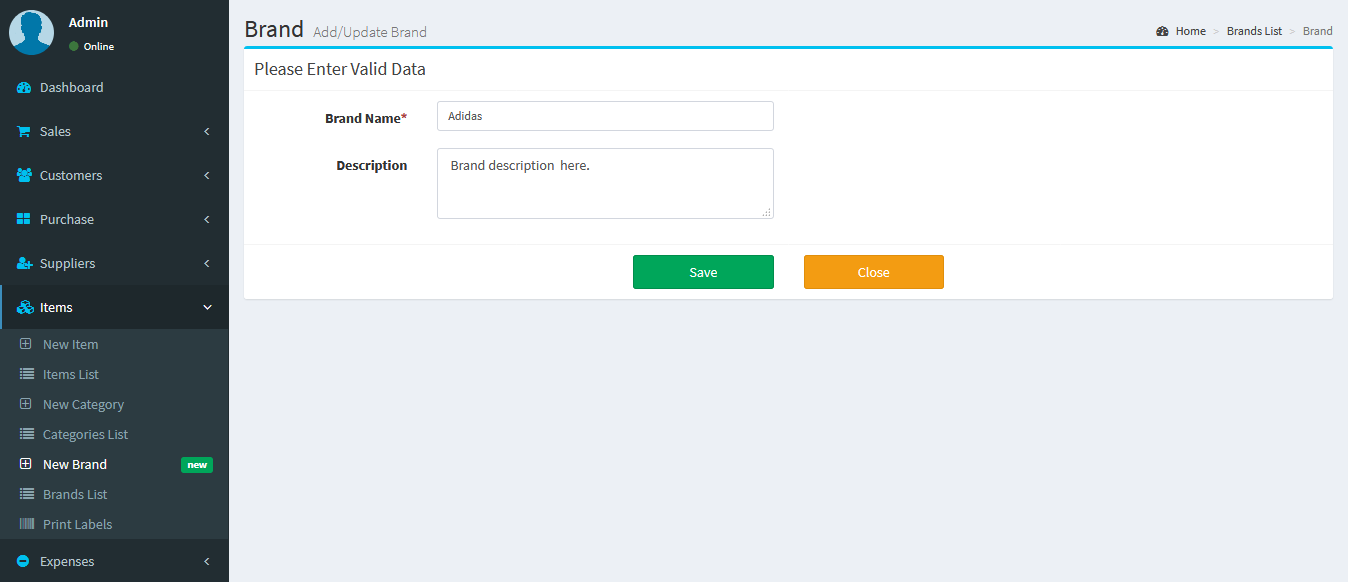 Brands List :
Items
New Item: Items -> New Item Adding a Items it's a very easy task. Enter Item name, Select Category, Unit, SKU(Optional Field), Alert Quantity(Optional field), Select Image(Optional field),Purchase Price(Without Tax), Select Tax, Tax Type(Inclusive / Exclusive), Profit Margin(in Percentage %) , Available/Current Stock(+/-) (Optional Field), Add Lot number(Optional), Expired Date(Optional) and click on Save button. Items List: Items -> Items List You can view the all the added Items list and you can manage Items list by Delete & Edit actions. New Item :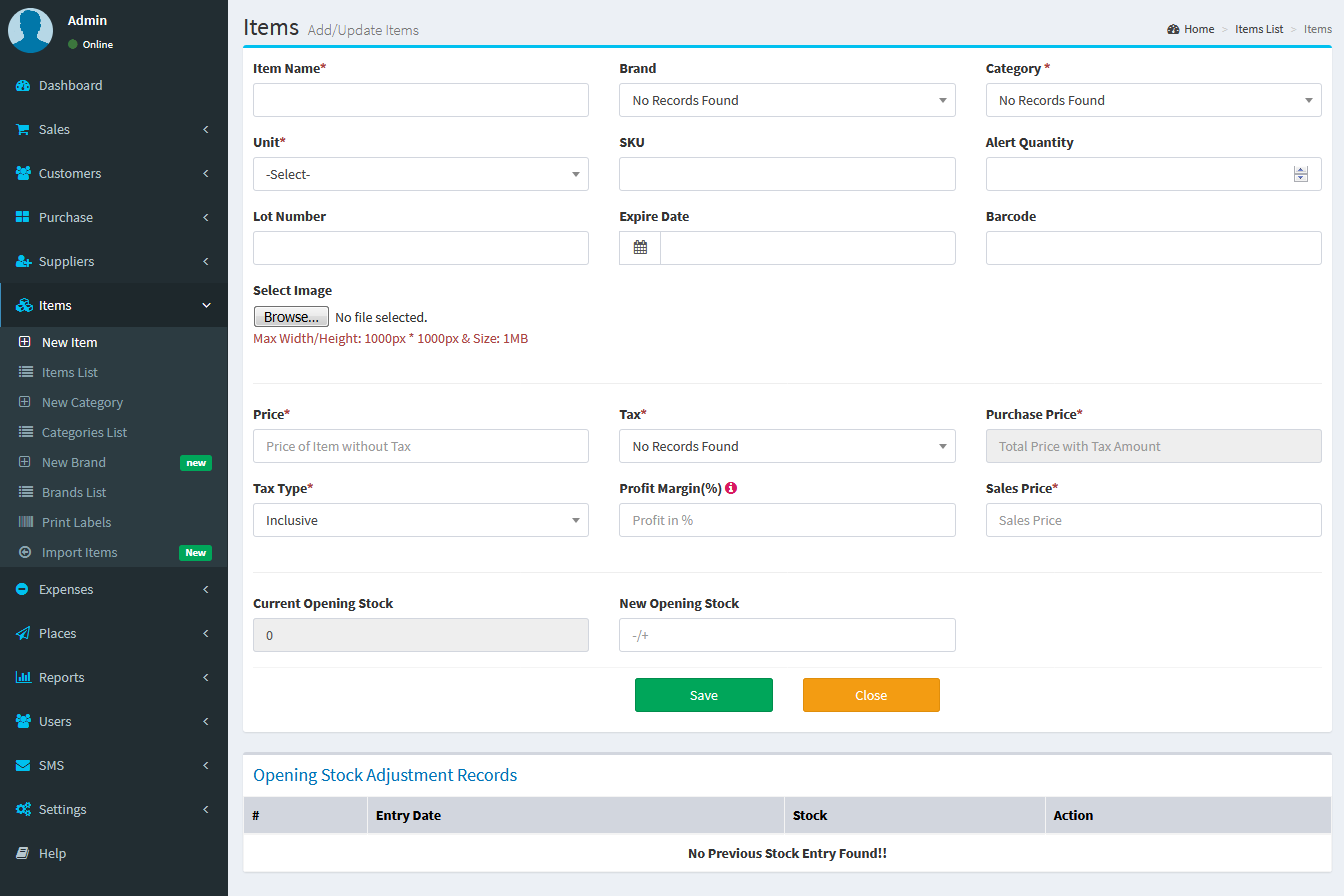 Items List :
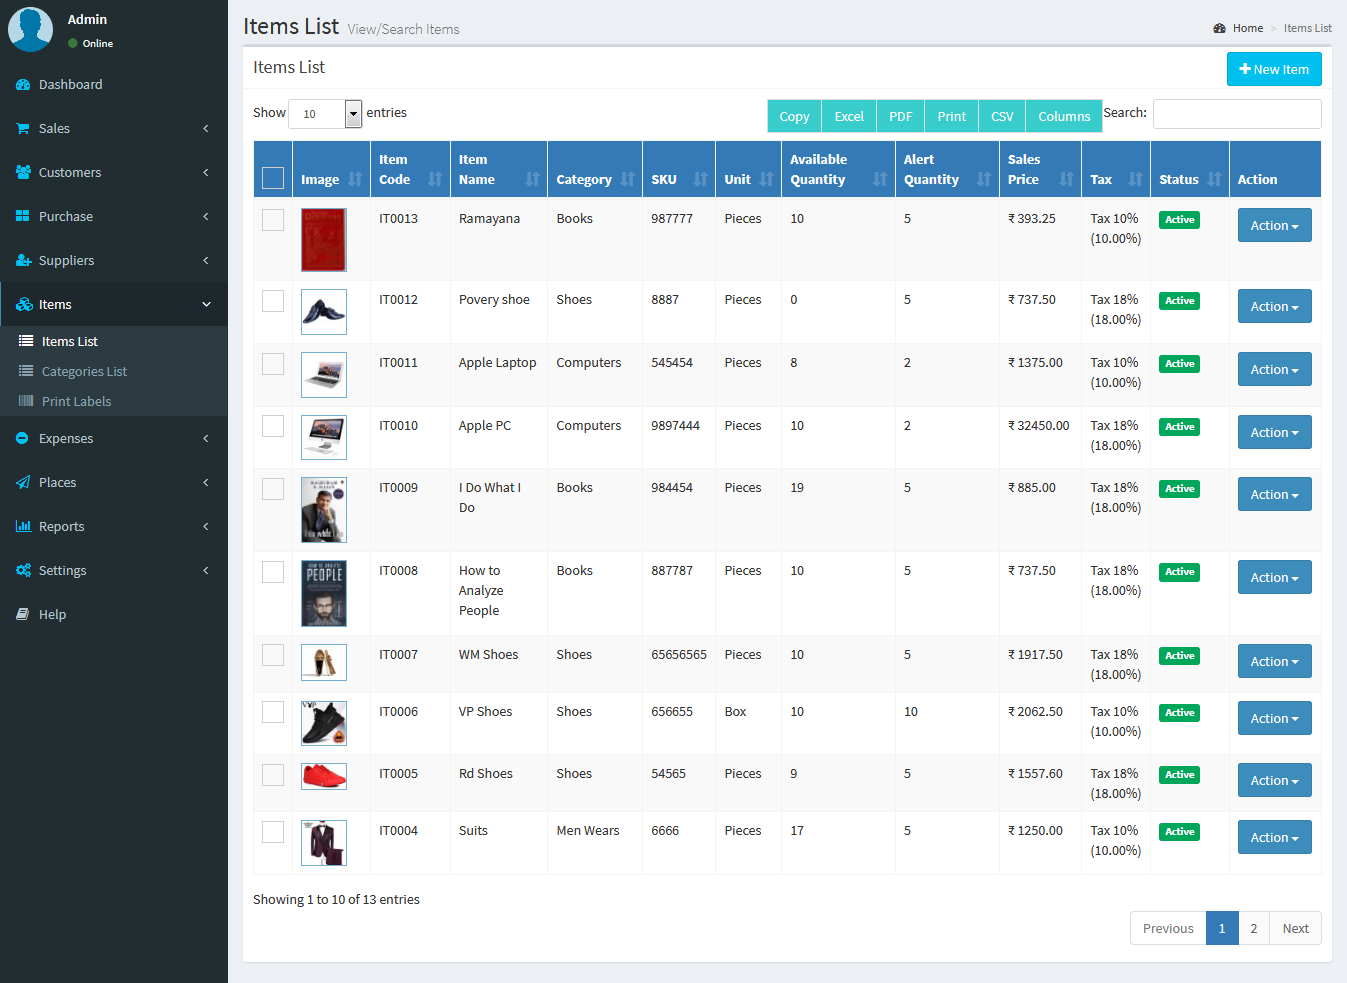
Print Labels
Item: Items -> Print Labels Select Items From Search Box and Select Number of quantities of Labels and Click on Preview Button and take prints. Print Labels :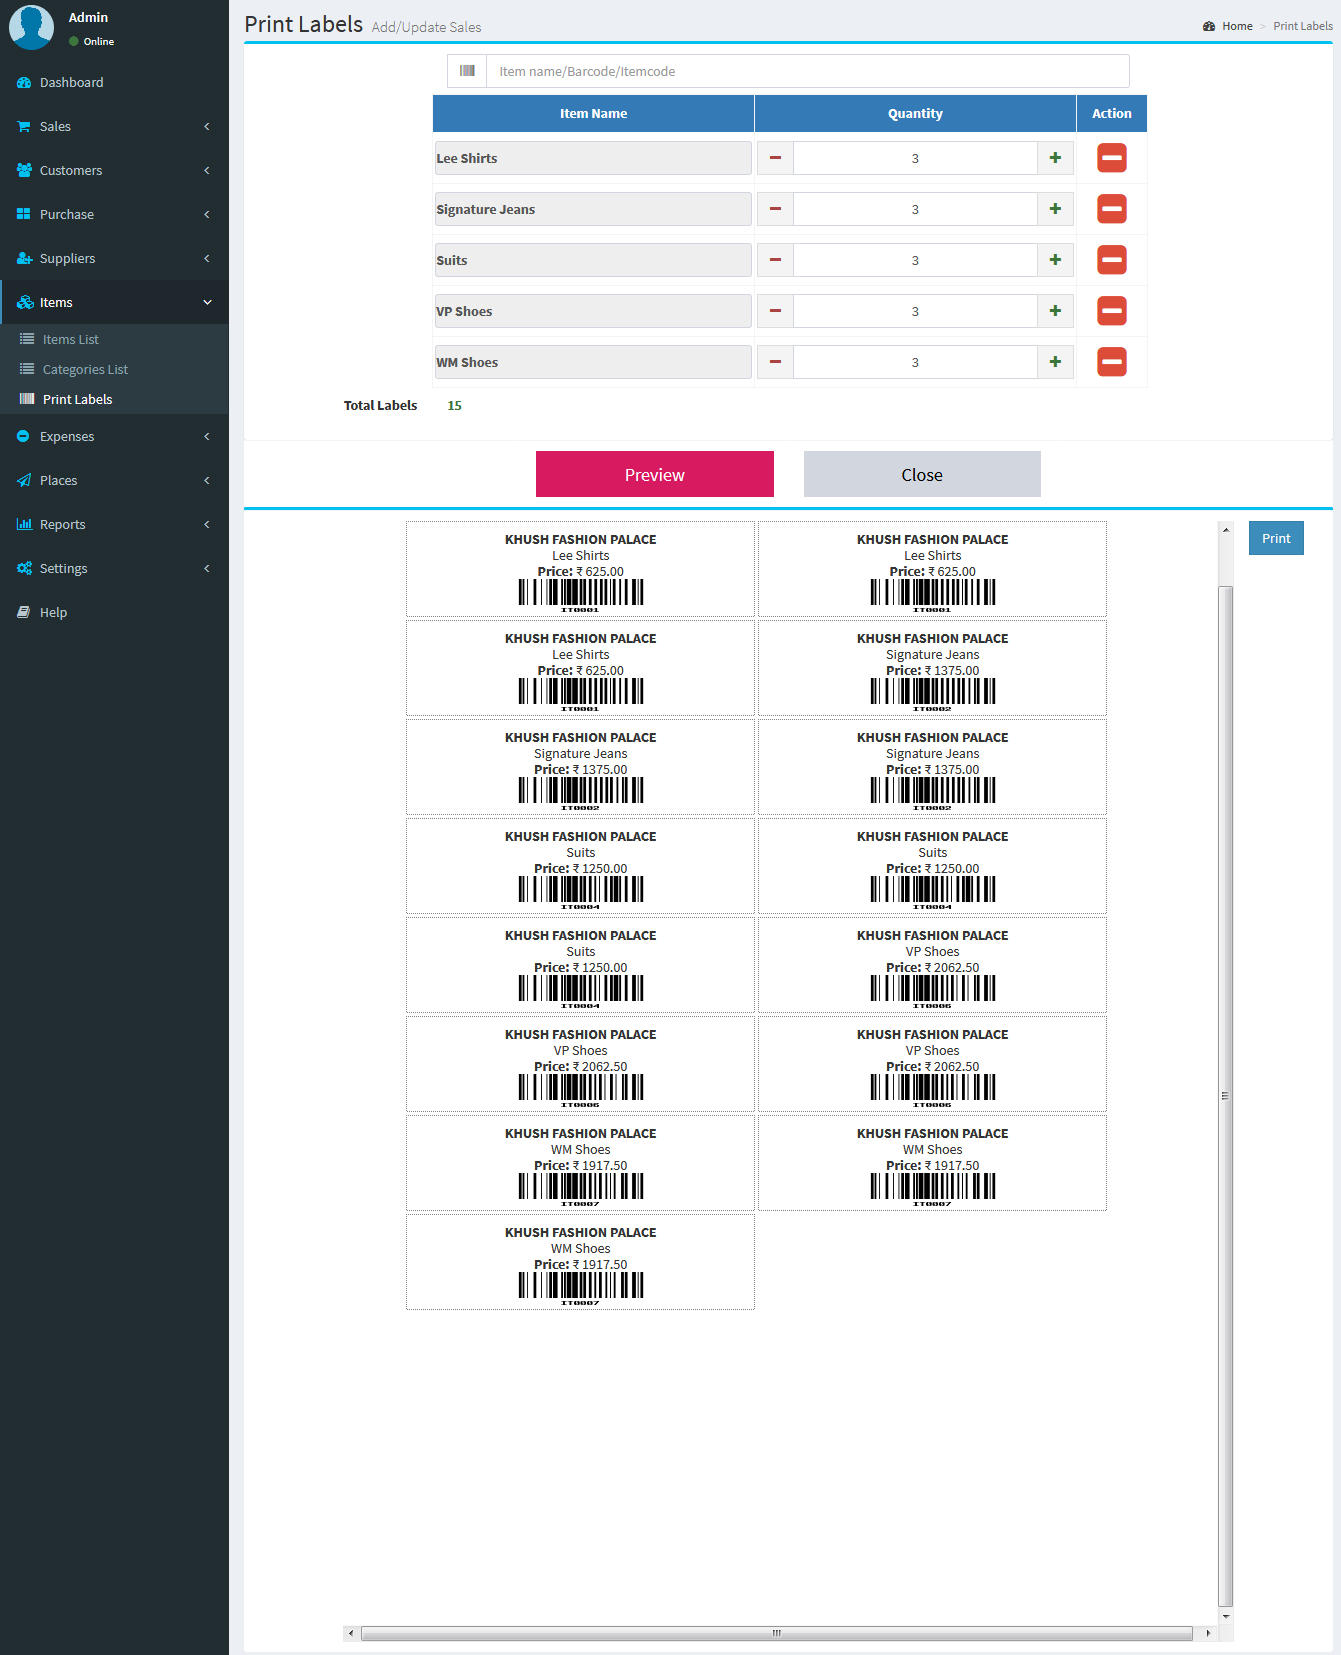
Suppliers
New Supplier: Suppliers -> New Supplier Adding a Suppliers it's a very easy task. Enter Supplier name, Mobile, Phone, Email, GST Number, TAX Number, Opening Balance, Country(Optional field), State, City, Postcode(Optional field), Address(Optional field) and click on Save button. Suppliers List: Suppliers -> Suppliers List You can view the all the added Suppliers list and you can manage Suppliers list by Delete & Edit actions. * Due Payments Suppliers -> Suppliers List -> Action Button -> Due Payments * Return Due Payments Suppliers -> Suppliers List -> Action Button -> Return Due Payments Import Suppliers: Suppliers -> Import Supplier New Supplier :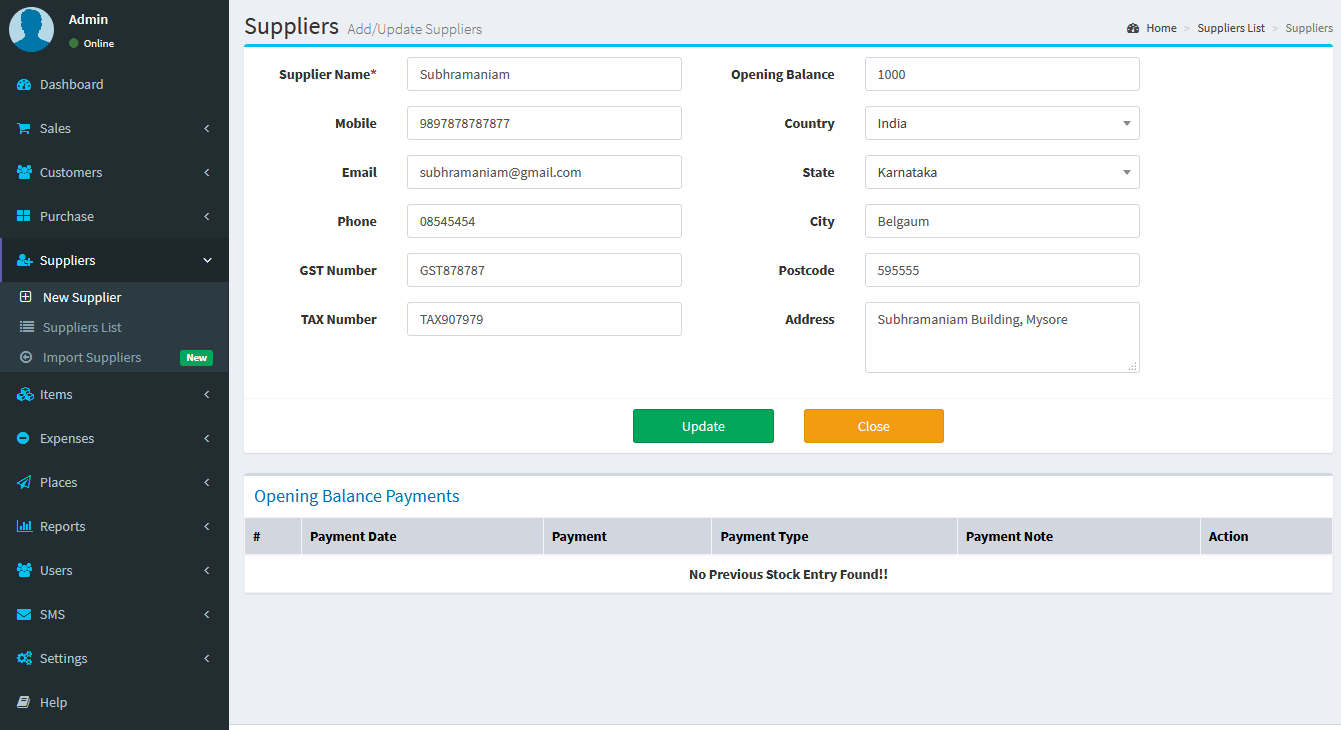 Suppliers List :
 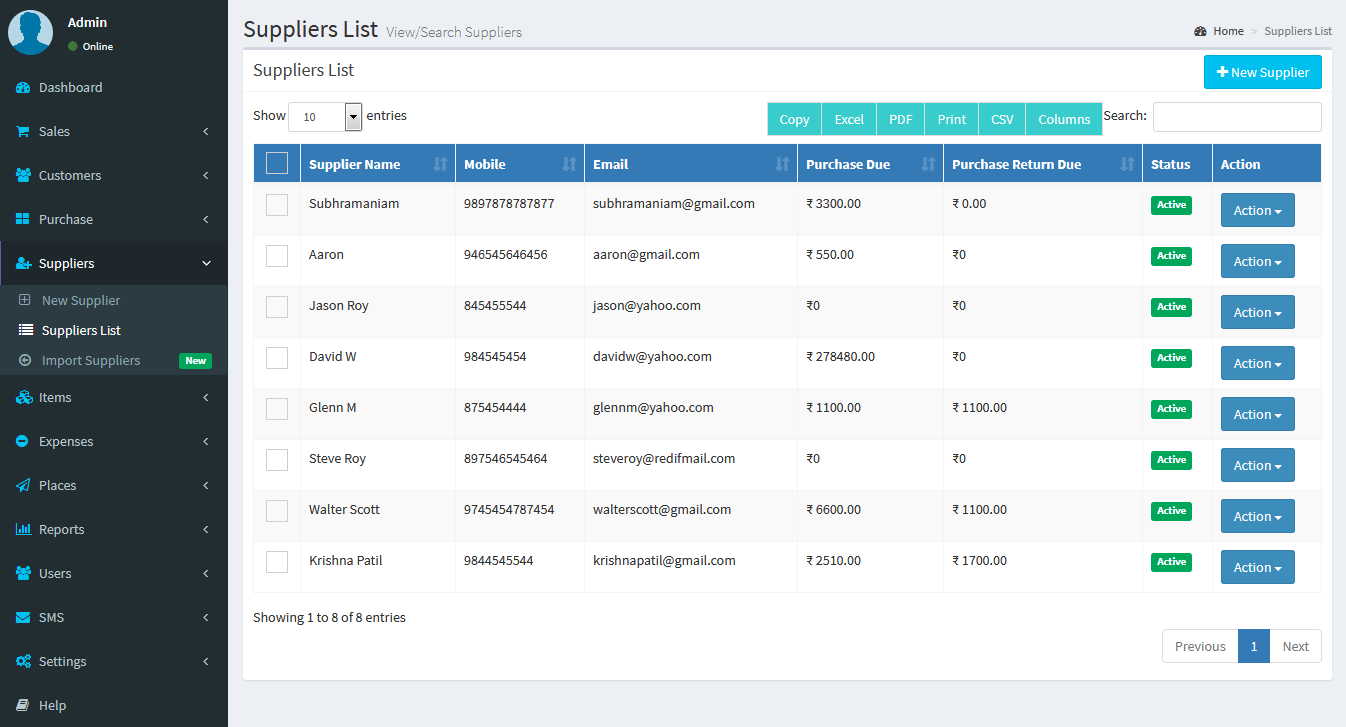 Due Payments :
 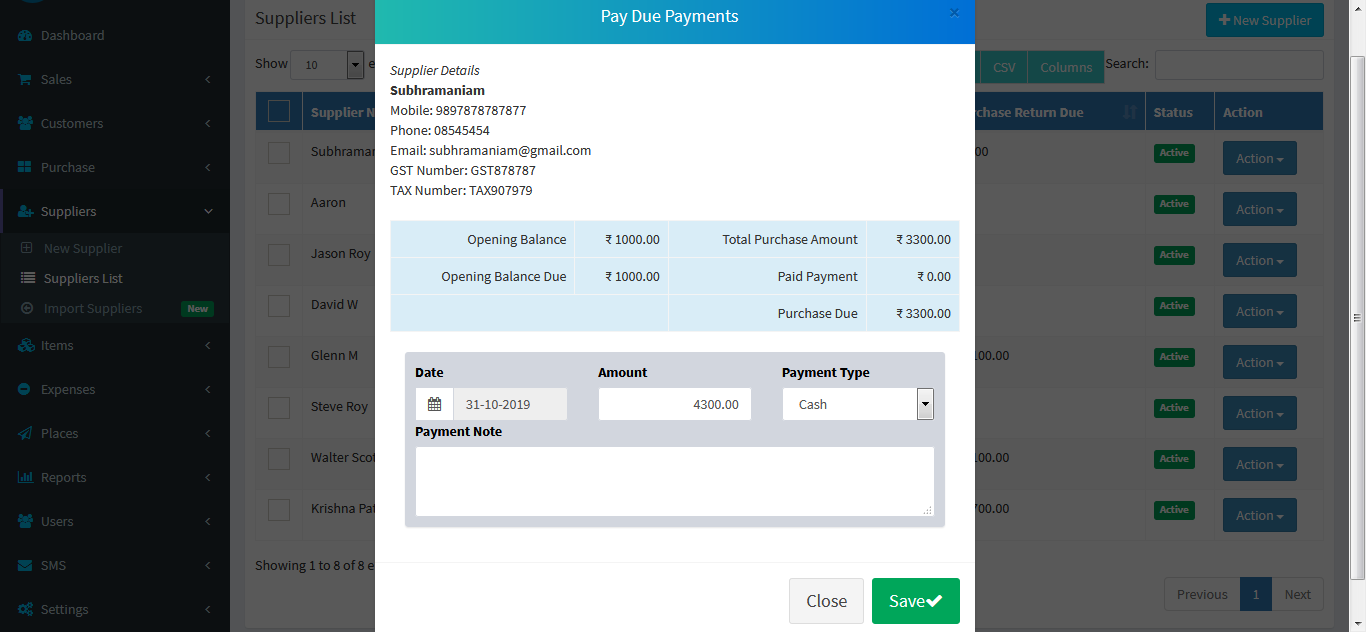 Return Due Payments :
  Import Suppliers :
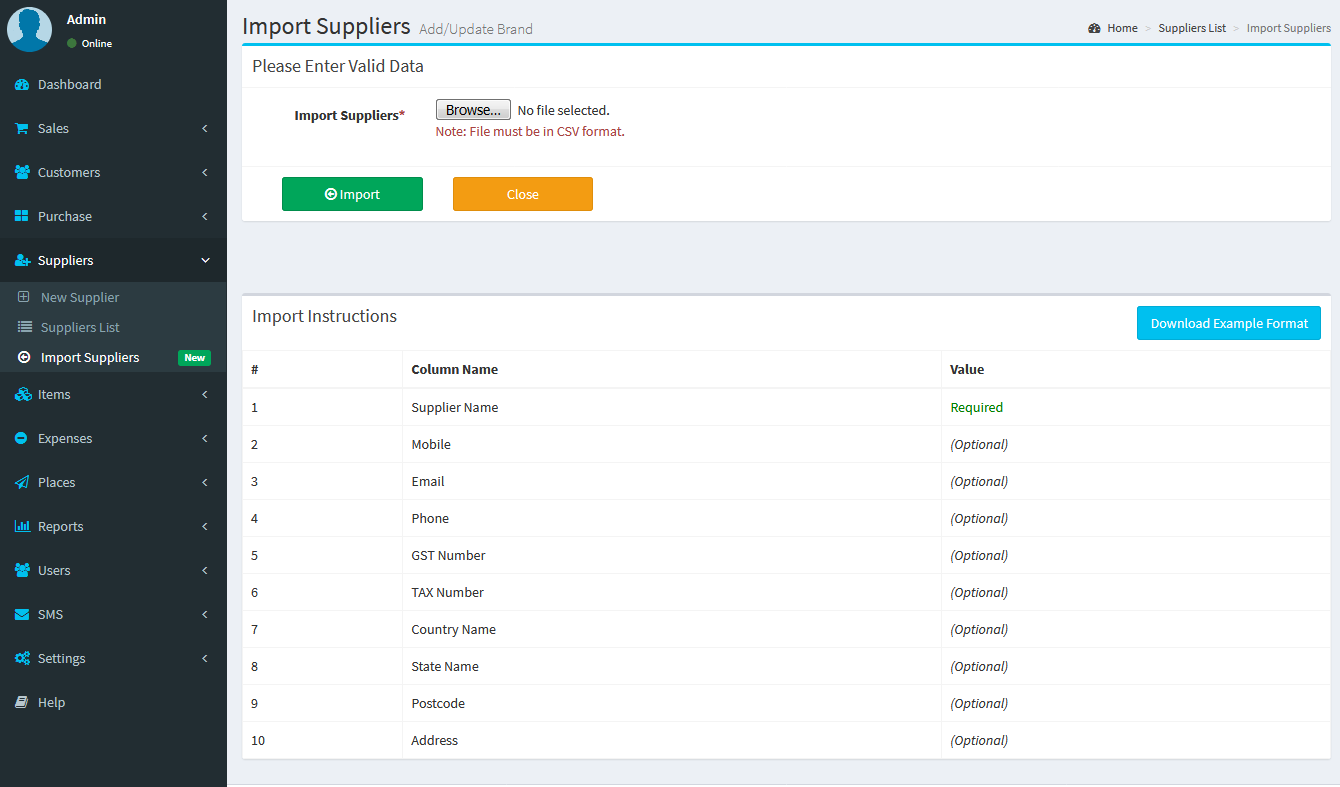
Customers
New Customer: Customers -> New Customer Adding a Customers it's a very easy task. Enter Customer name, Mobile, Phone, Email, GST Number, TAX Number, Opening Balance, Country(Optional field), State, City, Postcode(Optional field), Address(Optional field) and click on Save button. Customers List: Customers -> Customers List You can view the all the added Customers list and you can manage Customers list by Delete & Edit actions. * Due Payments Customers -> Customers List -> Action Button -> Due Payments * Return Due Payments Customers -> Customers List -> Action Button -> Return Due Payments Import Customers: Customers -> Import Customers New Customer :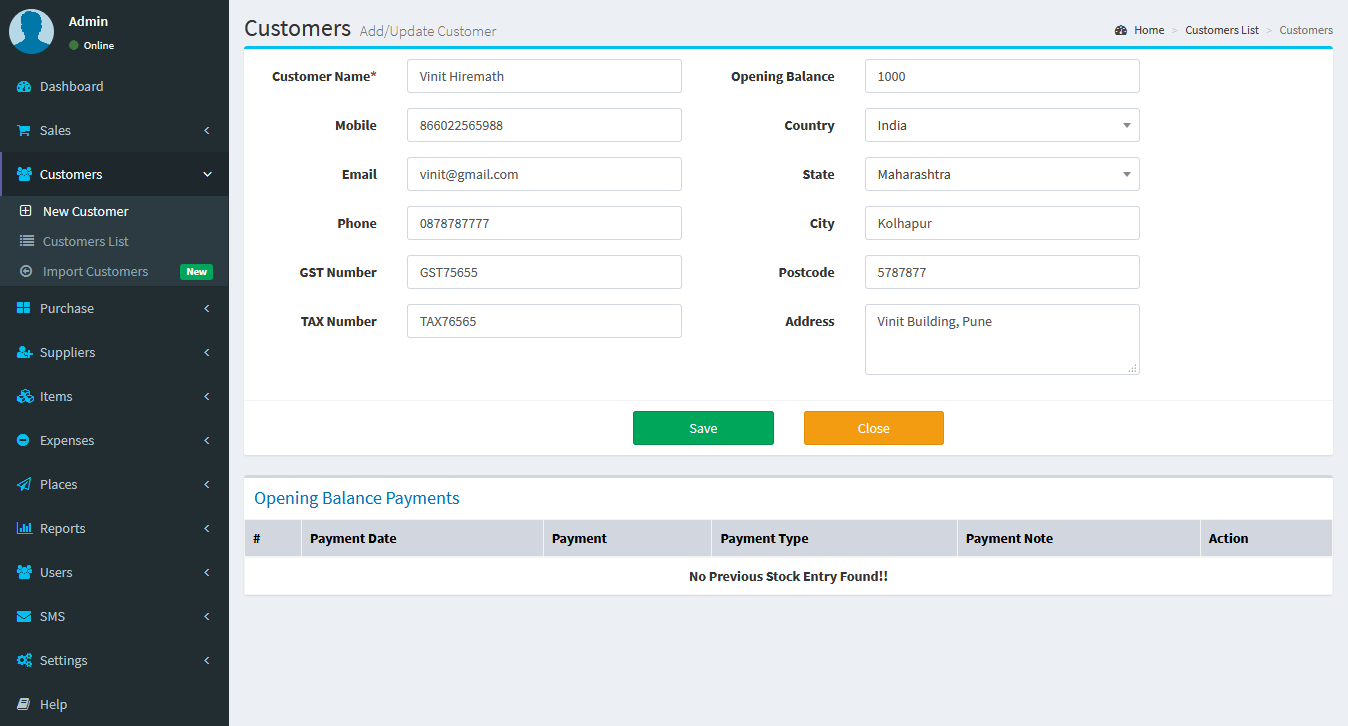 Customers List :
  Due Payments :
 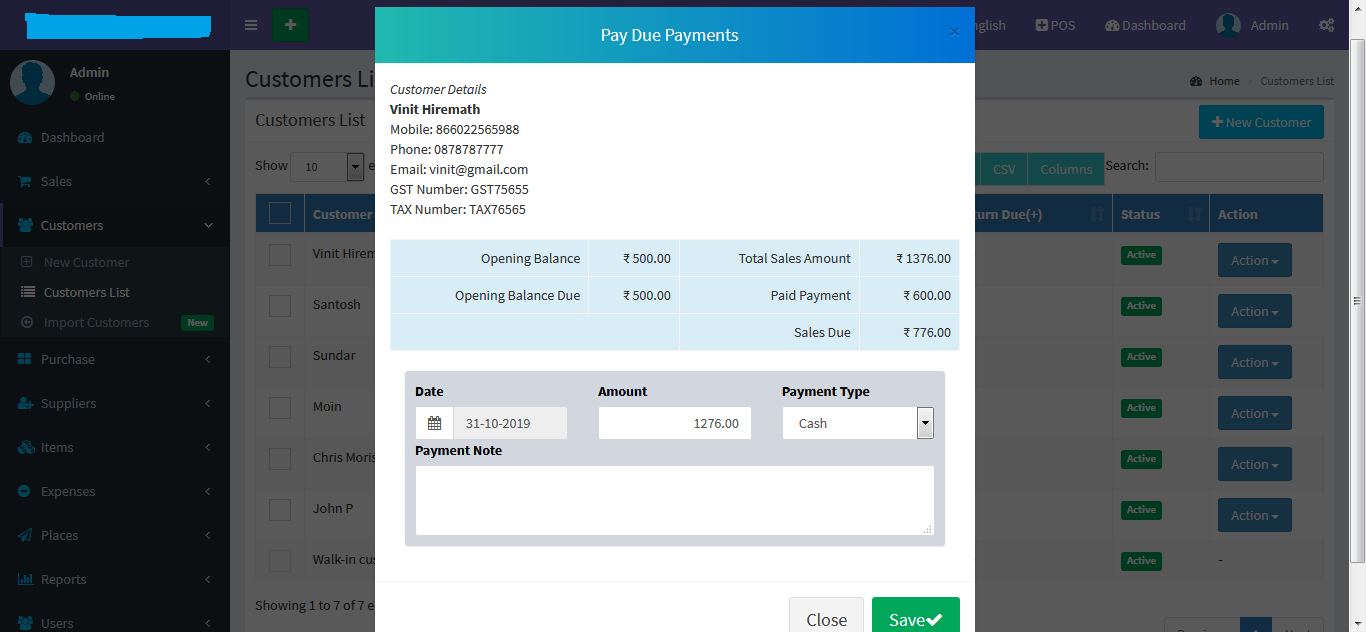 Return Due Payments :
 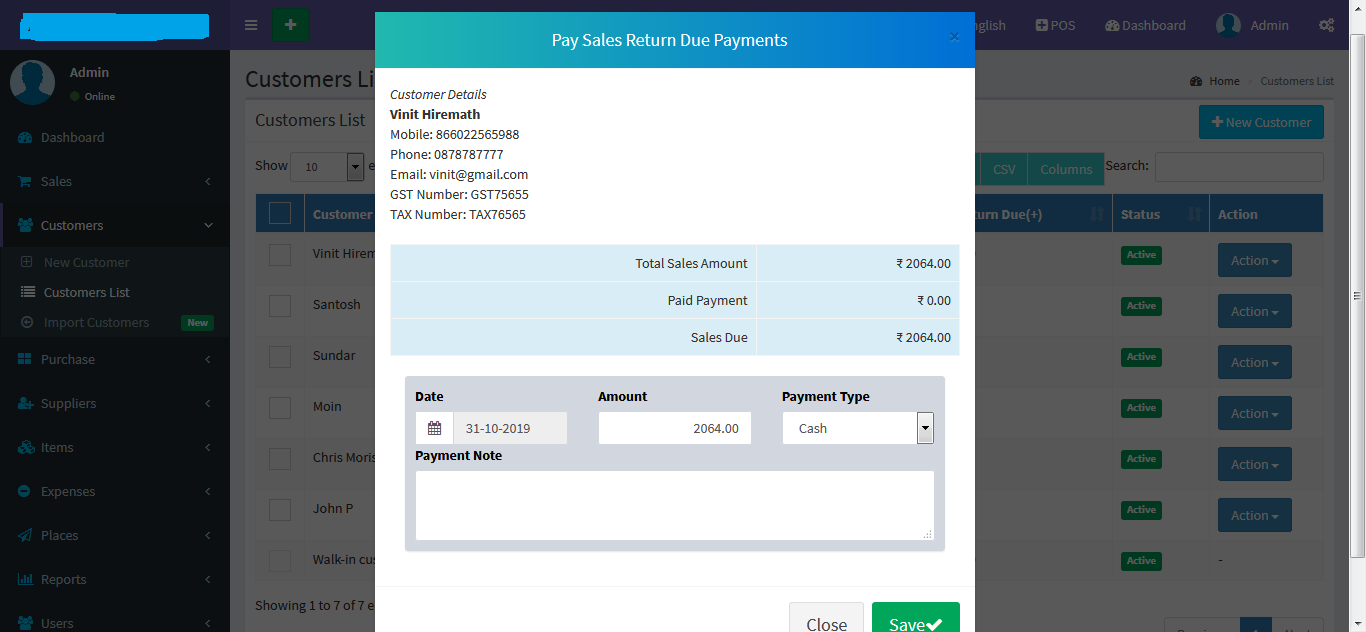 Import Customers :
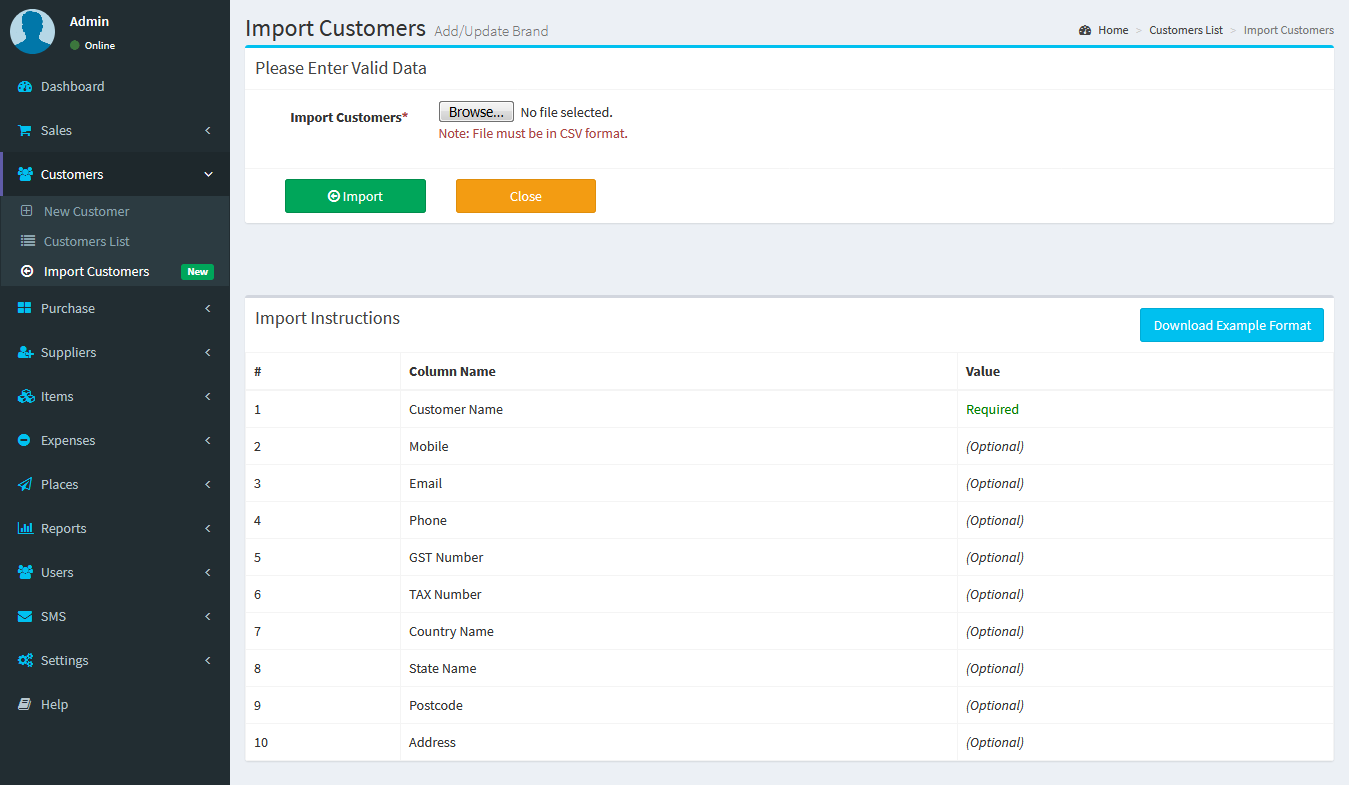
Purchase
New Purchase: Purchase -> New Purchase- New Purchase : Creating or entering a Purchase information in inventory is a very easy task. You need to select date, Suppliers name from selection box (Also user can Instantly create Supplier), Purchase Status(Received / Pending / Ordered), and reference number(Optional field), and you need select the items from the Search Box, here you search item by item name, Barcode, Itemcode, after selecting item from search box, all other information will be shown in the same row, it includes Item name,Purchase quantity, purchase price, Tax, Discount, and Total amount and you select any number of items in purchase table. You also enter Other charges, Discount on All Items, Purchase Note and Purchase Payment Informations in signle form.
- Purchase Invoice : Create the Purchase Invoice you can take the print or create PDF File.
- Barcode Print : You will barcode list based item quantity, each item type have its group unique barcode/item code.
 Purchases List :
 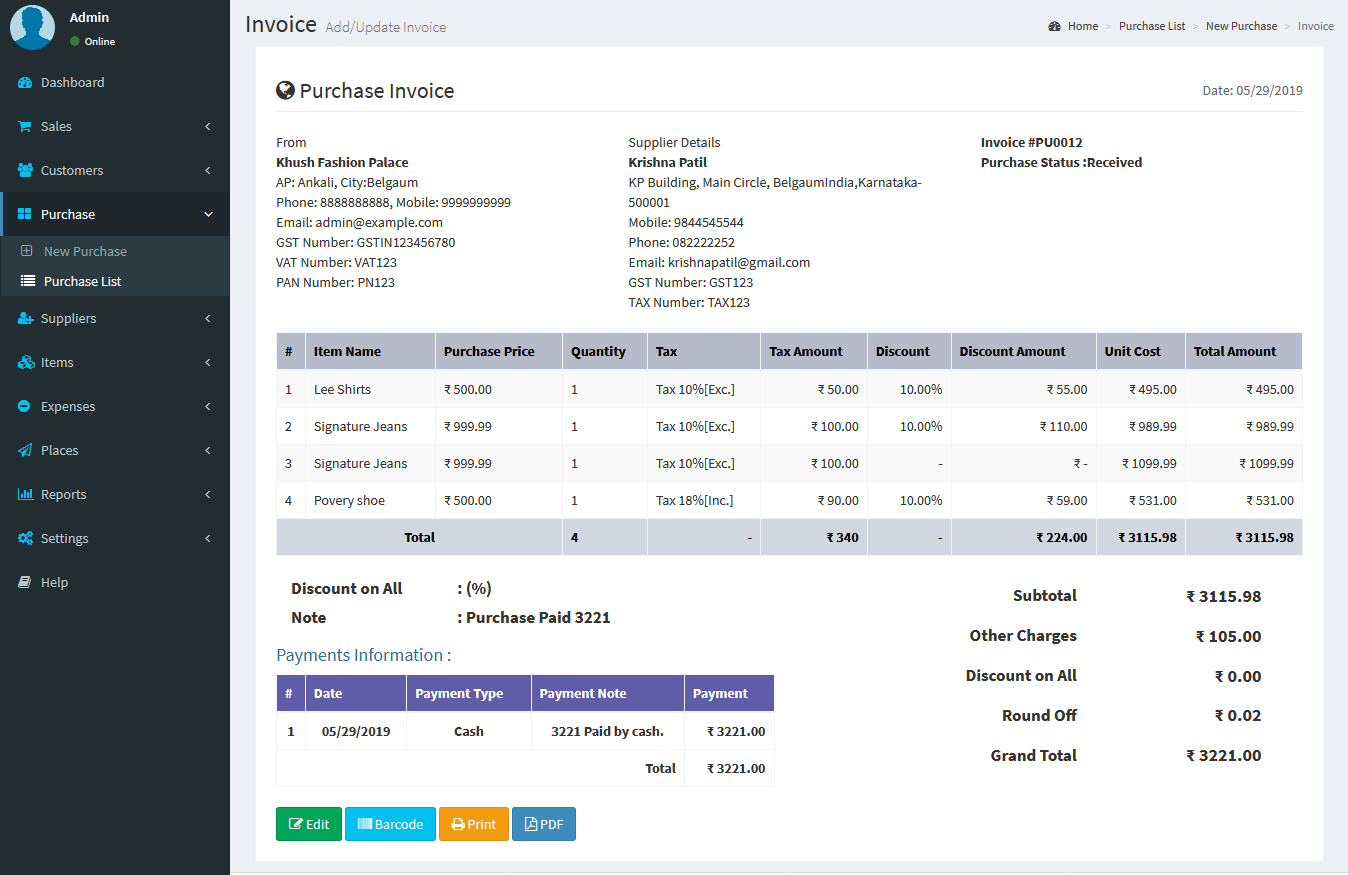 Purchase Invoice :
 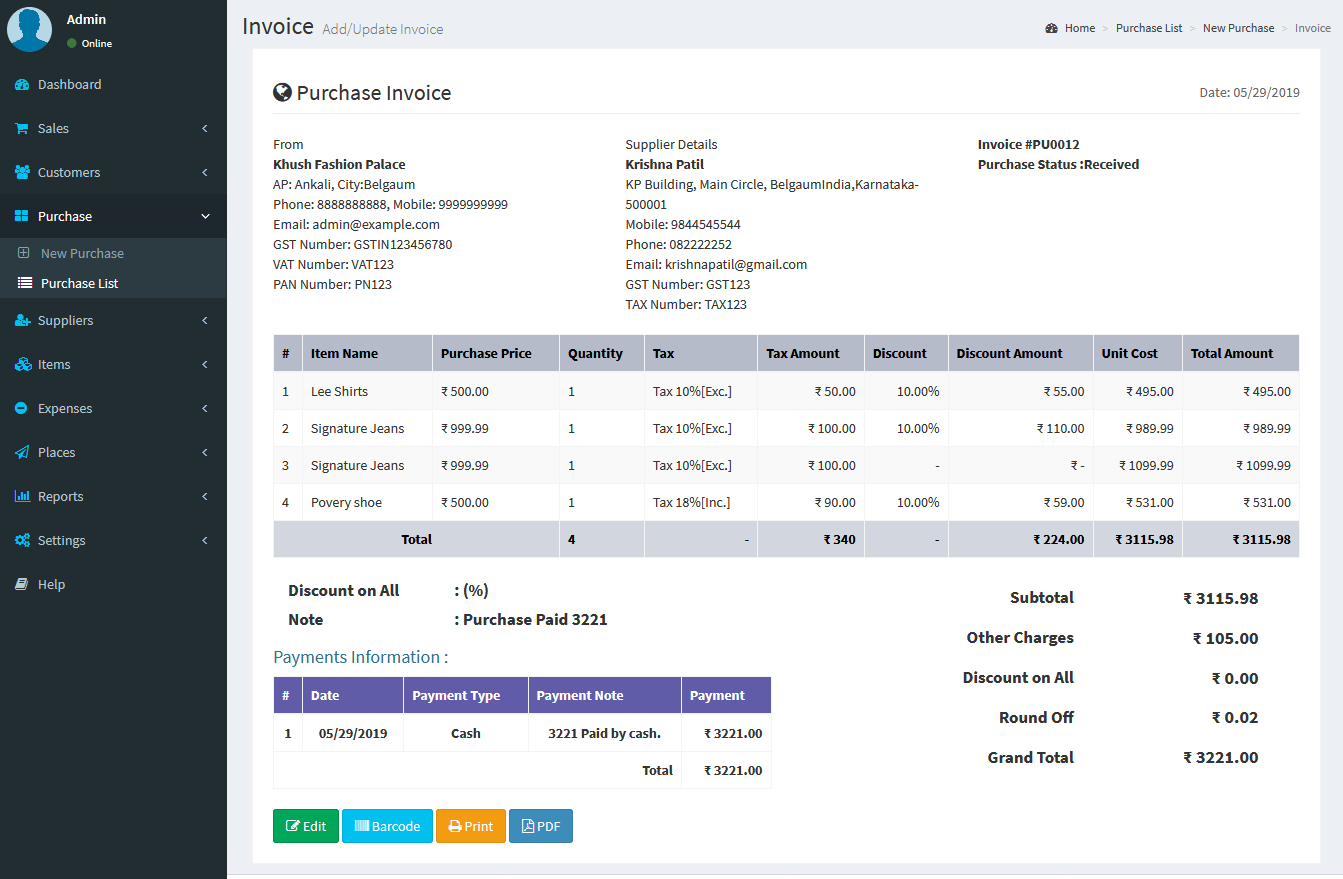 Barcode Print :
 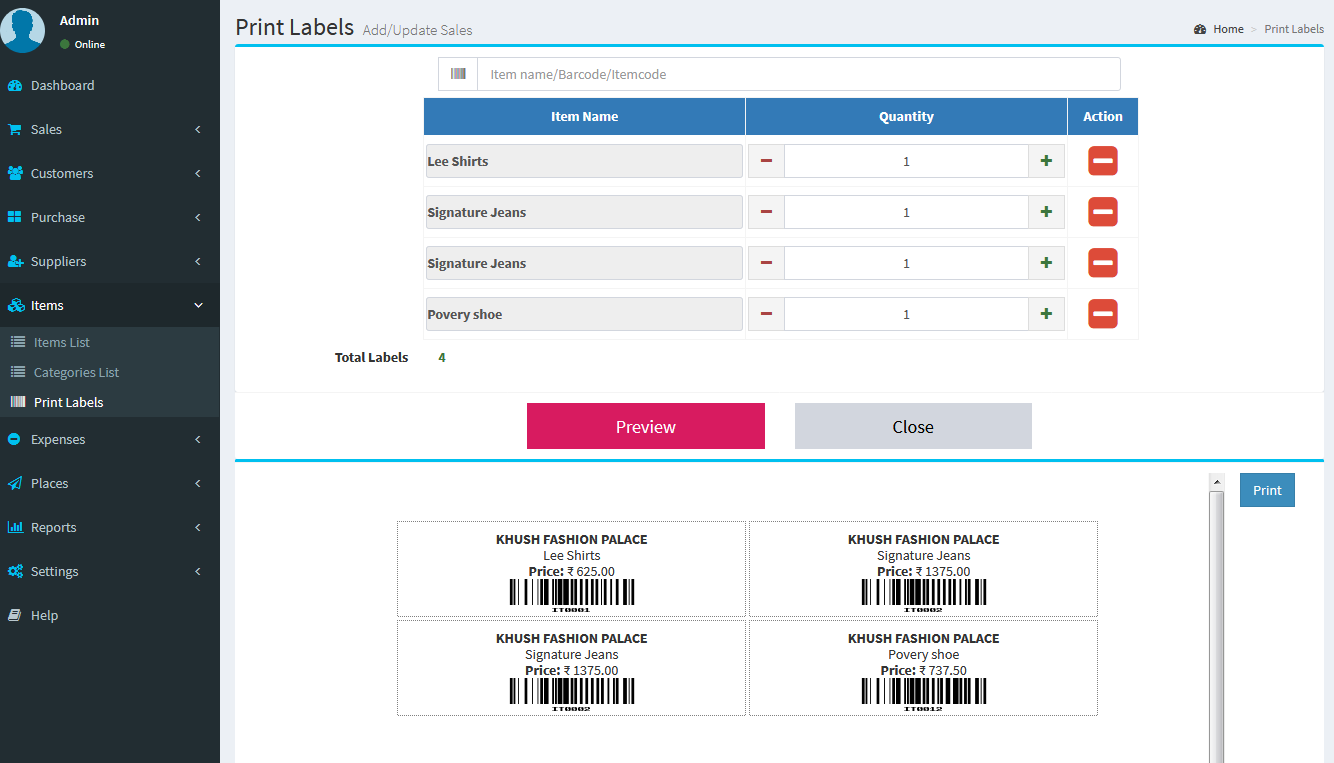 Purchase Invoice Print :
  Purchase Invoice PDF :
 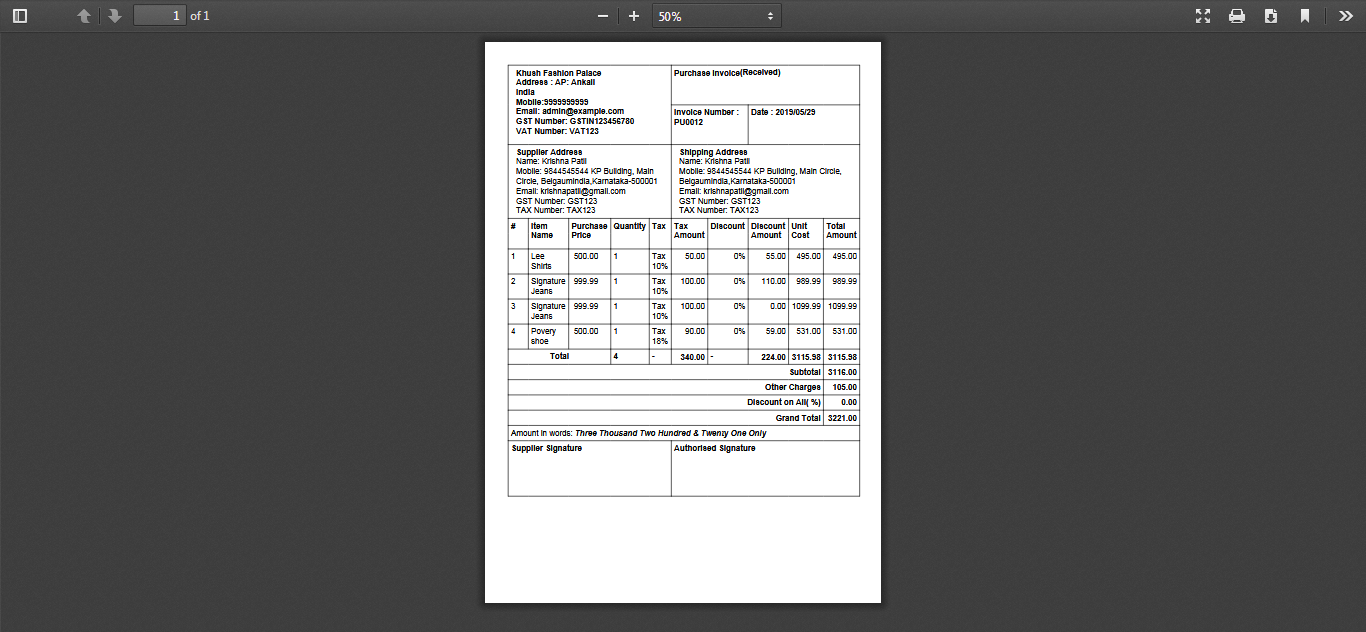 Purchase Payments :
 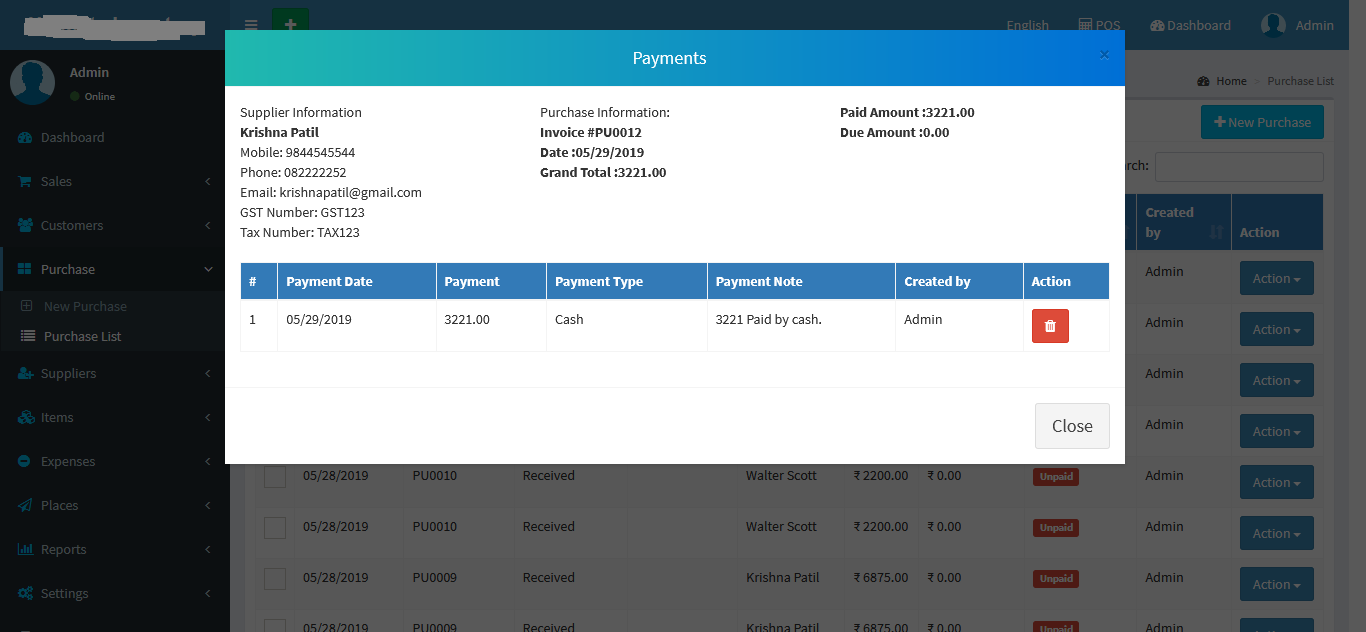 Pay Purchase Payments:
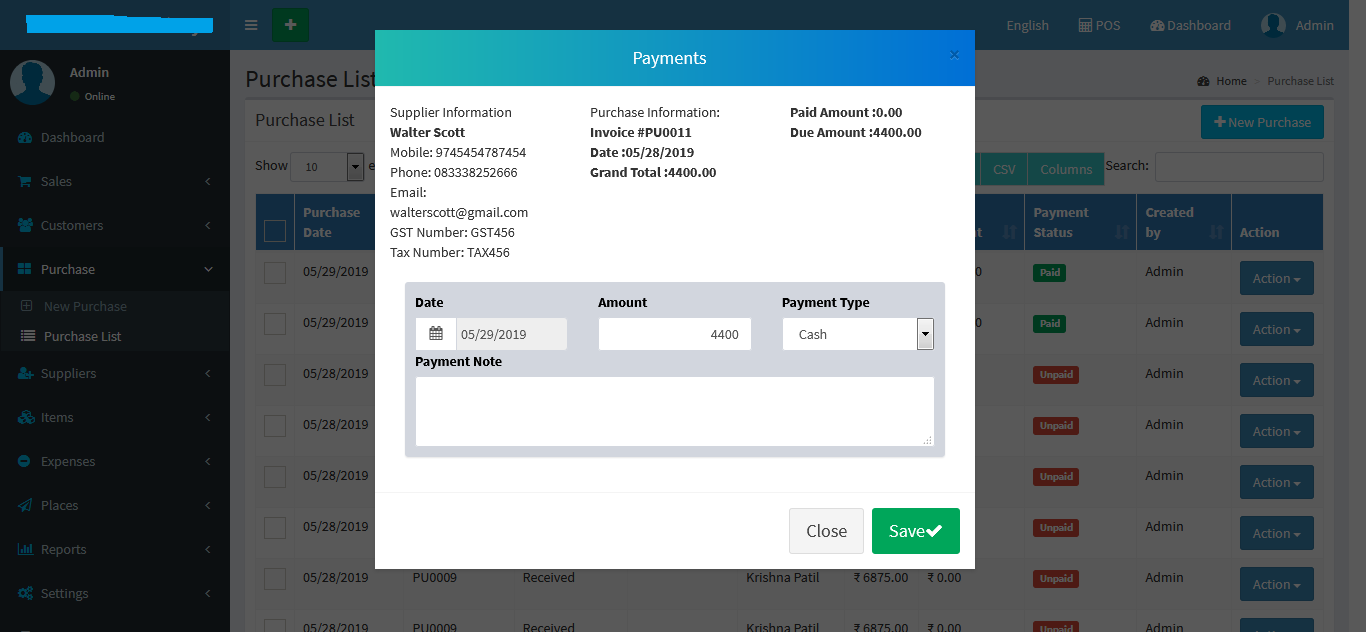
Purchase Return
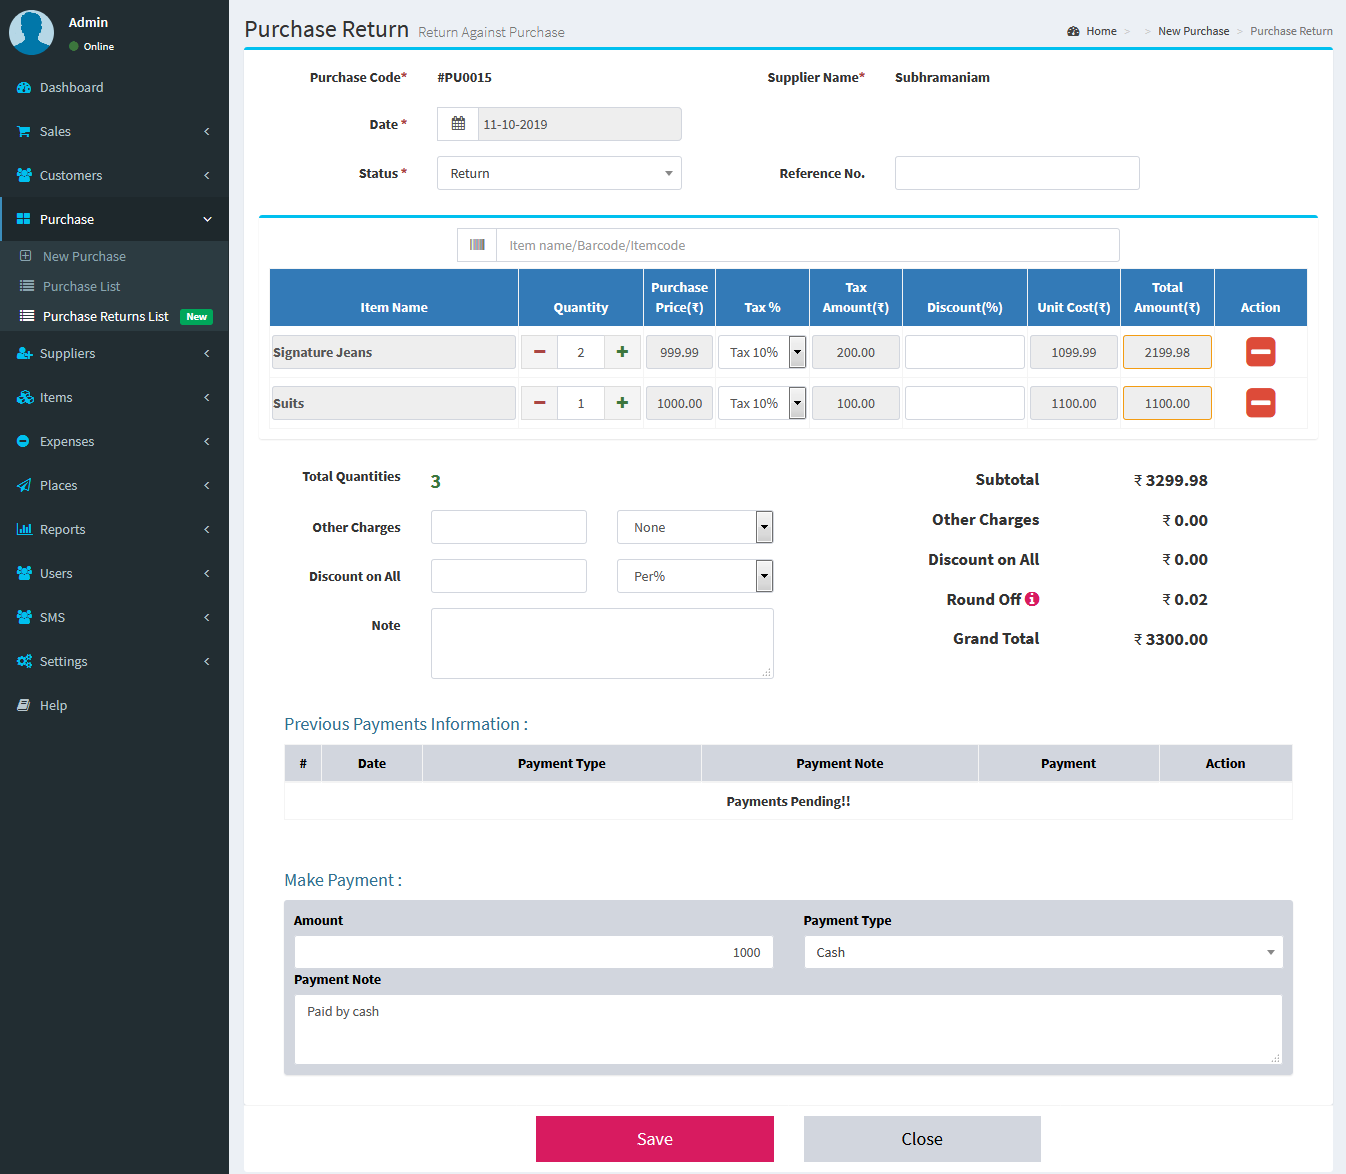
New Purchase Return: Purchase -> Purchase Return List -> Create New- New Purchase Return: Creating or entering a Purchase Return information in inventory is a very easy task. You need to select date, Suppliers name from selection box (Also user can Instantly create Supplier), Purchase Return Status(Return / Cancel), and reference number(Optional field), and you need select the items from the Search Box, here you search item by item name, Barcode, Itemcode, after selecting item from search box, all other information will be shown in the same row, it includes Item name,Purchase quantity, purchase price, Tax, Discount, and Total amount and you select any number of items in purchase table. You also enter Other charges, Discount on All Items, Purchase Note and Purchase Payment Informations in signle form.
- Purchase Return Invoice : Create the Purchase Invoice you can take the print or create PDF File.
 Purchases Return List :
 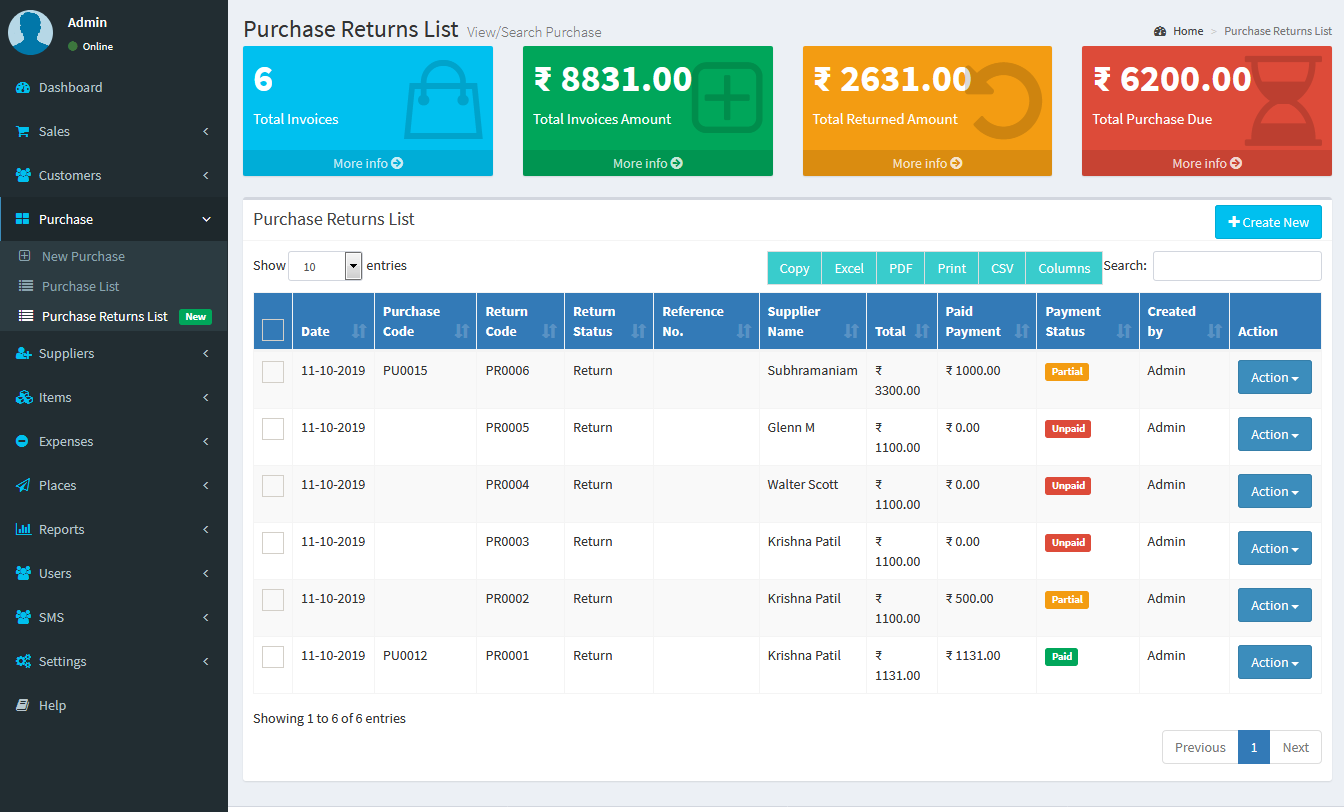 Purchase Return Invoice :
 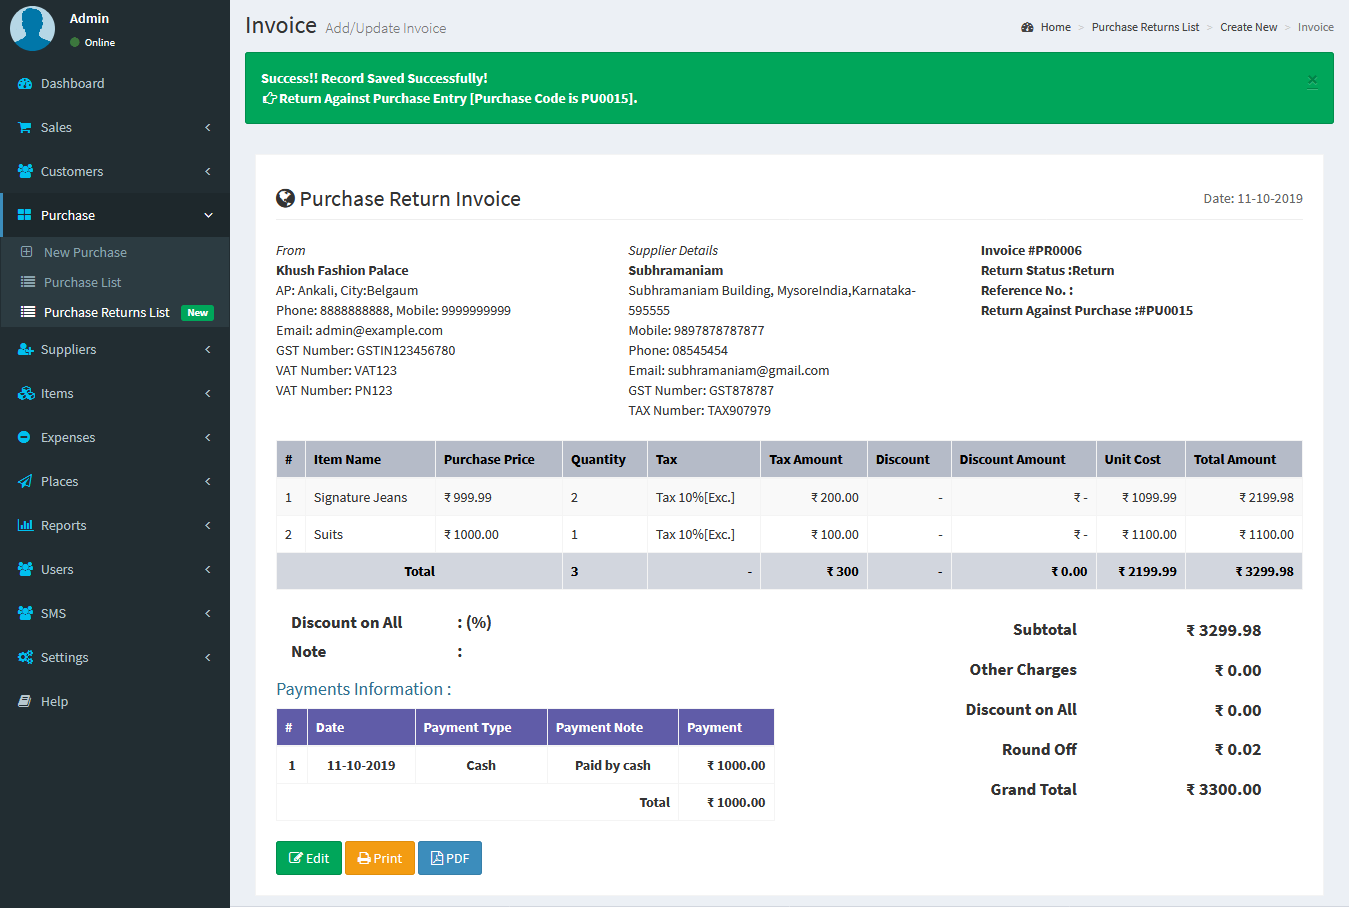 Purchase Return Invoice Print :
 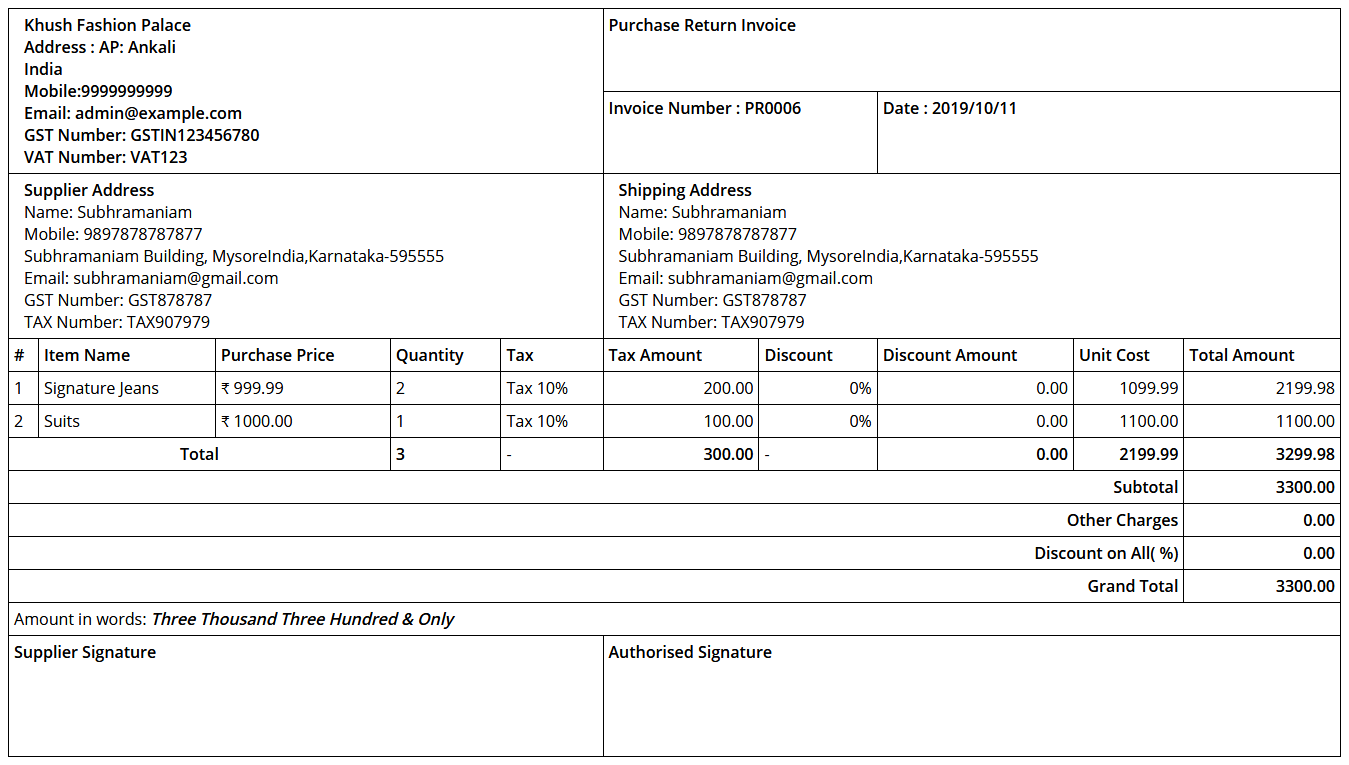 Purchase Return Invoice PDF :
 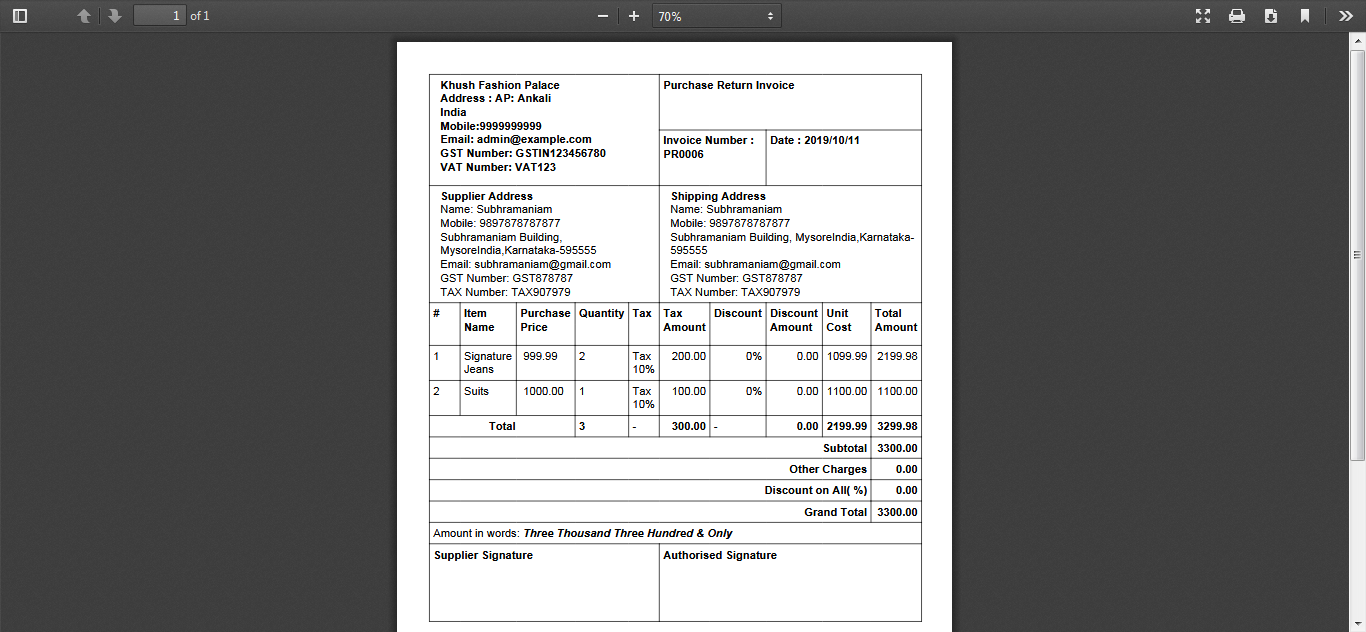 Purchase Return Payments :
 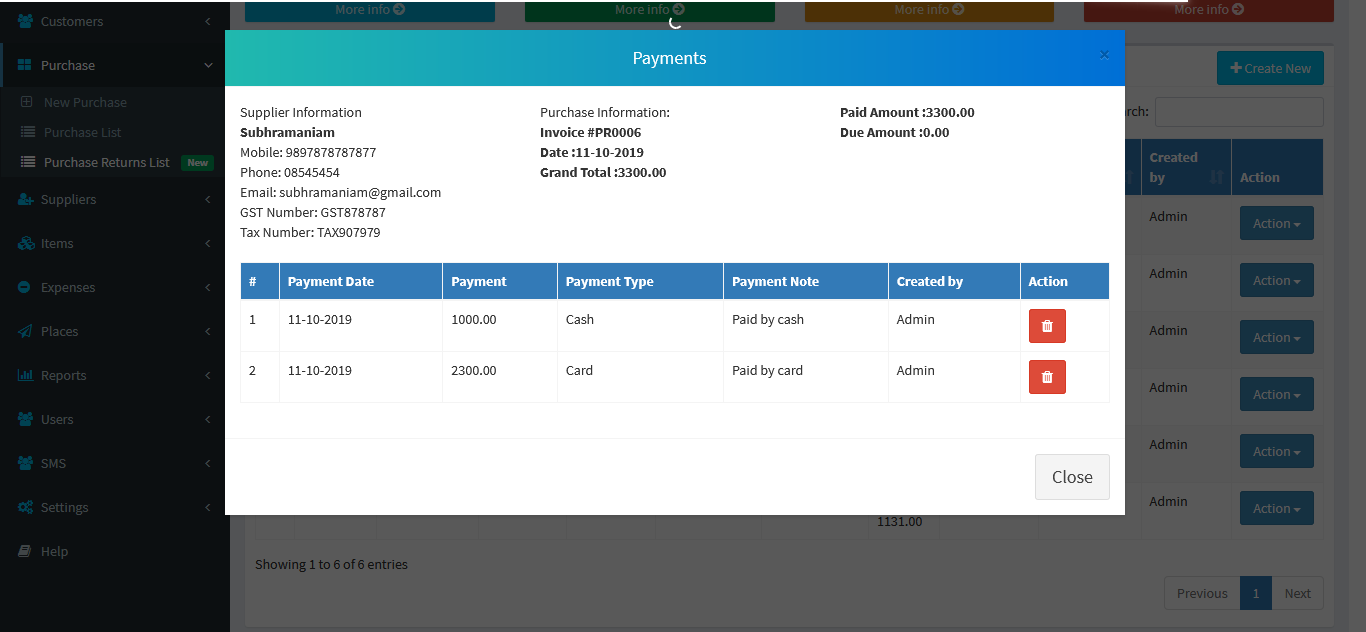 Pay Purchase Return Payments:
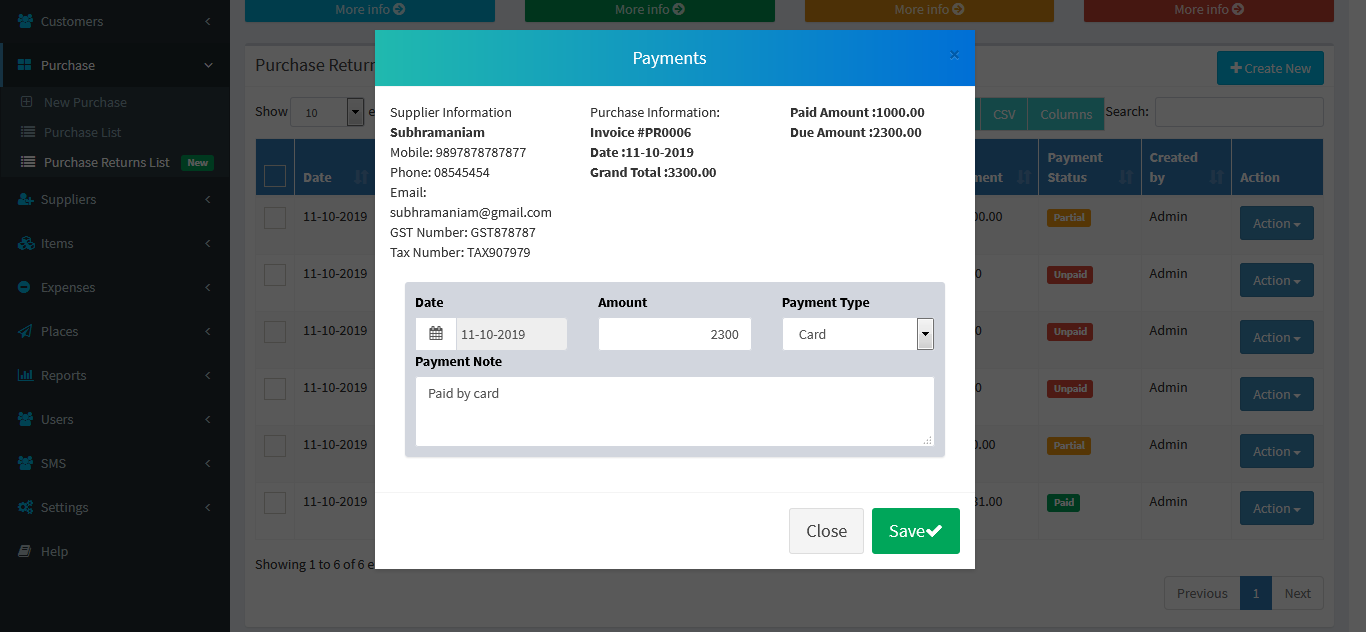
Sales
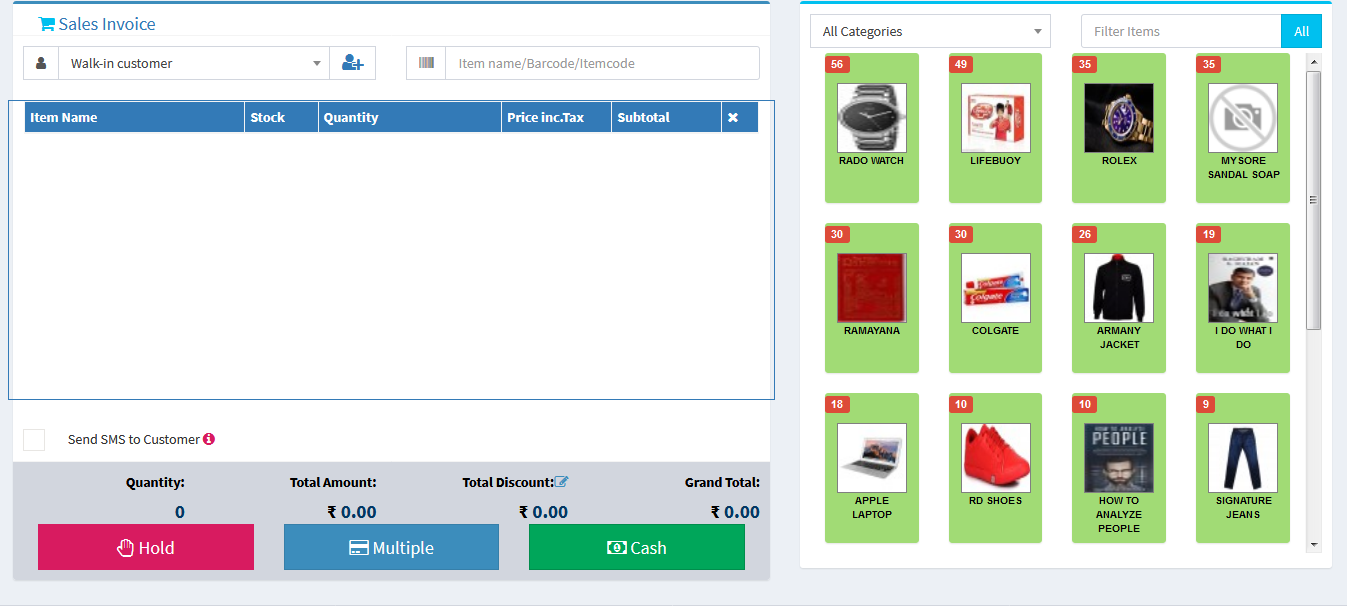
New Sales: Sales -> POS- POS Sales : Easy version sales entry. Here you can sell to Specific or Walk-in Customer.Select Items from Item Search box using Item name, Barcode or Item code. Select Items From Right Side Box, Also given category wise search and Specific Item Wise search Box. From Items List You can Increase or Decrese Item Quantities. On Total amount You Provide Discount on Overall sales. Payments Can Be access with Cash Or Multiple Payments Oprions!
- Send SMS : If you want you can send the SMS to Existing/Saved Customer when Invoice Generate. SMS Template available in SMS -> SMS Templates menu bar. [Note: Walk-in Customer will receive any SMS]
- POS Invoice : POS Formatted invoice.
- Creating or entering a Sales information in inventory is a very easy task. Select Customer,You need select the items from the table, where item name has the standard search box for items name, here you need to select item name, all other information will be shown in the same row, it includes HSN, available quantity, sales quantity,UQC,GST% and you select any number of items in purchase table and click on Save button.
- Send SMS : If you want you can send the SMS to Existing/Saved Customer when Invoice Generate. SMS Template available in SMS -> SMS Templates menu bar. [Note: Walk-in Customer will receive any SMS]
- Sales Invoice : Create the Sales Invoice you can take the print.
- POS Invoice : You can print sales invoice in POS machine.
- Sales payments : You will get Sales payments options
 POS Payment:
 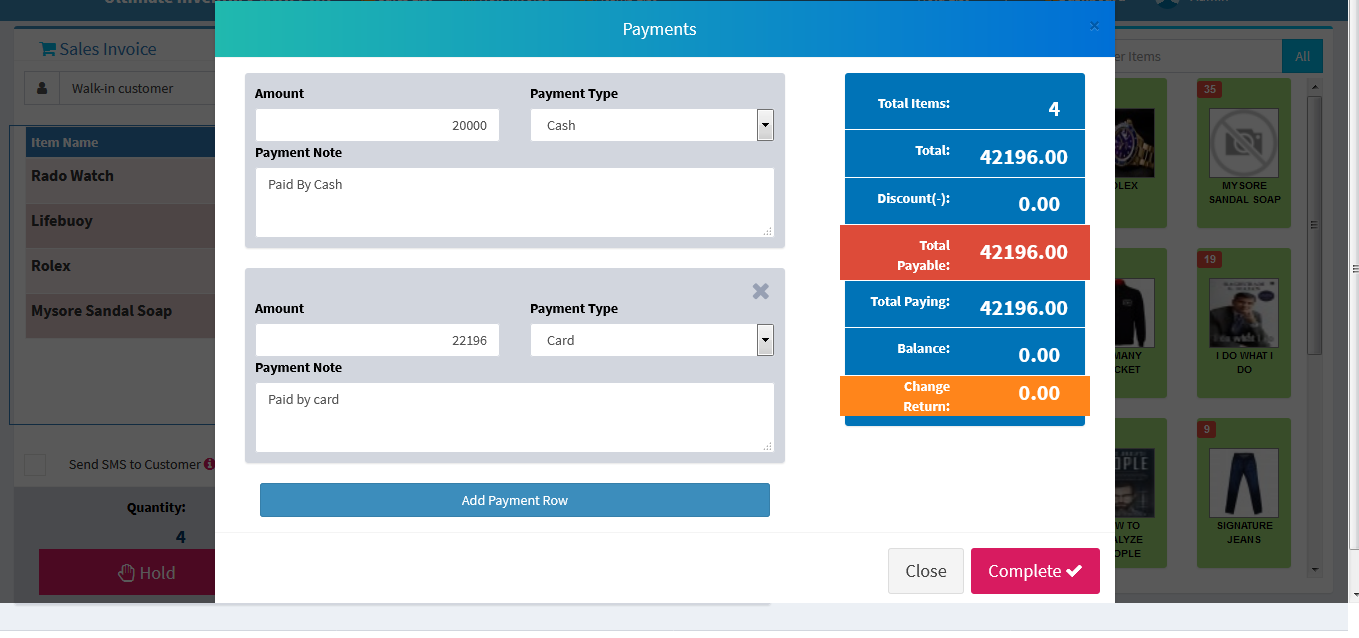 Detailed Sales Entry:
  Sales List :
 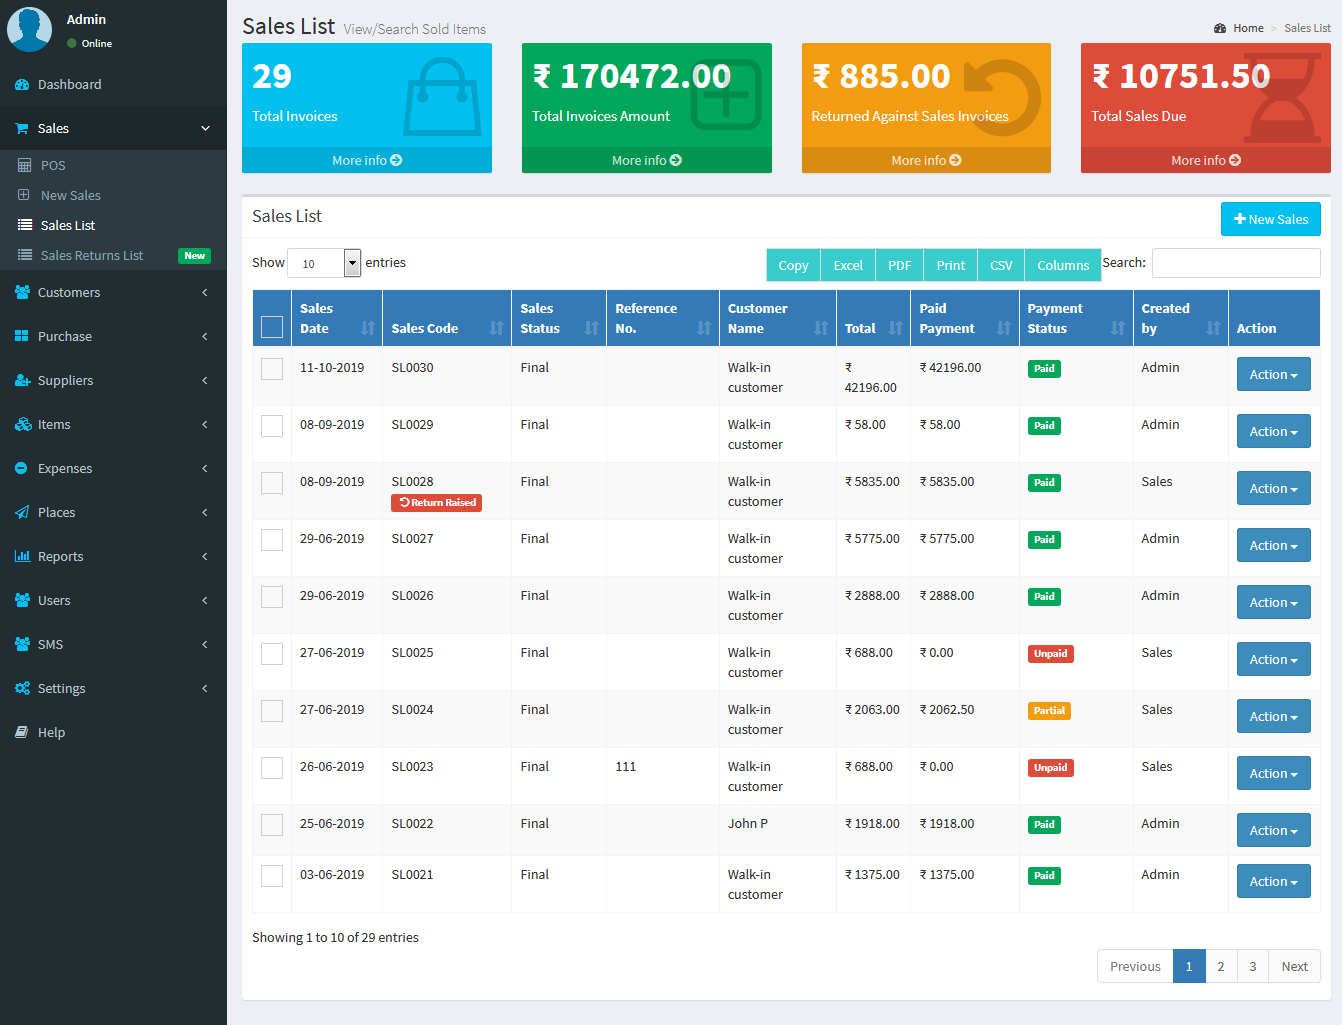 Sales Invoice :
  Sales Invoice Print :
 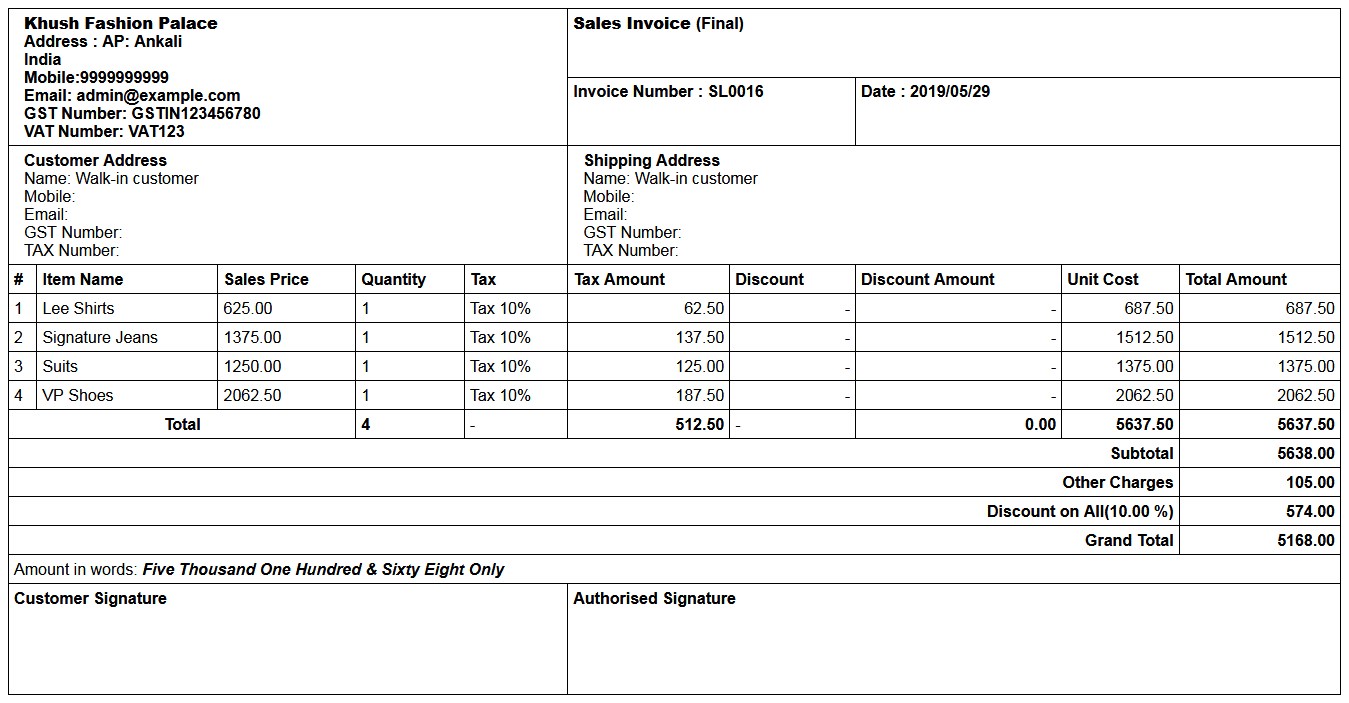 Sales Invoice PDF :
 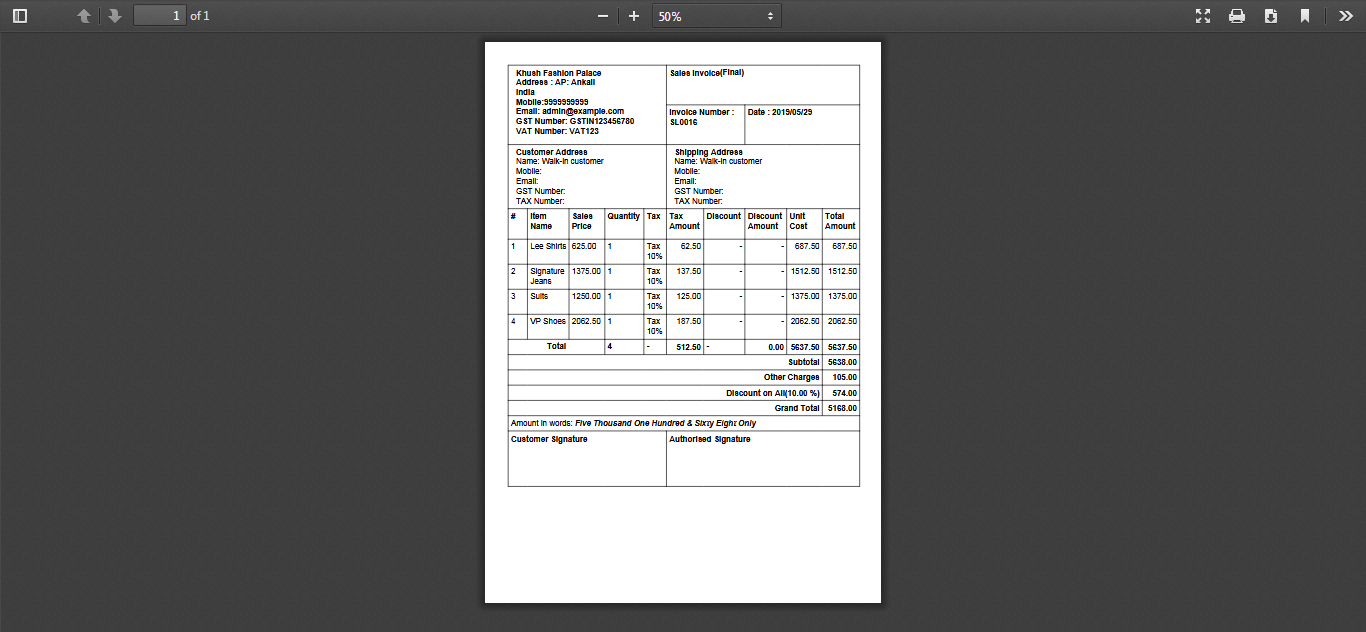 POS Invoice for Sales :
 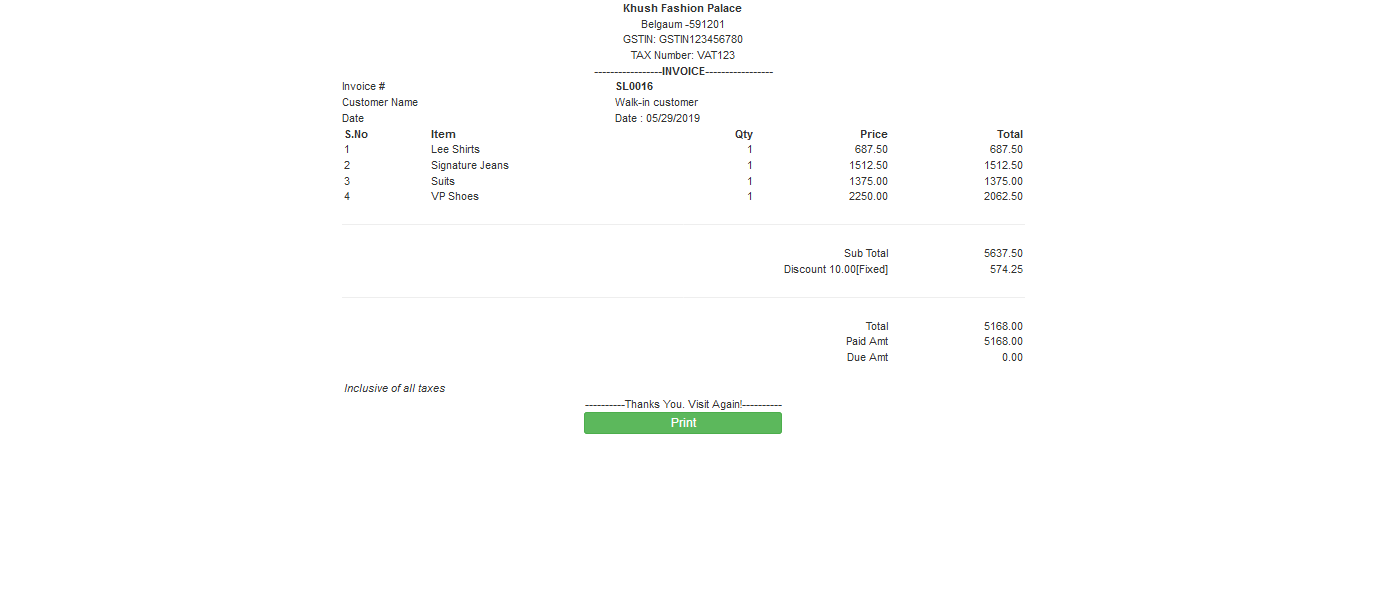 Pay Sales Payments :
 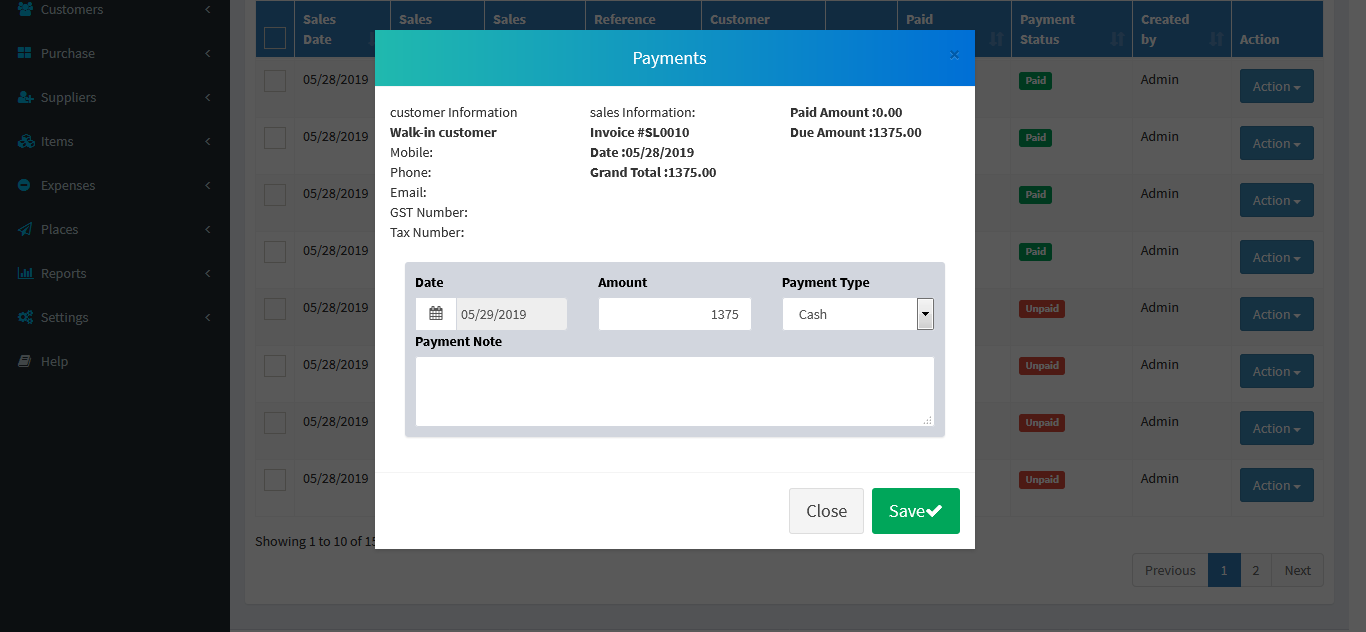 View Sales Payments :
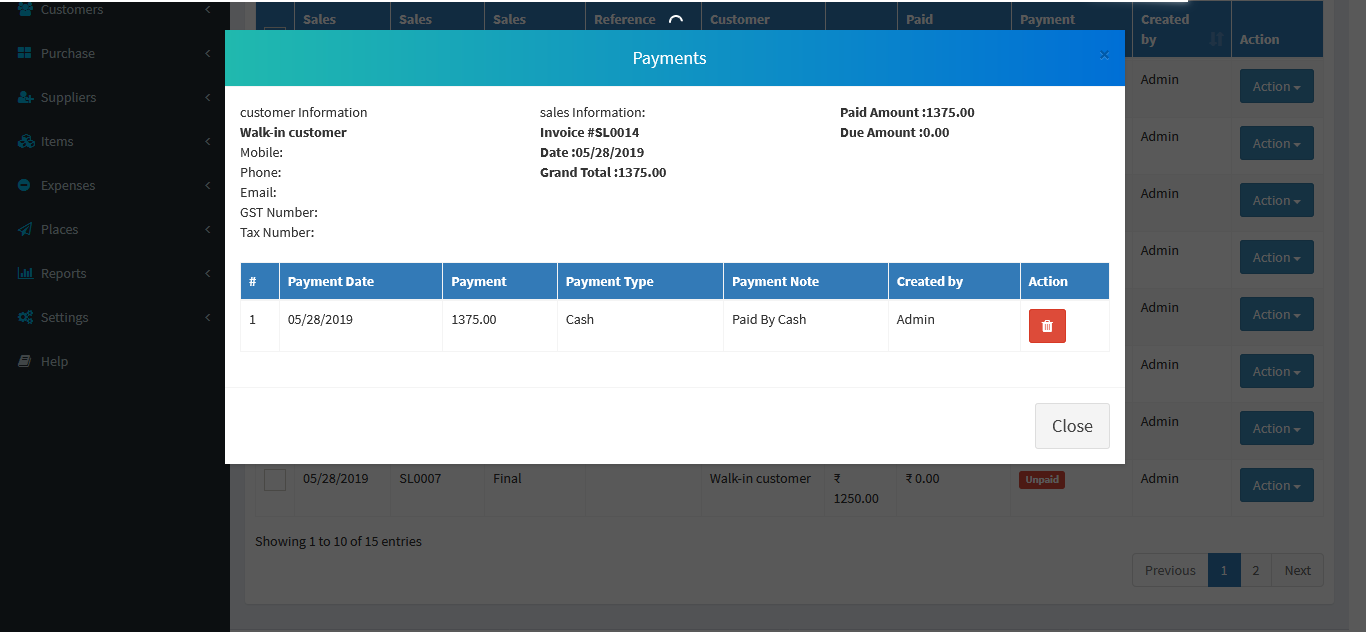
Sales Return
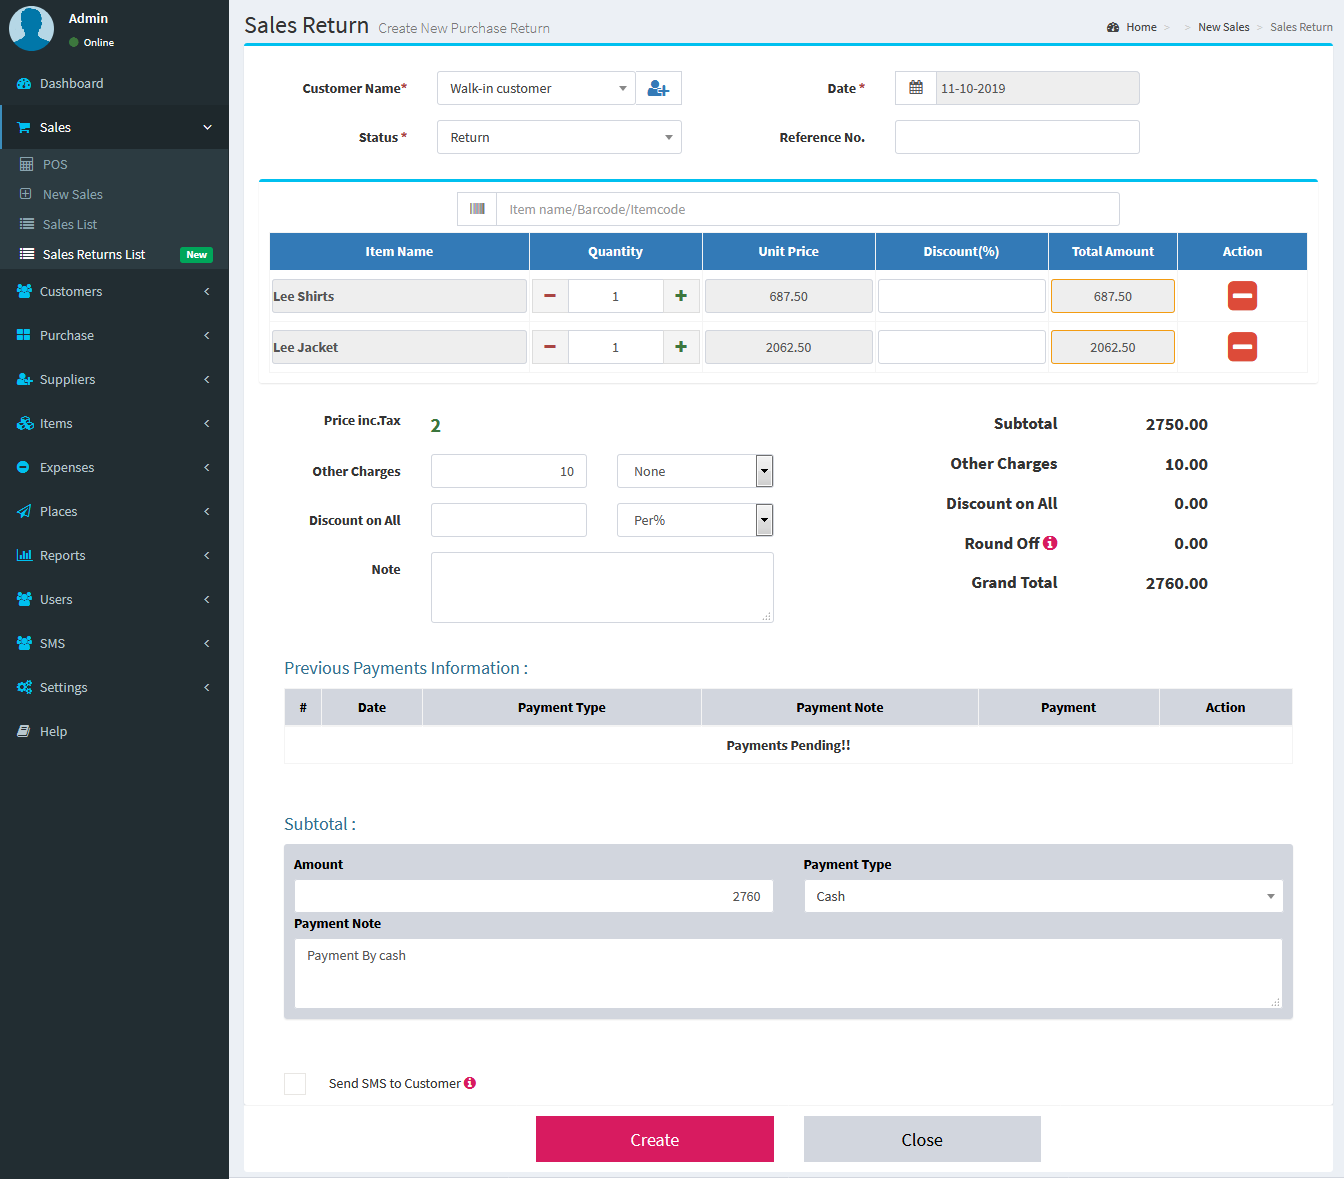
New Sales Return: Sales -> Sales Return List -> Create new- Creating or entering a Sales return information in inventory is a very easy task. Select Customer,You need select the items from the table, where item name has the standard search box for items name, here you need to select item name, all other information will be shown in the same row, available quantity, sales quantity,UQC,Tax and you select any number of items in purchase table and click on Save button.
- Send SMS : If you want you can send the SMS to Existing/Saved Customer when Invoice Generate. SMS Template available in SMS -> SMS Templates menu bar. [Note: Walk-in Customer will receive any SMS]
- Sales Invoice : Create the Sales Return Invoice you can take the print.
- POS Invoice : You can print sales invoice in POS machine.
- Sales Return payments : You will get Sales return payments options
 Sales Return List :
 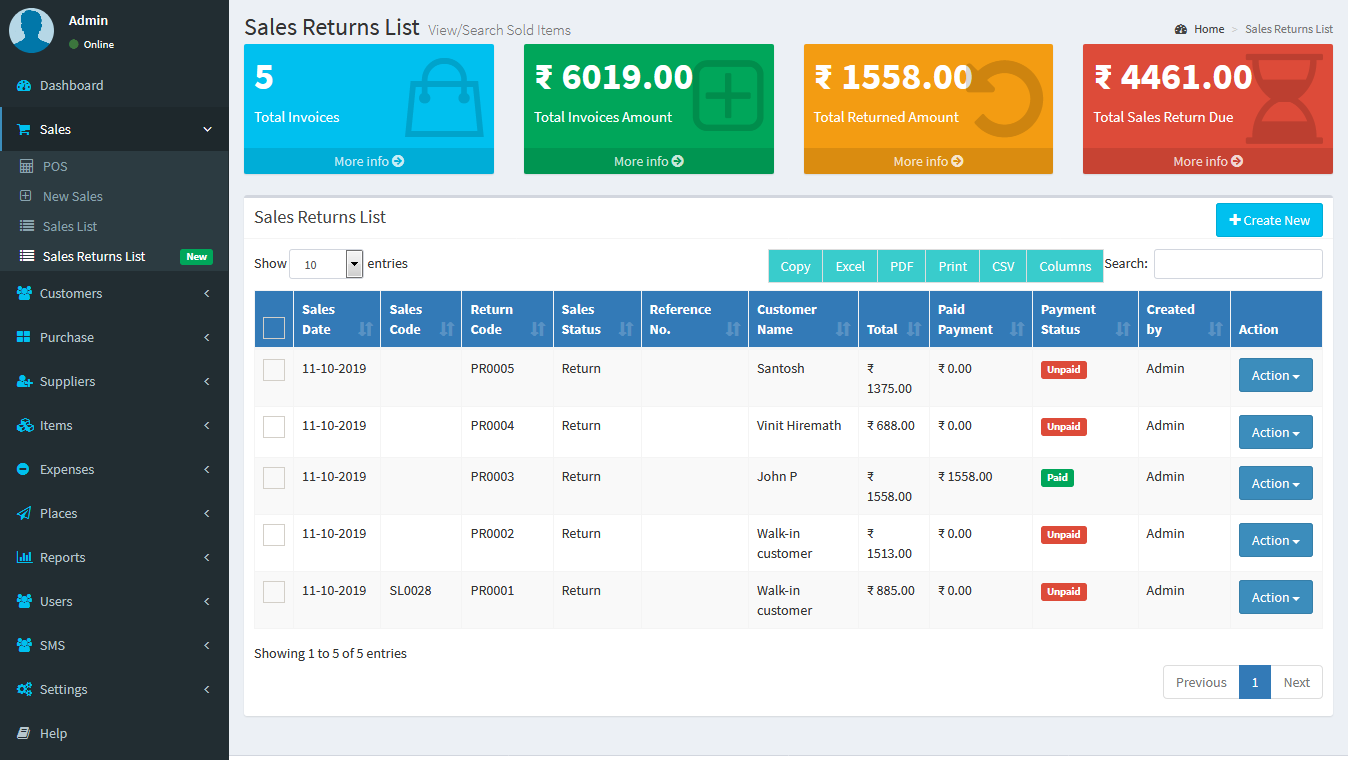 Sales Return Invoice :
 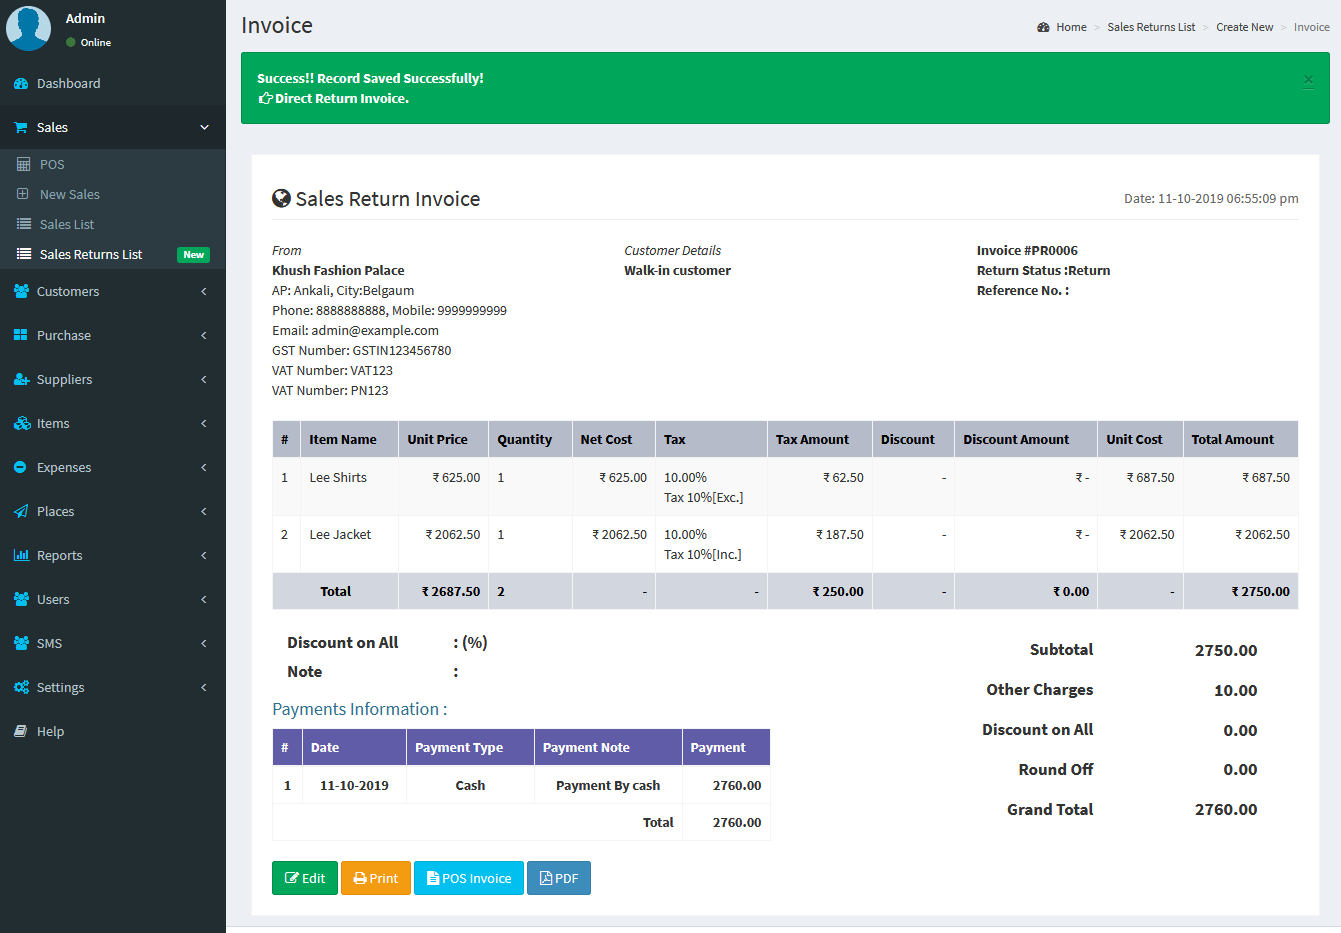 Sales Return Invoice Print :
 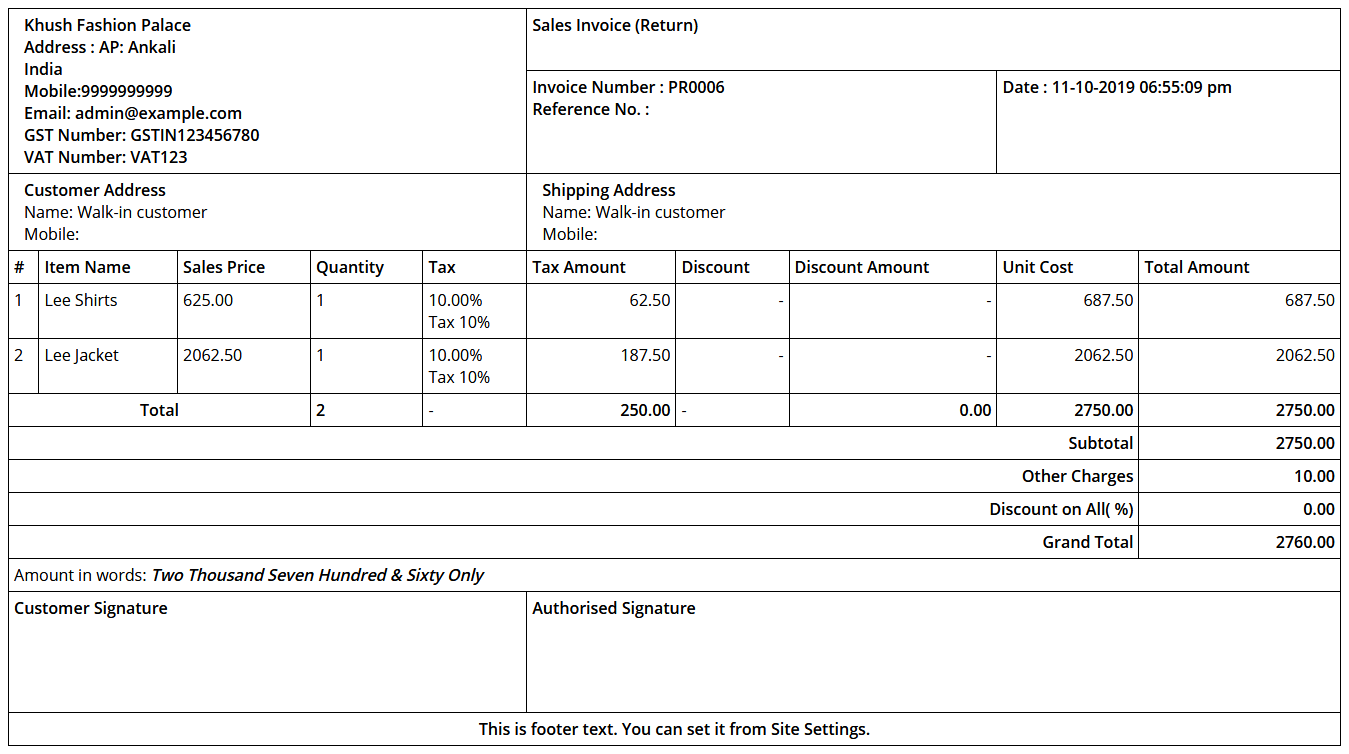 Sales Return Invoice PDF :
 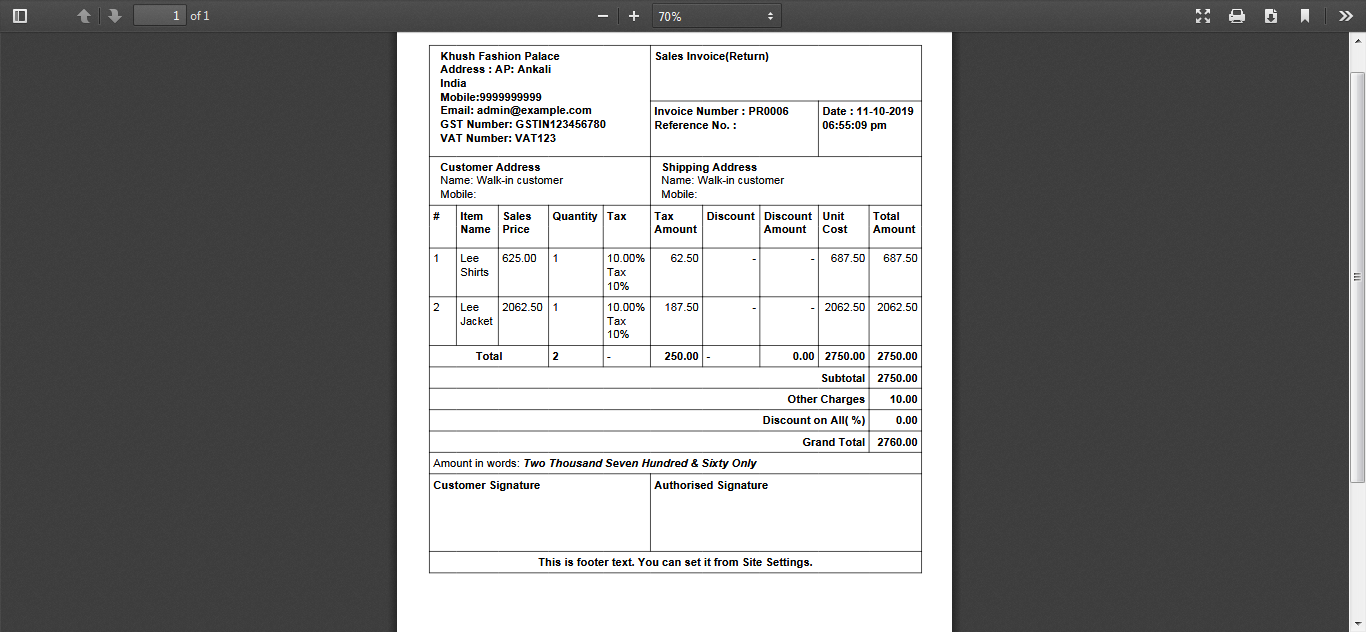 POS Invoice for Sales Return:
  Pay Sales Payments :
 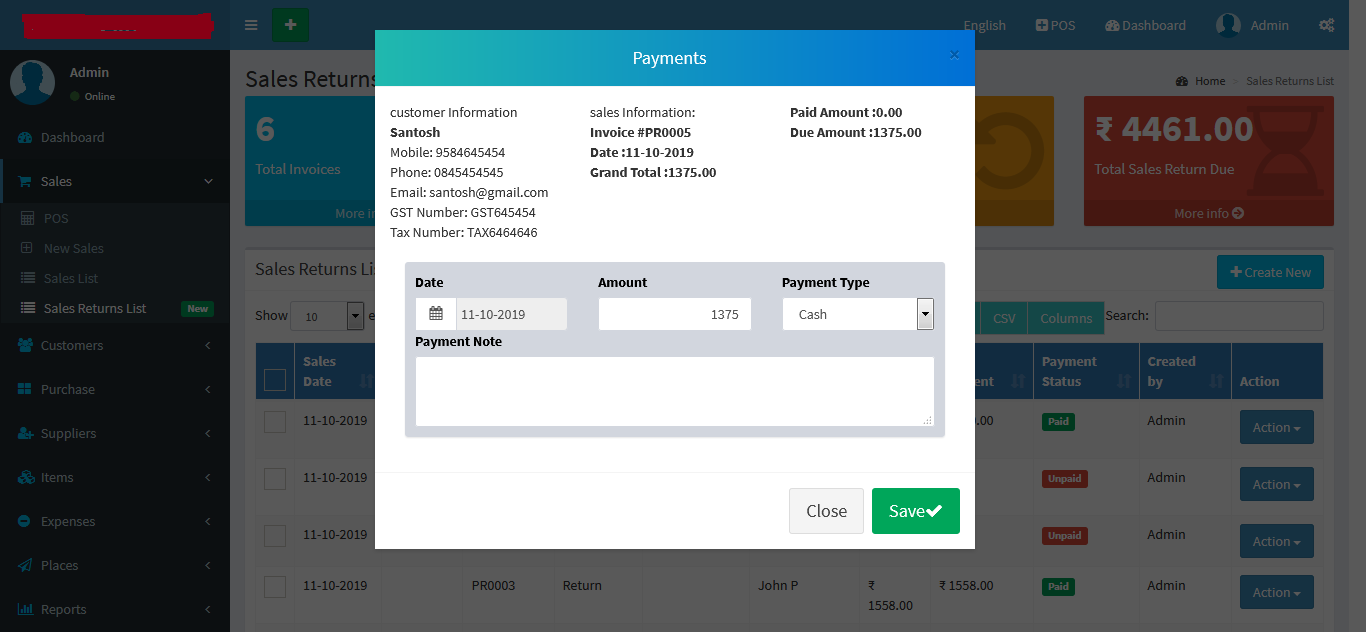 View Sales Payments :
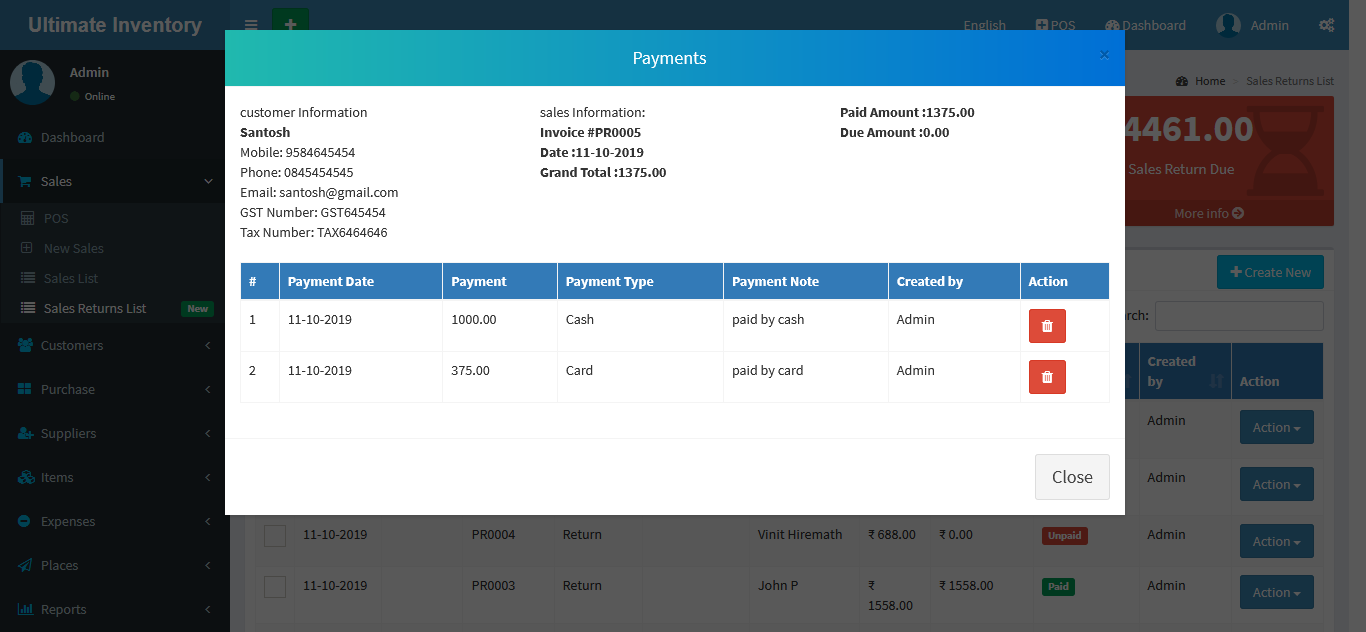
Expenses
New Expense Category: Expense -> New Expense Category Creating or entering a Expense Category information in inventory is a very easy task. Enter Category Name, Enter Description and click on Save button. Expense Category List: Expense -> Expense Category List You can view the all the added Expense Category list and you can Sales list by Delete & Edit actions. New Expense: Expense -> New Expense Creating or entering a Expense information in inventory is a very easy task. Select Date, Select Category Name, enter Expense for, enter Amount, enter Reference no., enter Note and click on Save button. Expense List: Expense -> Expense List You can view the all the added Expense list and you can Sales list by Delete & Edit actions. New Expense Category :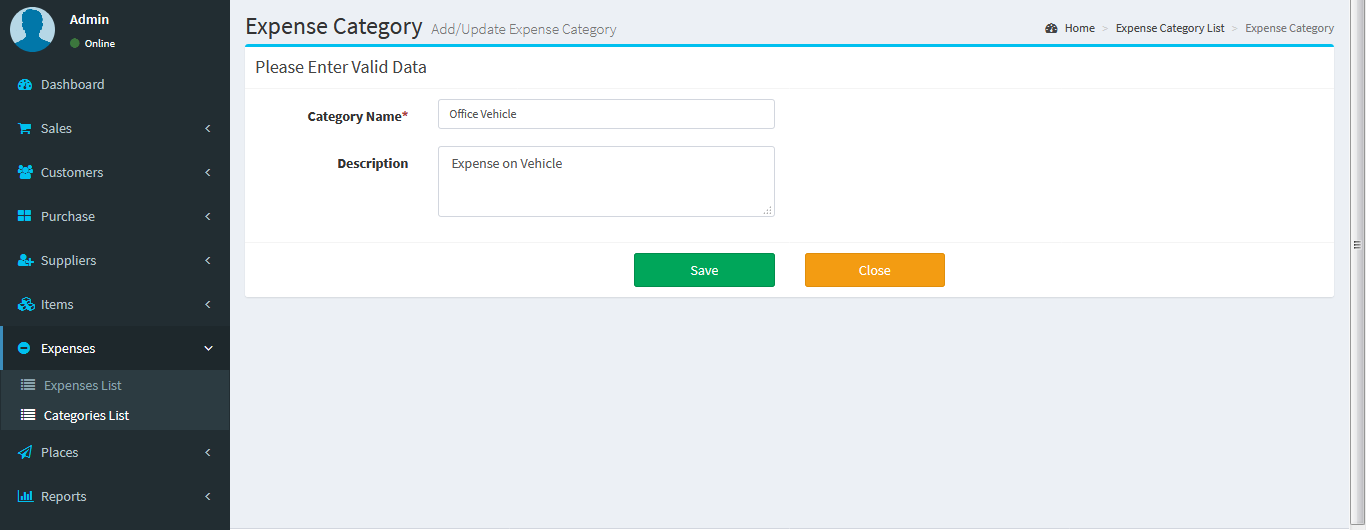 Expense Category List :
 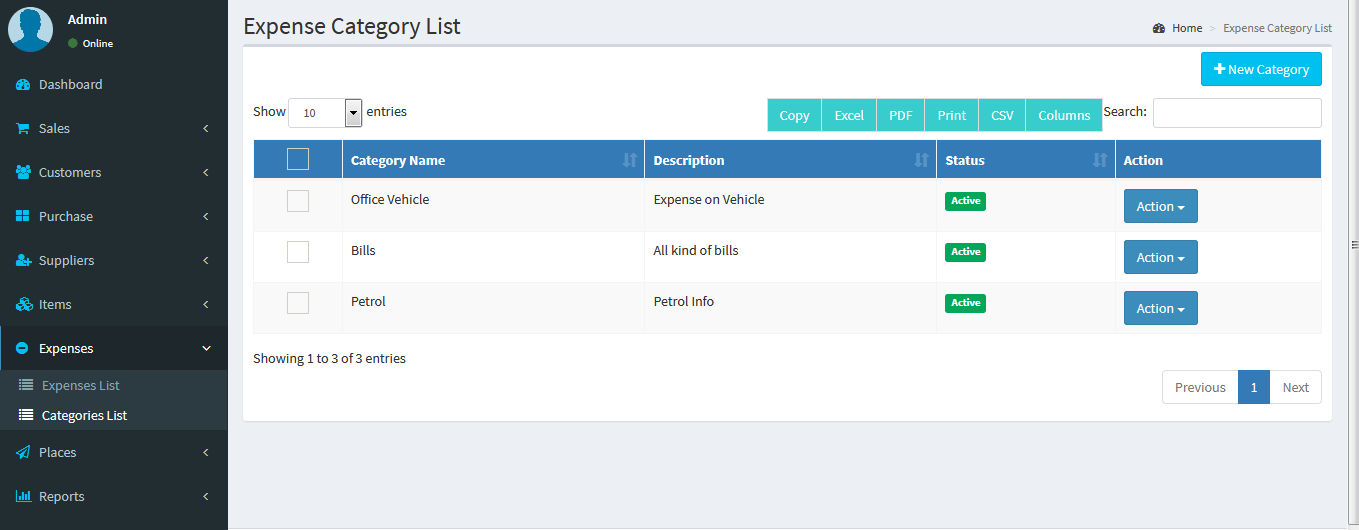 New Expense :
 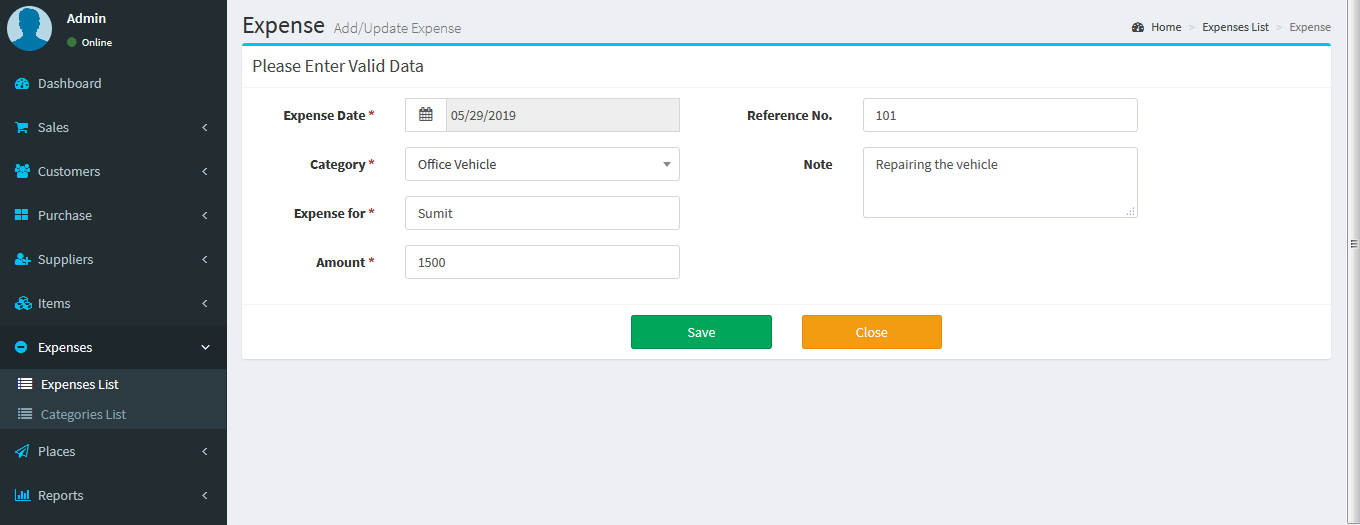 Expense List :
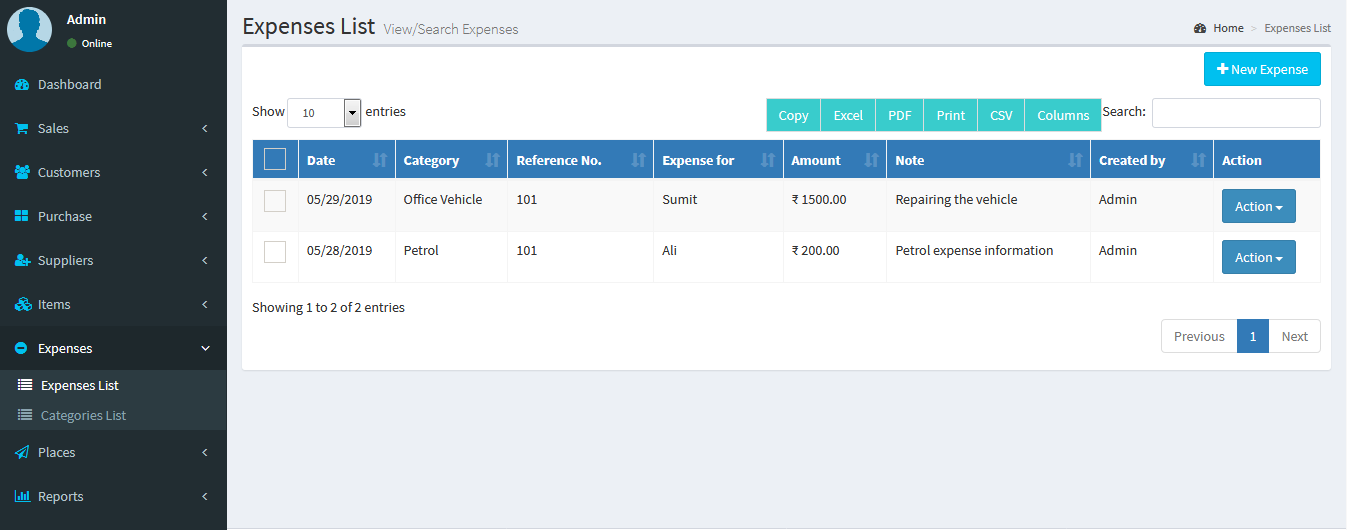
Places
New Country: Places -> New Country Adding a Country it's a very easy task. Enter Country name and click on Save button. Country List: Places -> Country List You can view the all the added Country list and you can manage Country list by Delete & Edit actions. New State: Places -> New State Adding a State it's a very easy task. Enter State name, select country name and click on Save button. States List: Places -> States List You can view the all the added State list and you can manage State list by Delete & Edit actions. New Country :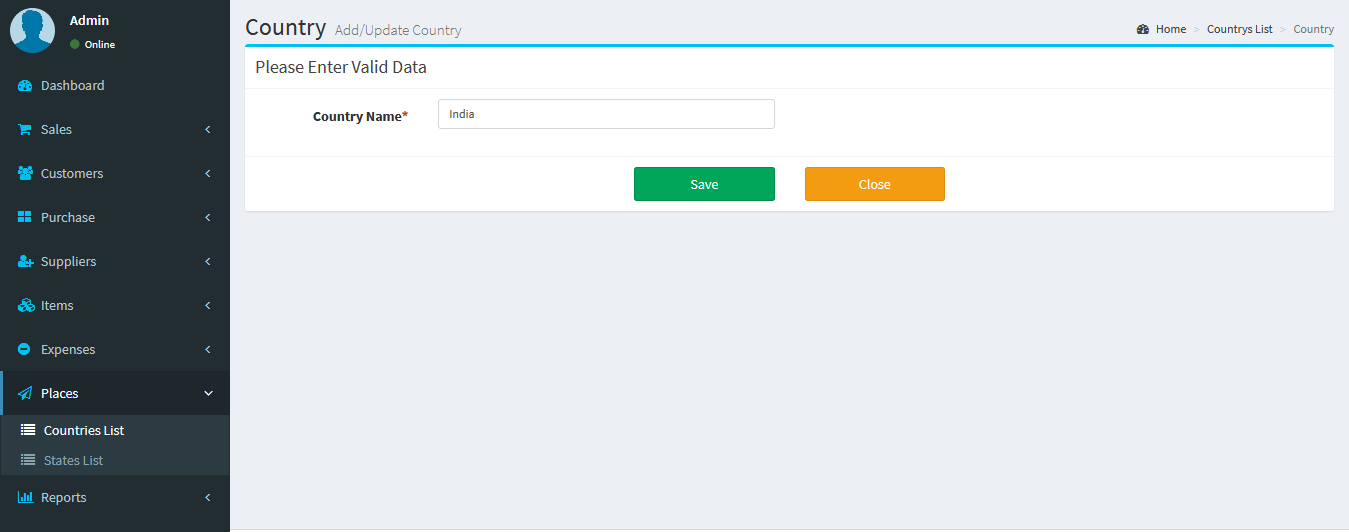 Countries List :
 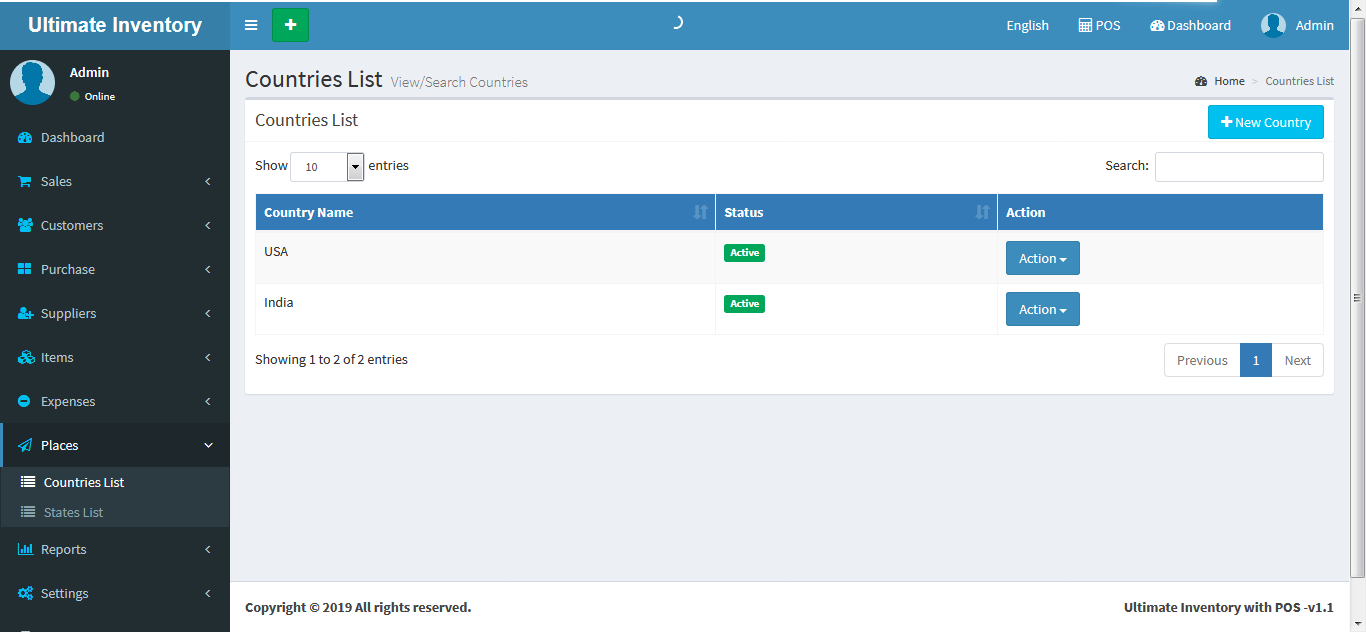 New State :
 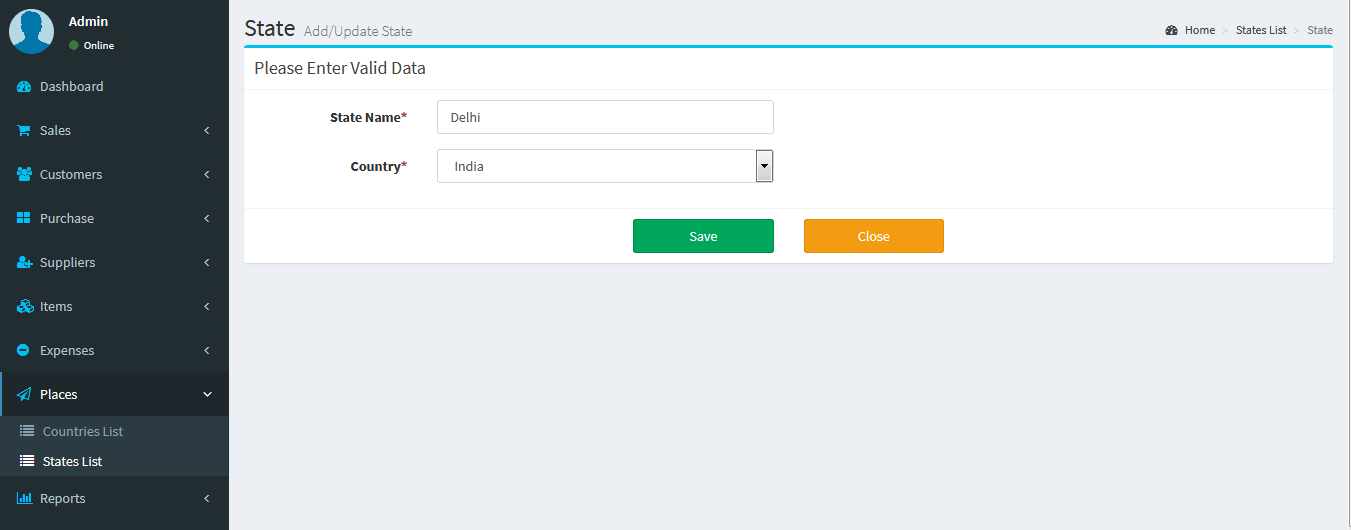 States List :
Users
Roles List: Users -> Roles List You can view the all the added Roles list and you can manage Roles list by Delete & Edit actions. New Role: Users -> Roles List -> New Role Adding a Role it's a very easy task. Enter Role name, Description(Optional field), Select Persmissions for that role and click on Save button. Users List: Settings -> Users List You can view the all the added users list and you can manage users by status active and inactive operation(Enable or Disable Users). Create User: Settings -> Create User Adding a User it's a very easy task. Enter user name, Mobile number, Email ID, Role(Admin/Sales/Purchase), enter password and confirm the password fields of the new user and click on Save button. Roles List :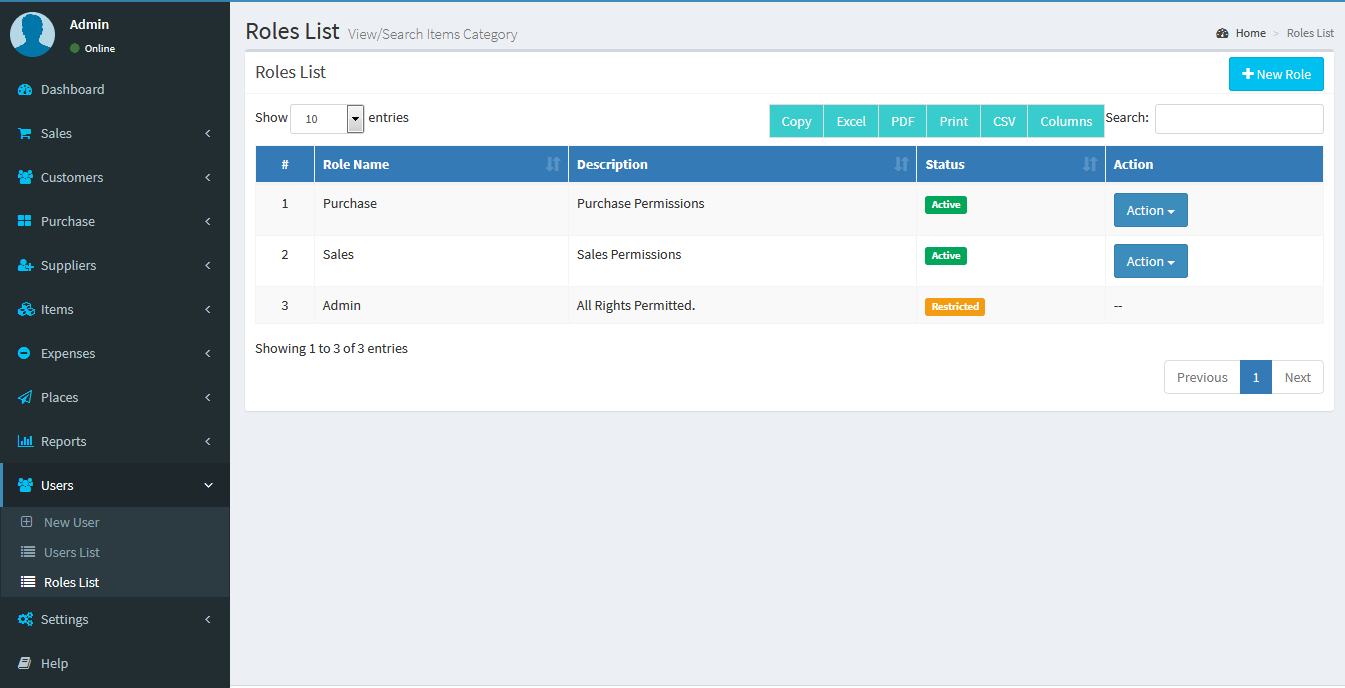 New Role :
 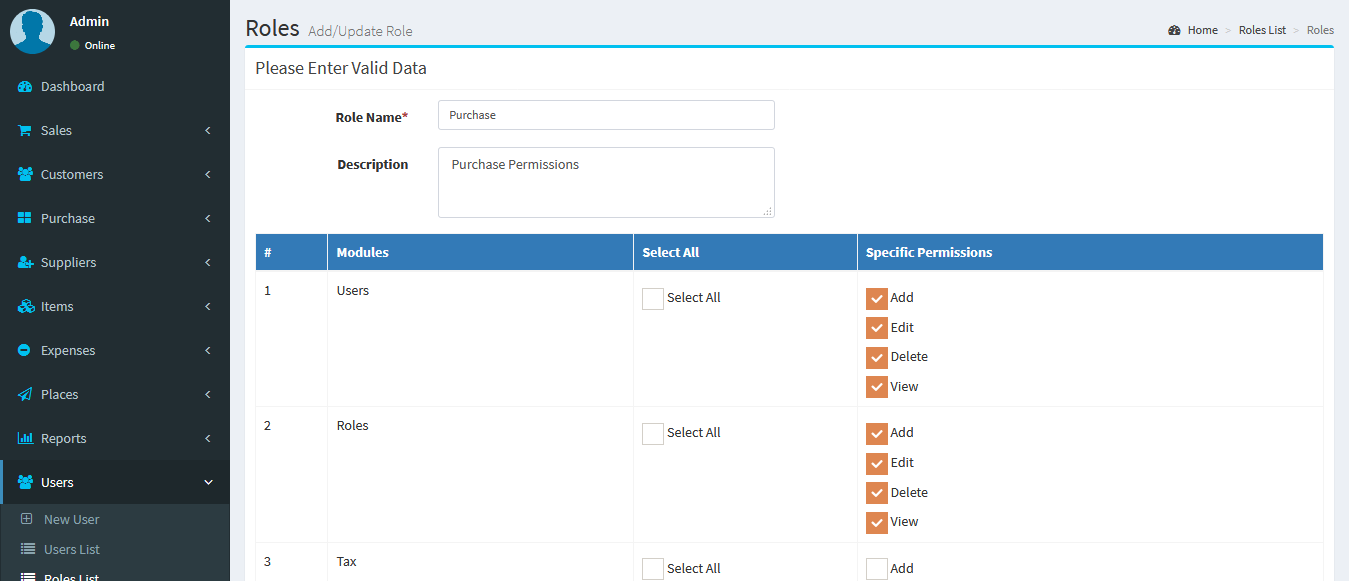 New User :
 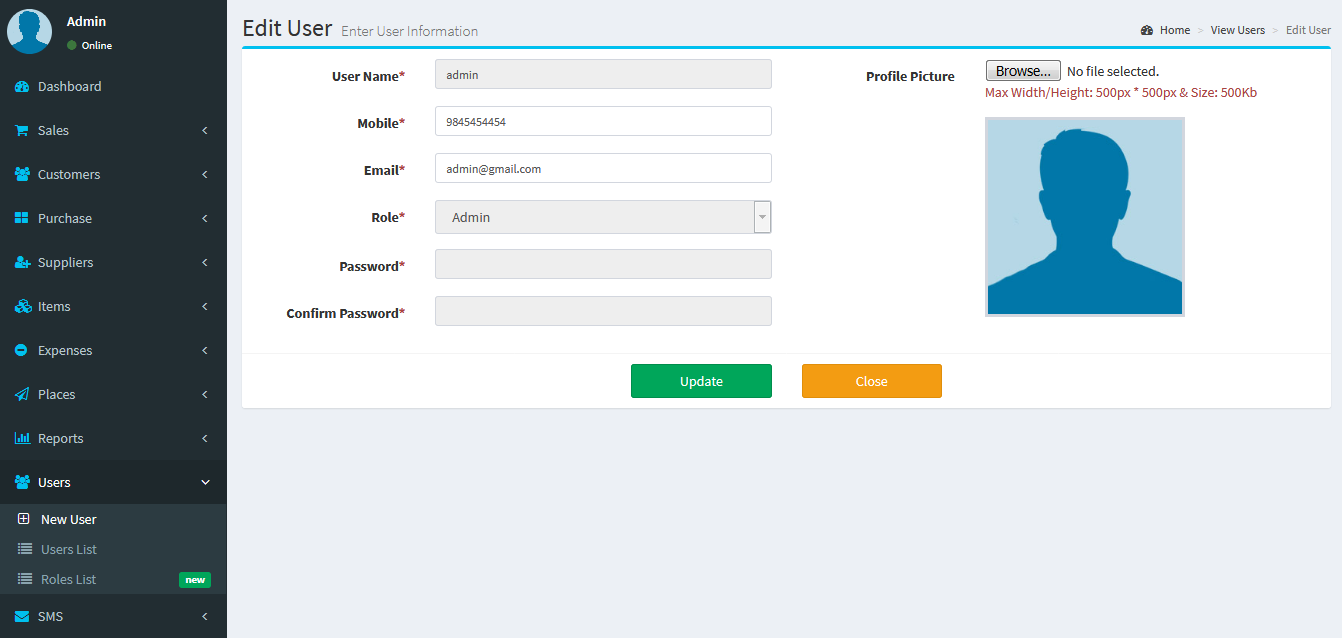 Users List :
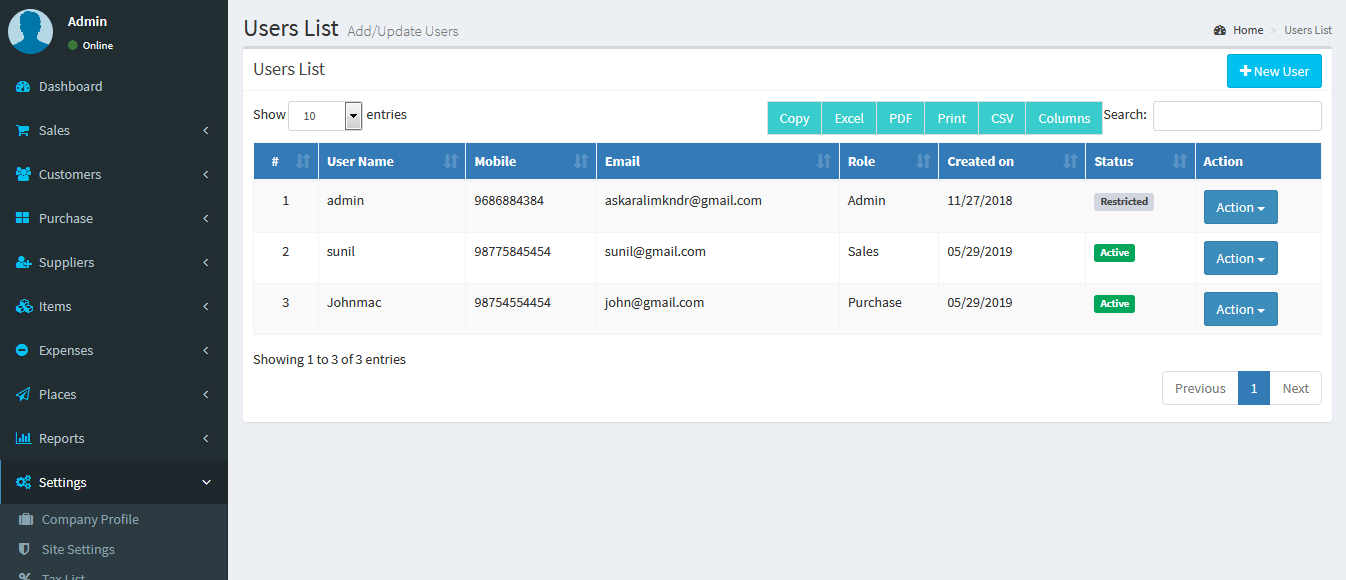
Reports
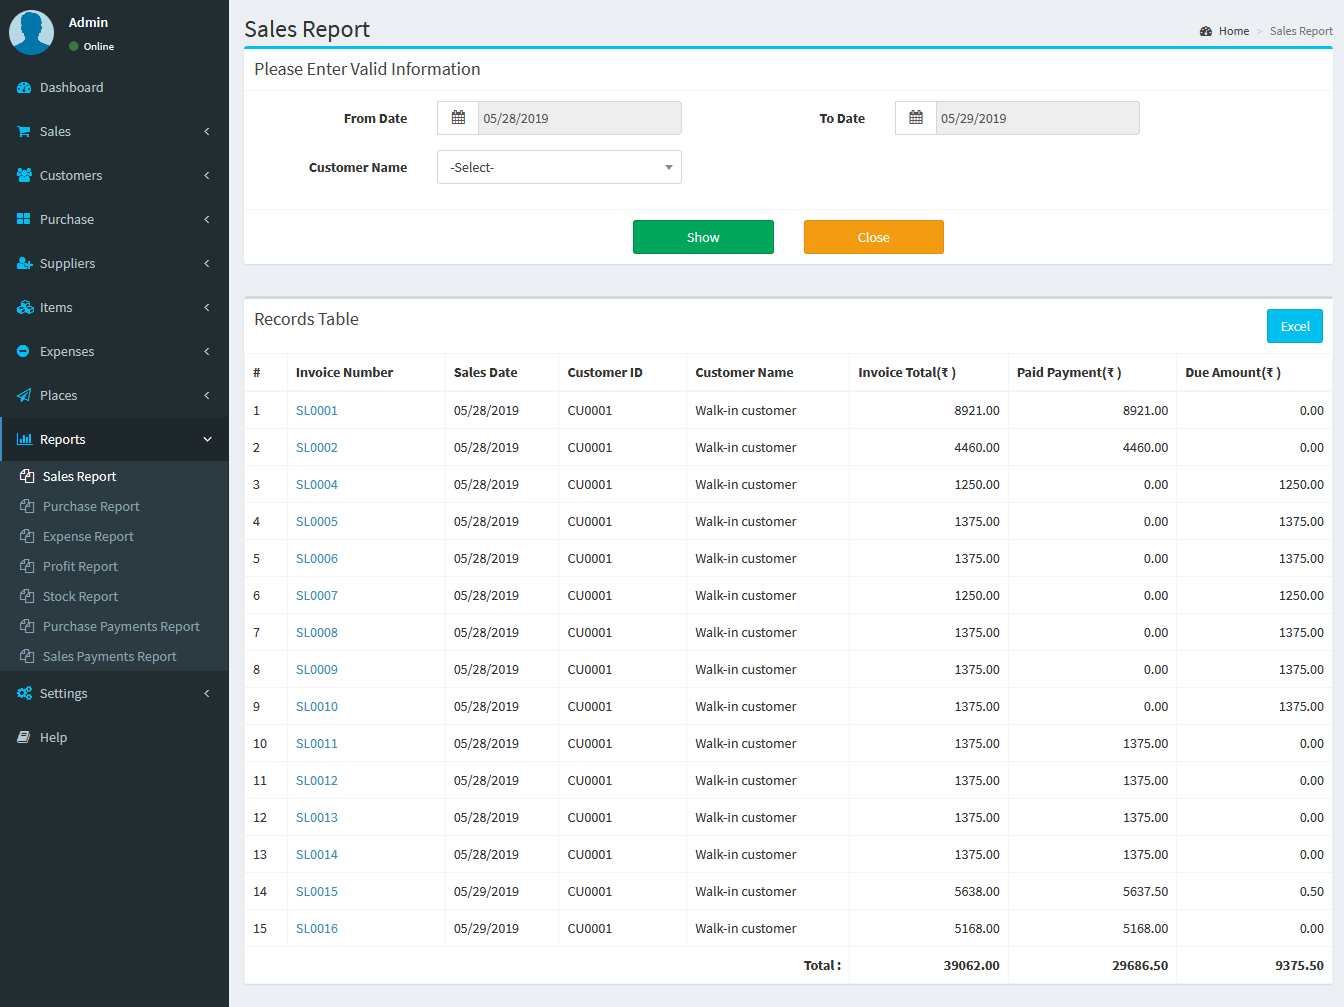
Sales Report: Reports -> Sales Report- Select from date, to date and customer name-> click on show button.
- In the same form it will shows all the required information
- You can export the report data into excel format.
- Select from date, to date and customer name-> click on show button.
- In the same form it will shows all the required information
- You can export the report data into excel format.
- Select from date, to date and Supplier name-> click on show button.
- In the same form it will shows all the required information
- You can export the report data into excel format.
- Select from date, to date and Supplier name-> click on show button.
- In the same form it will shows all the required information
- You can export the report data into excel format.
- Select from date, to date and Category name-> click on show button.
- In the same form it will shows all the required information
- You can export the report data into excel format.
- Select from date, to date and Item name-> click on show button.
- In the same form it will shows all the required information
- You can export the report data into excel format.
- Select from date, to date and Supplier name-> click on show button.
- In the same form it will shows all the required information
- You can export the report data into excel format.
- Select from date, to date and Customer name-> click on show button.
- In the same form it will shows all the required information
- You can export the report data into excel format.
- Select from date and Item name-> click on show button.
- In the same form it will shows all the required information
- You can export the report data into excel format.
 Report: Sales Return Report :
 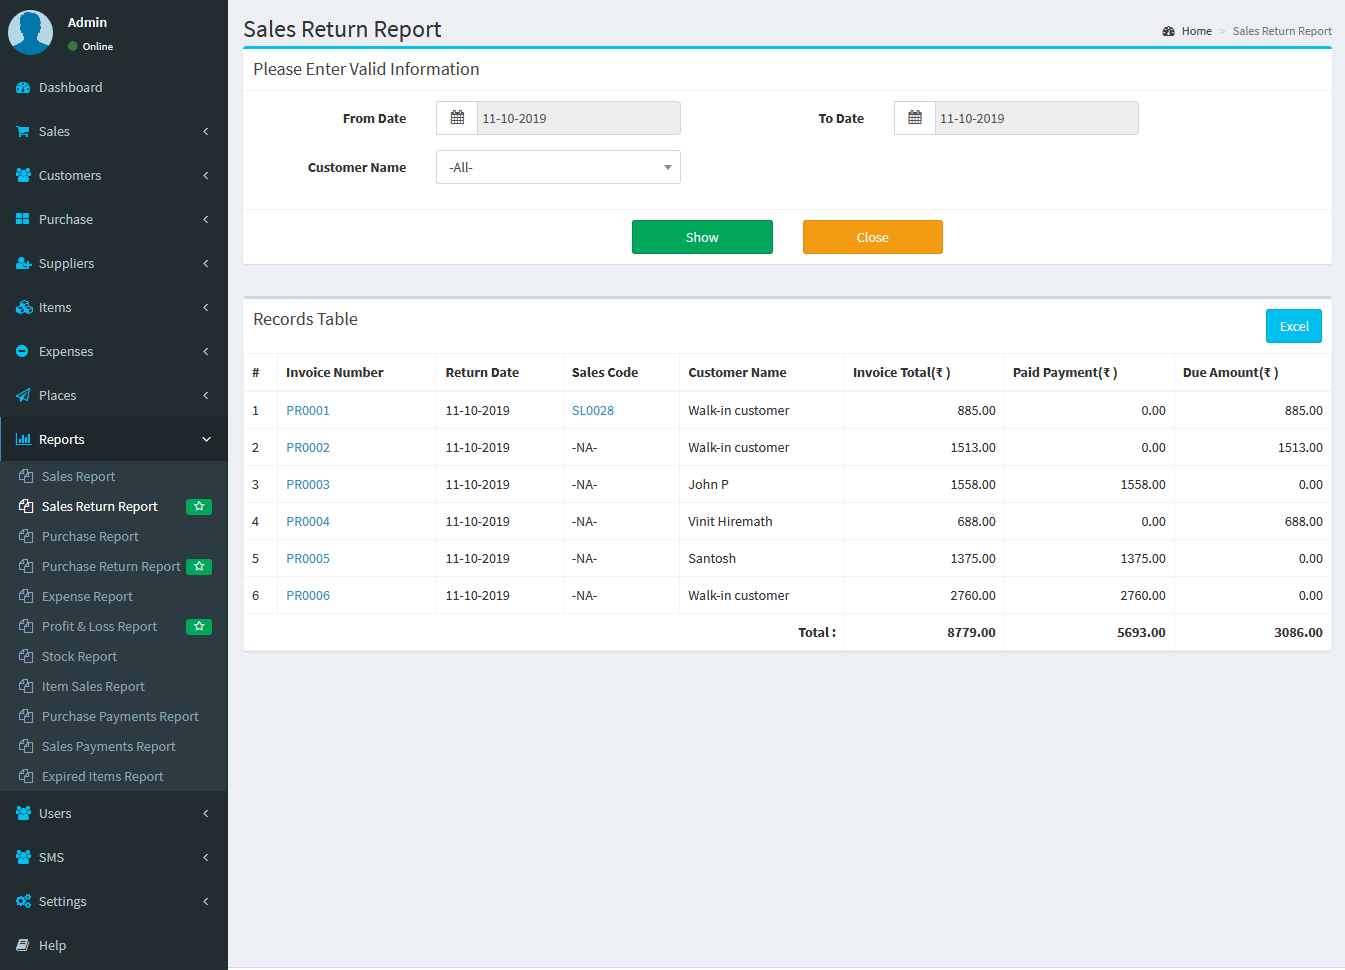 Report: Purchase Report :
 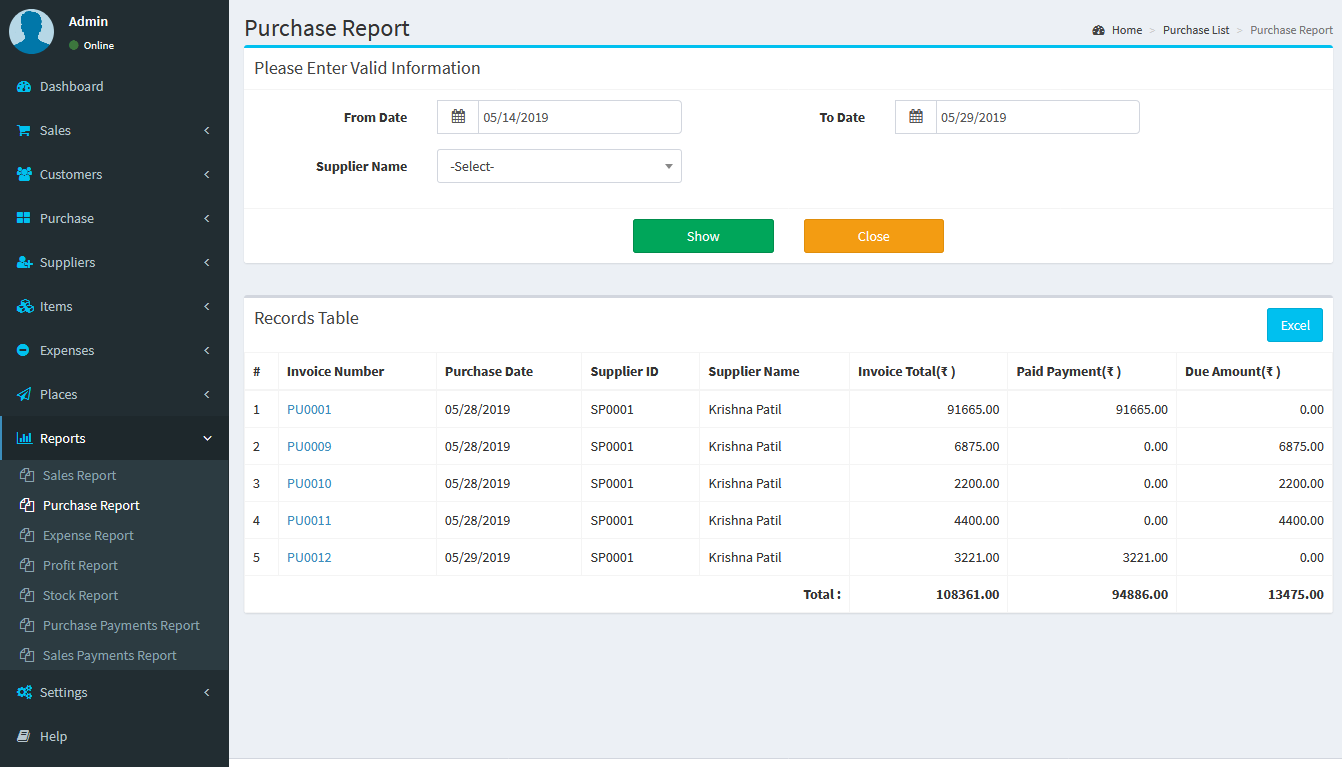 Report: Purchase Return Report :
 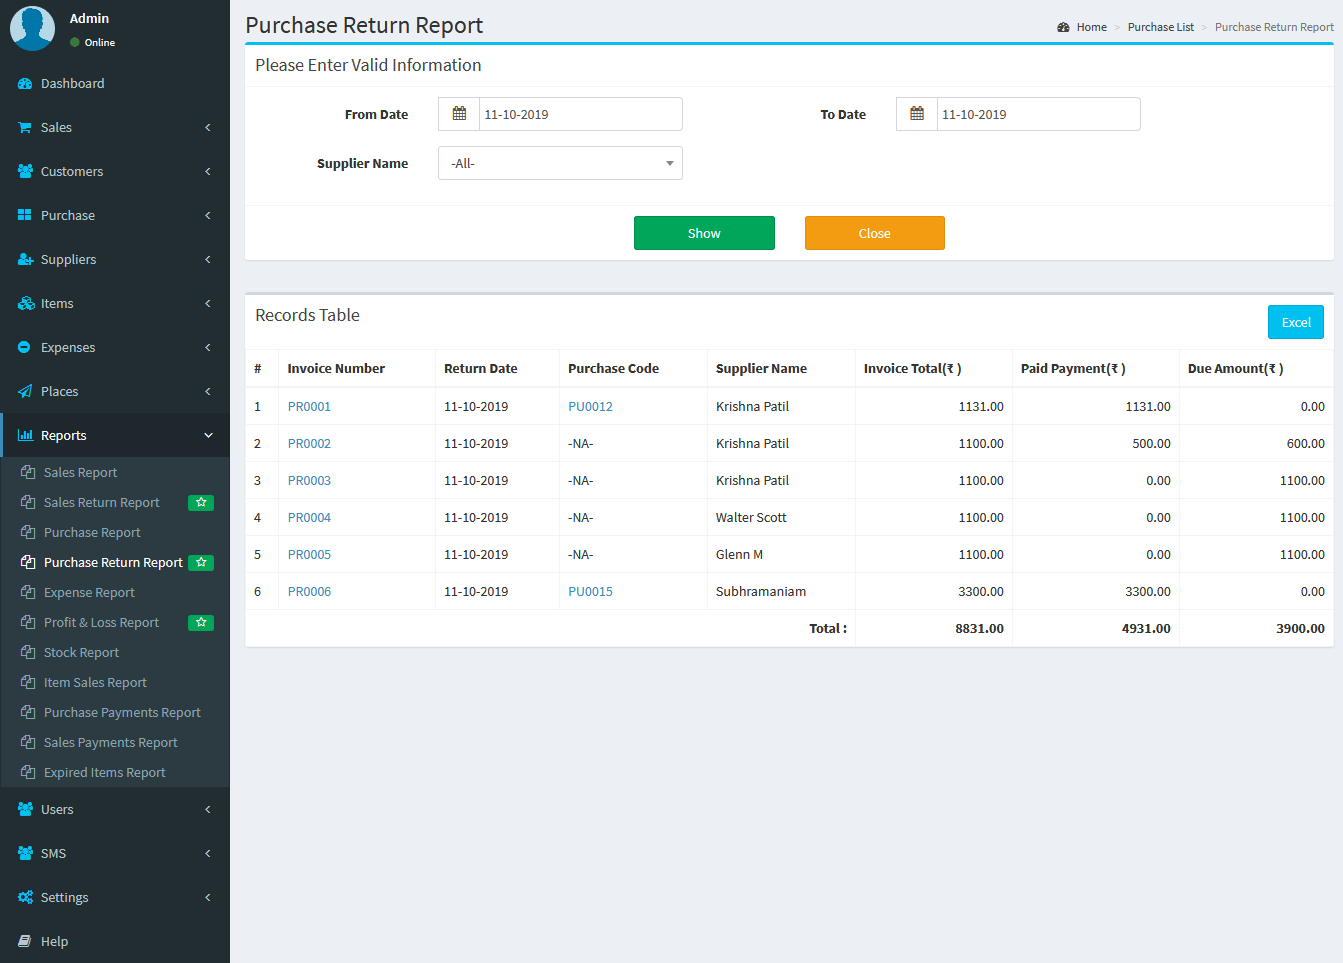 Report: Expense Report :
 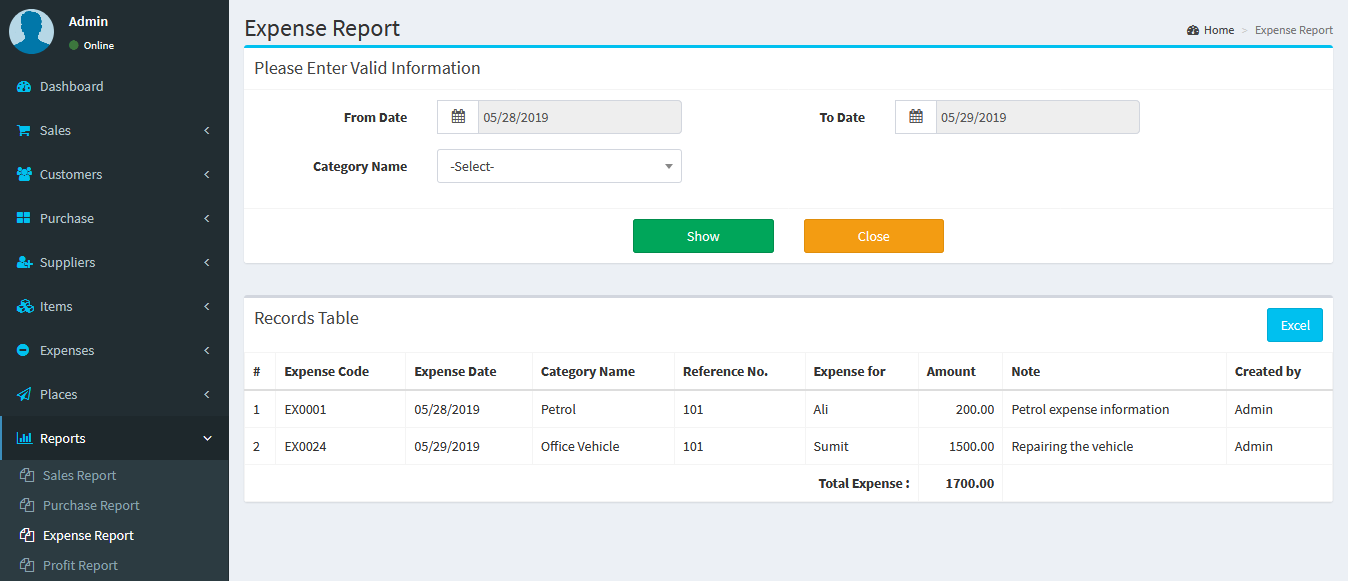 Report: Profit & Loss Report :
 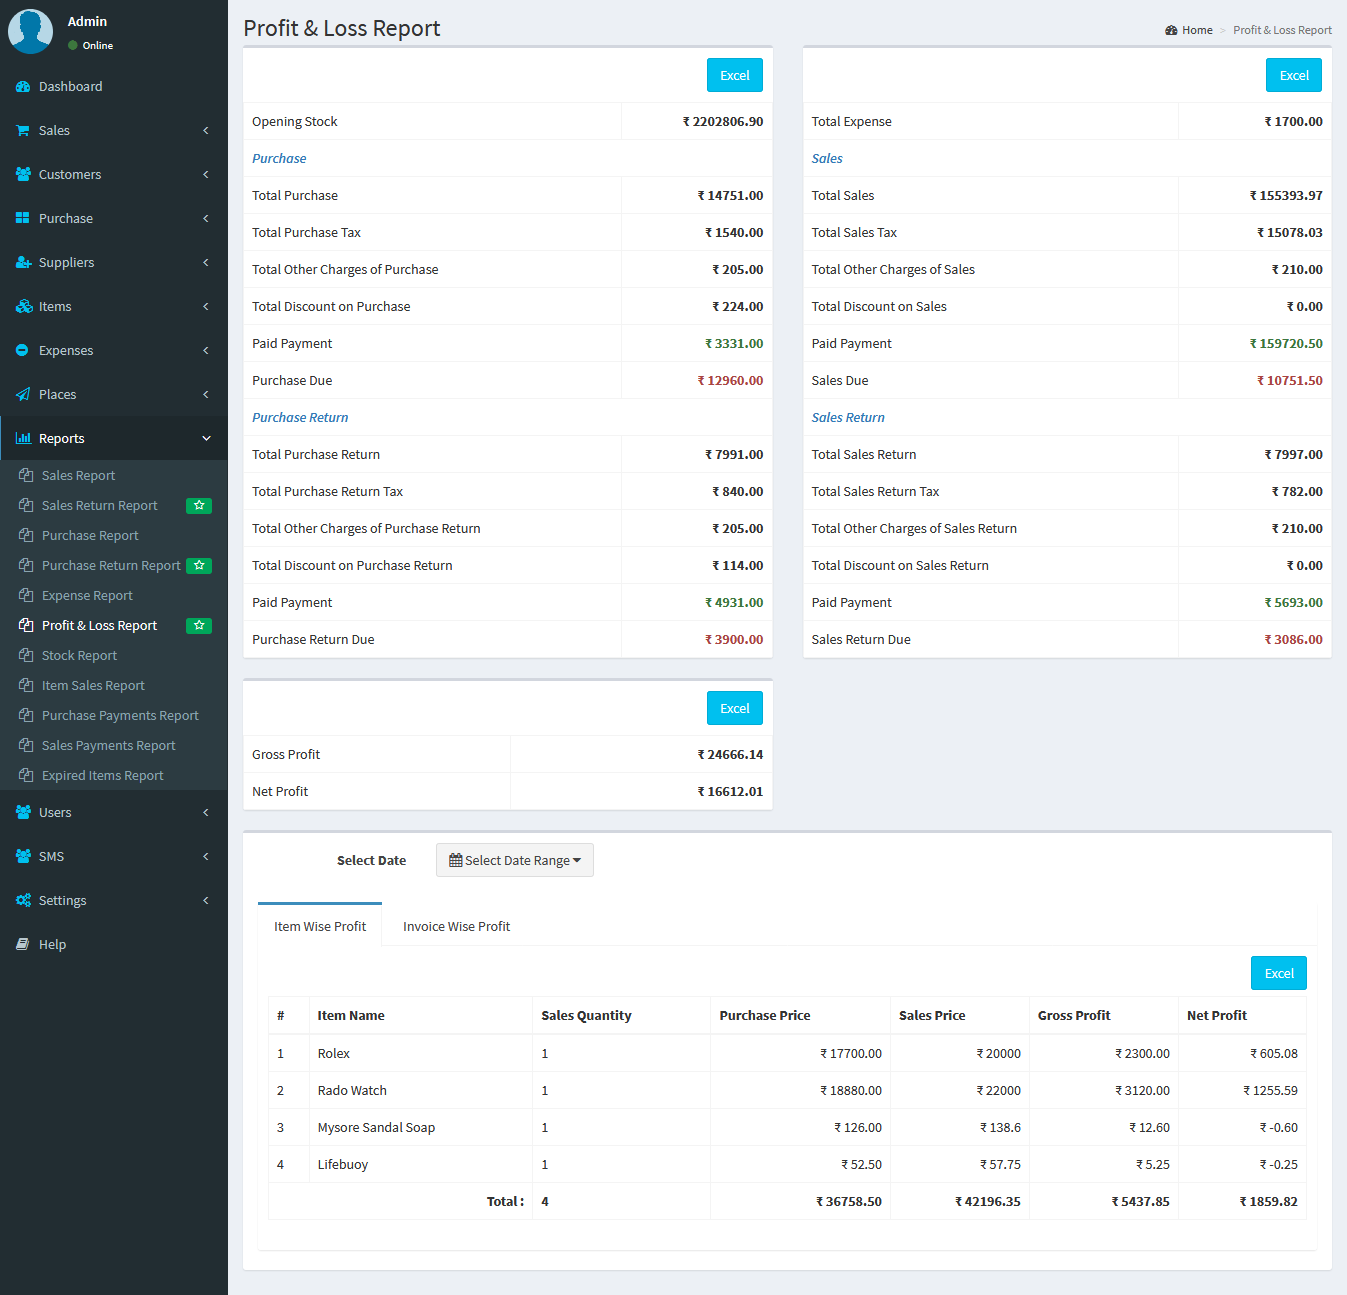 Report: Stock Report Item Wise :
 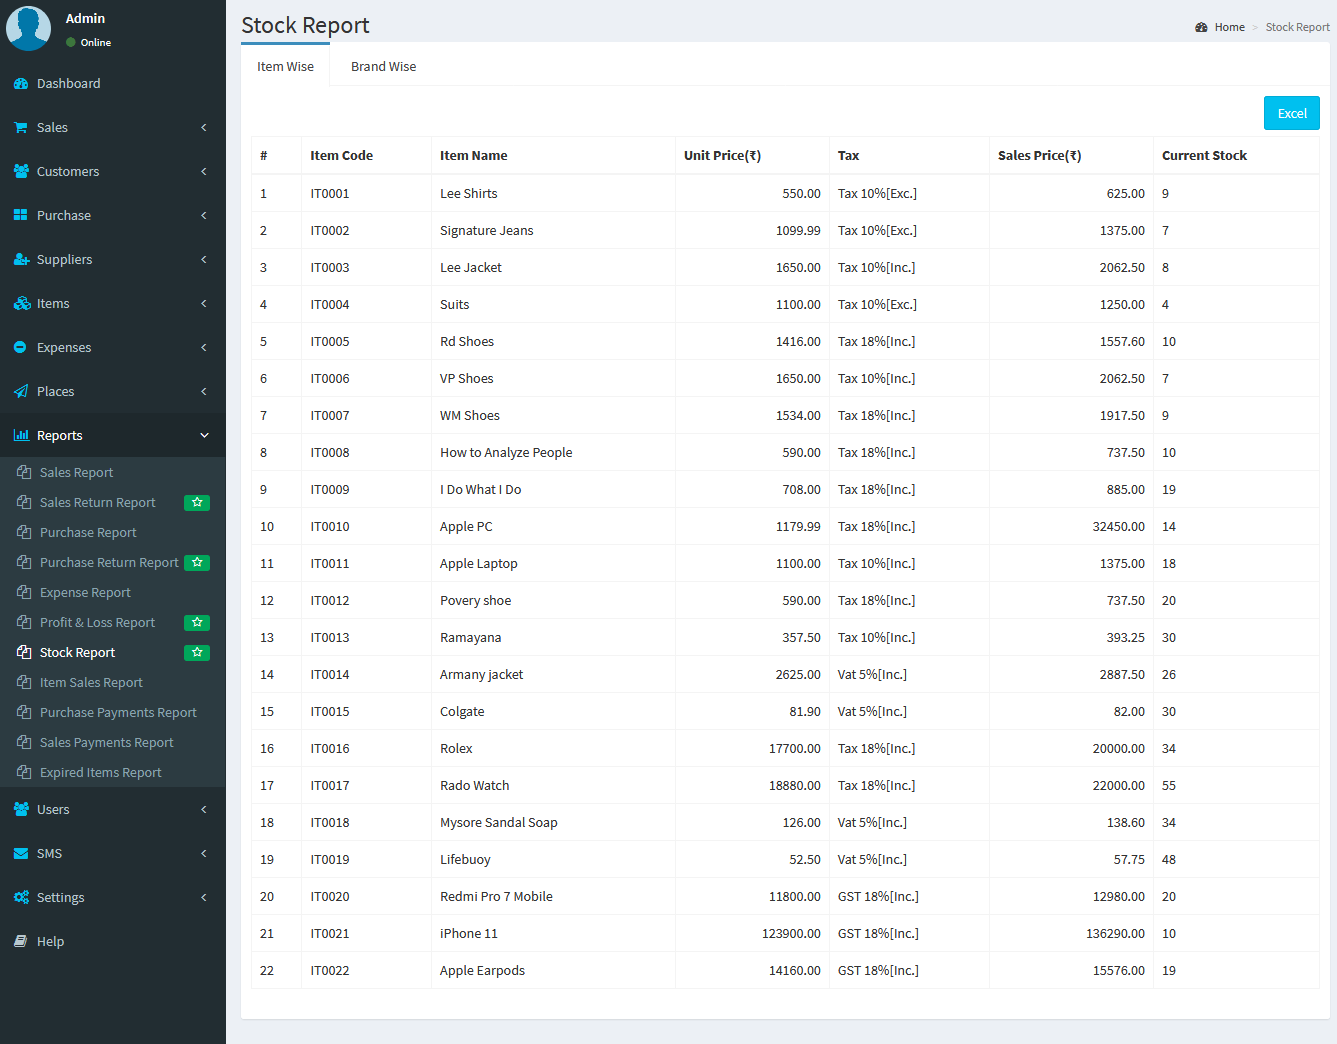 Report: Stock Report Brand Wise :
 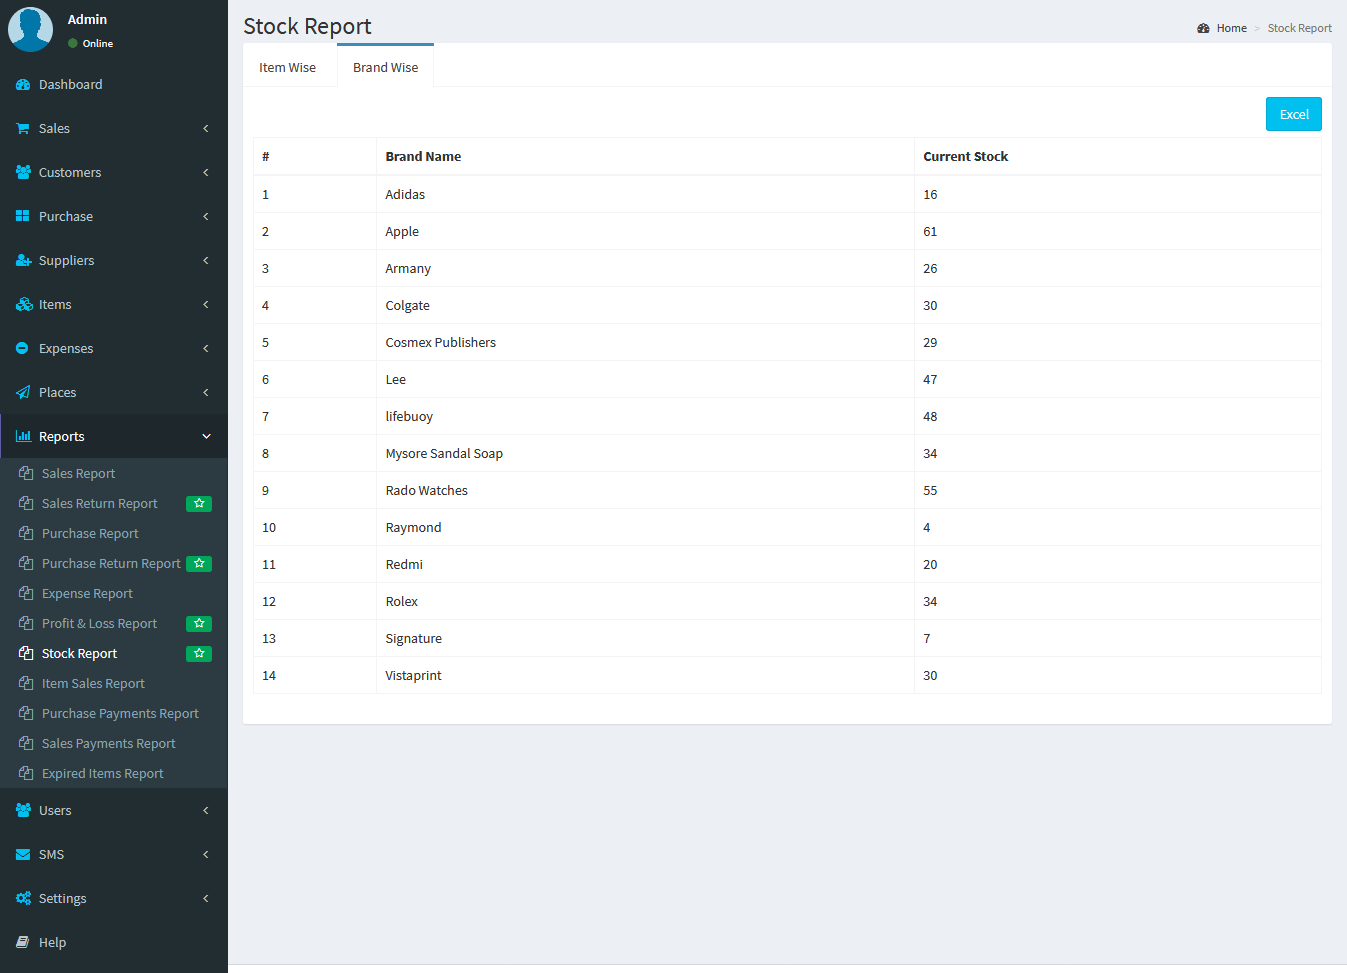 Report: Item Sales Report :
 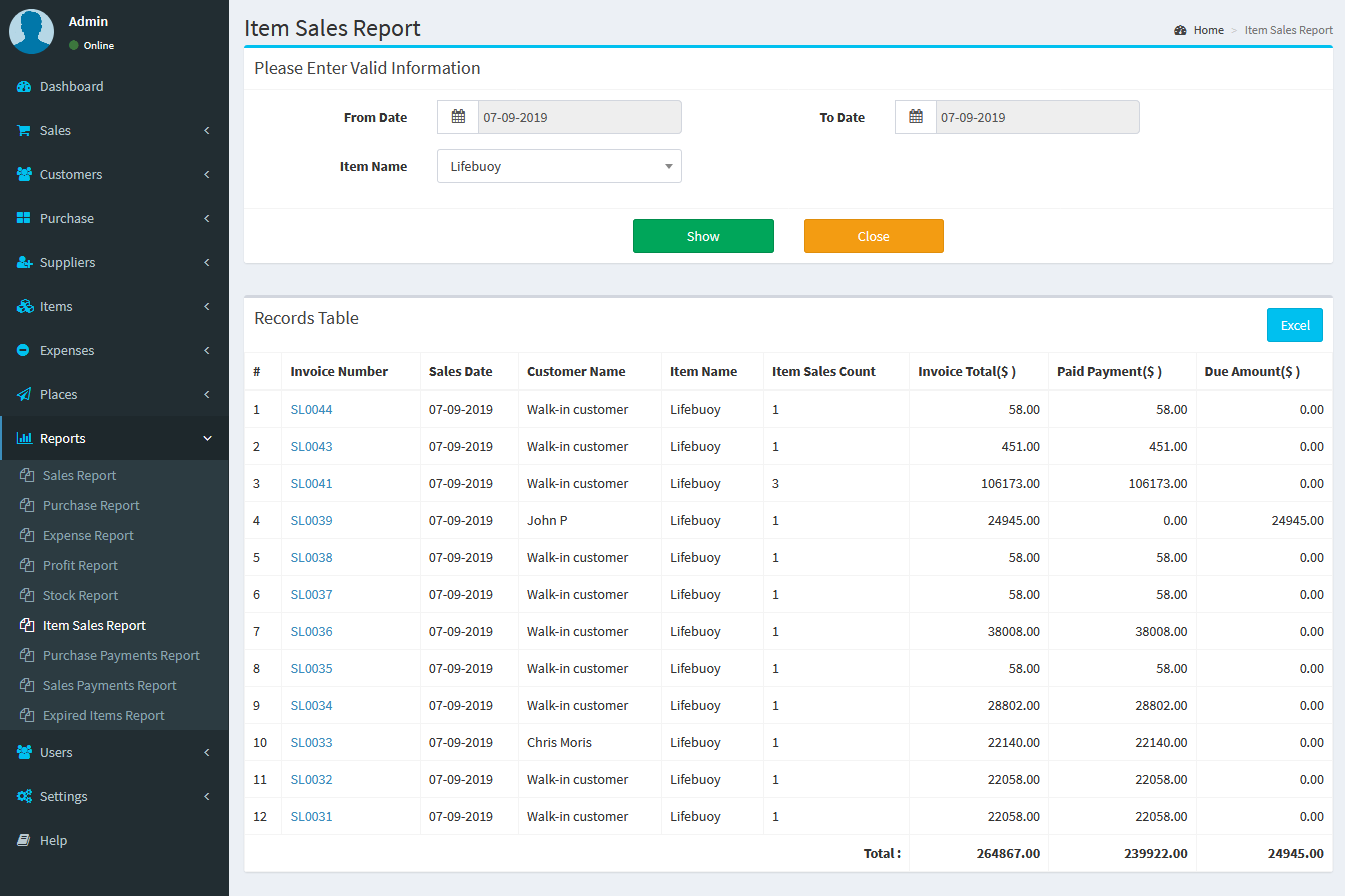 Report: Purchase Payments Report :
 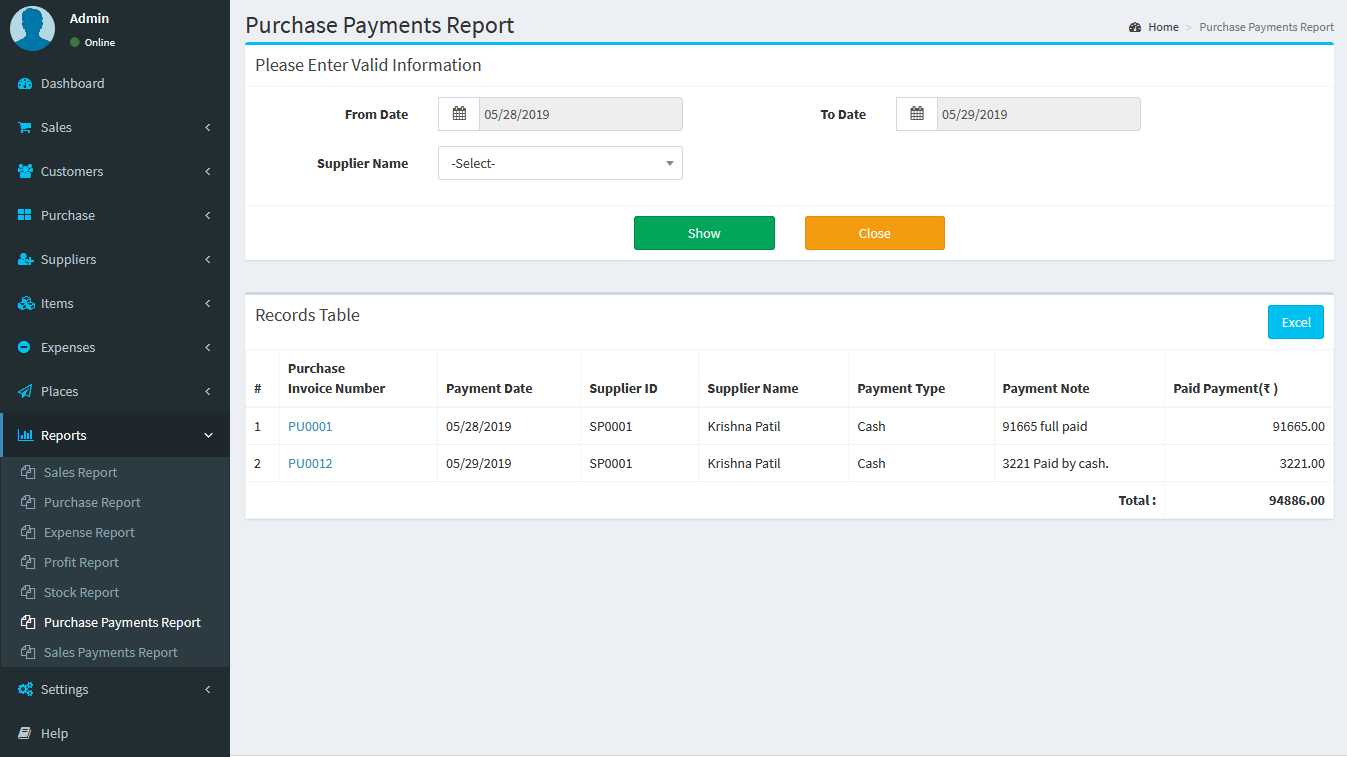 Report: Sales Payments Report :
 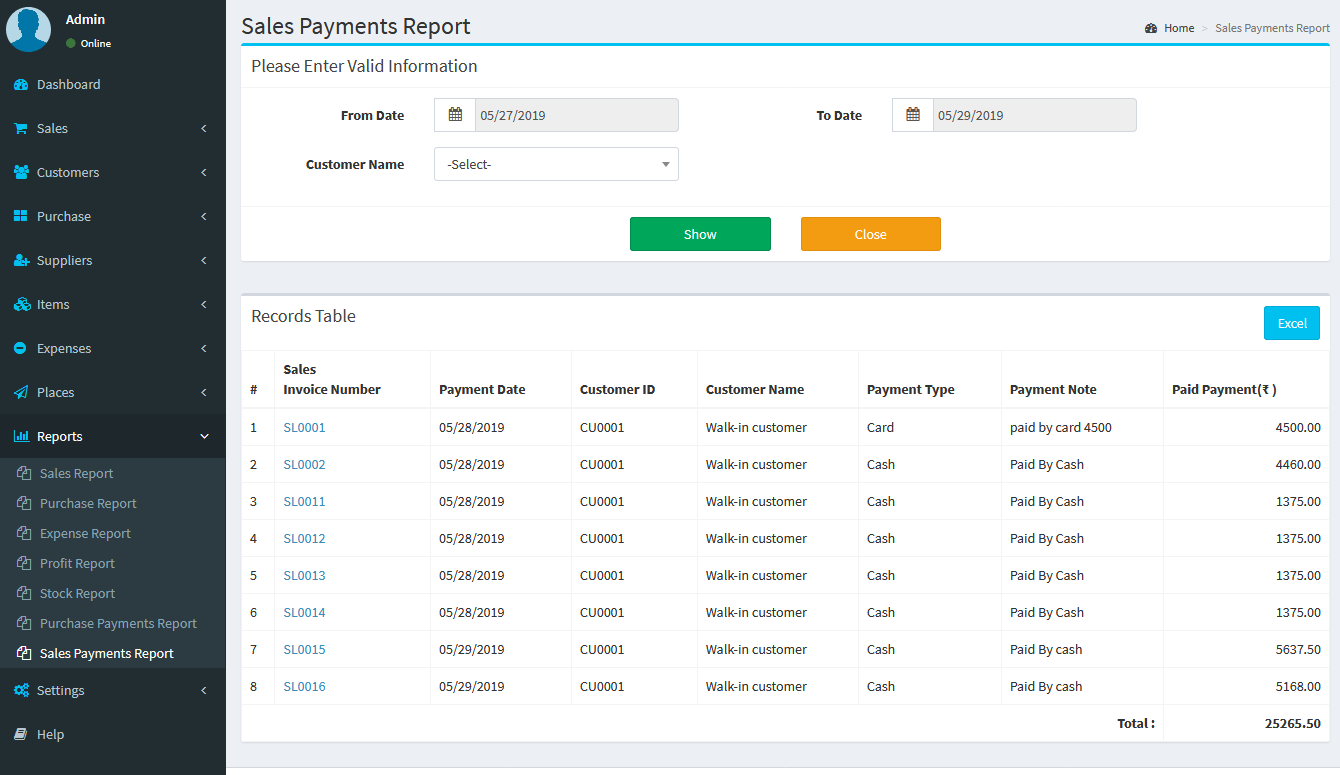 Report: Expired Items Report :
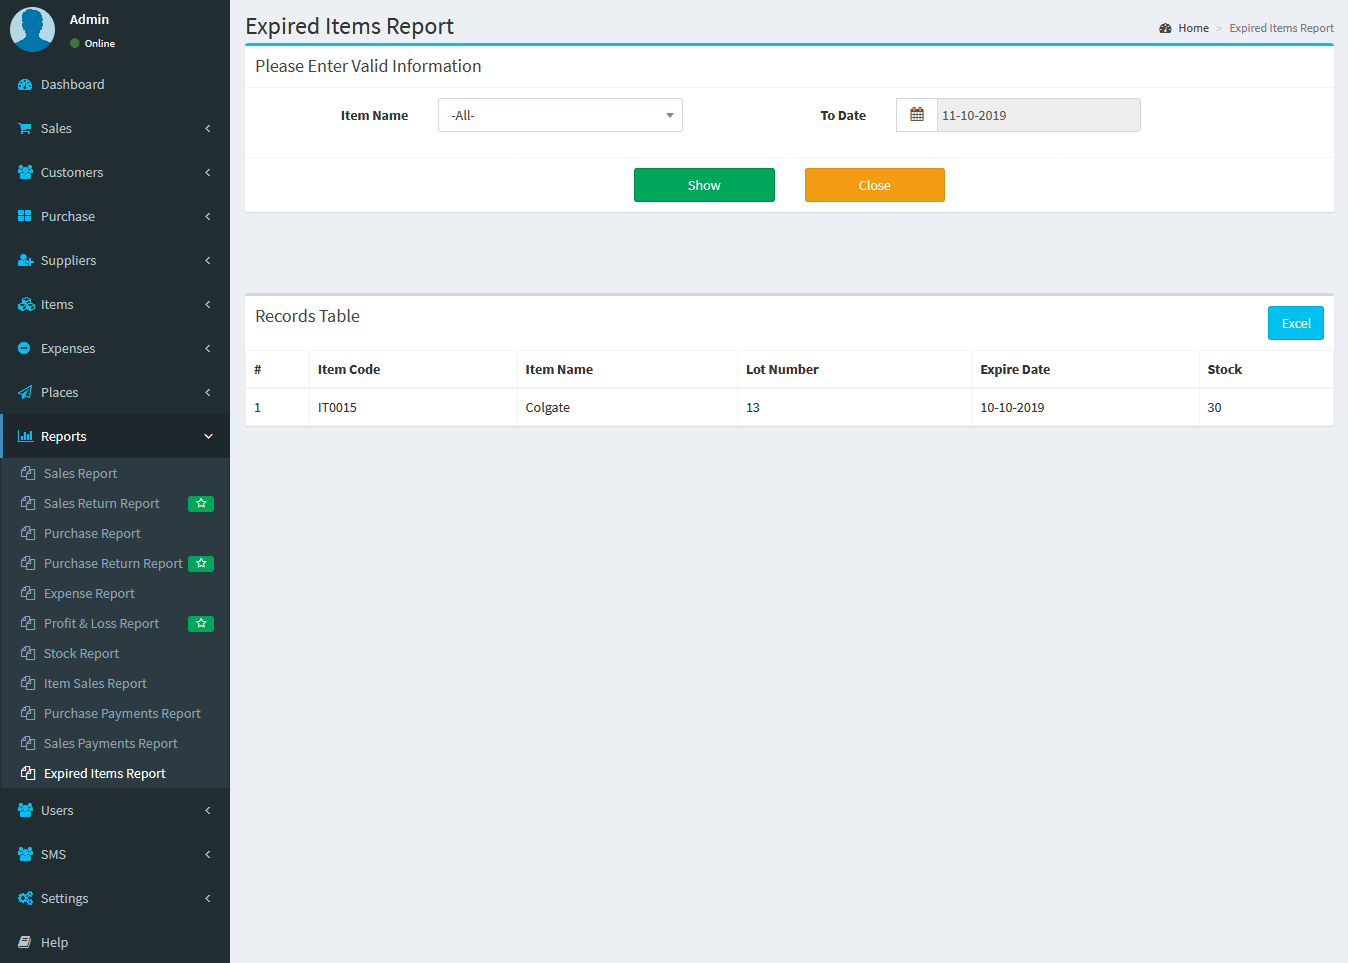
SMS
SMS API: SMS -> SMS API You need create API or enter API details here, almost all API works in this application. URL Based API works great. You need to enter:- URL - SMS API url link that is web link.
- Mobile Key - You need key of the mobile number in api. Ex: mobile, mobiles, phone etc., depends on Service provider
- Message Key - You need key of the message text key.
- After that you can enter other API keys and values linke Auth Key, sender ID, route etc.
Note !
You need to active the status for sending the SMS in whole application else application will send the SMS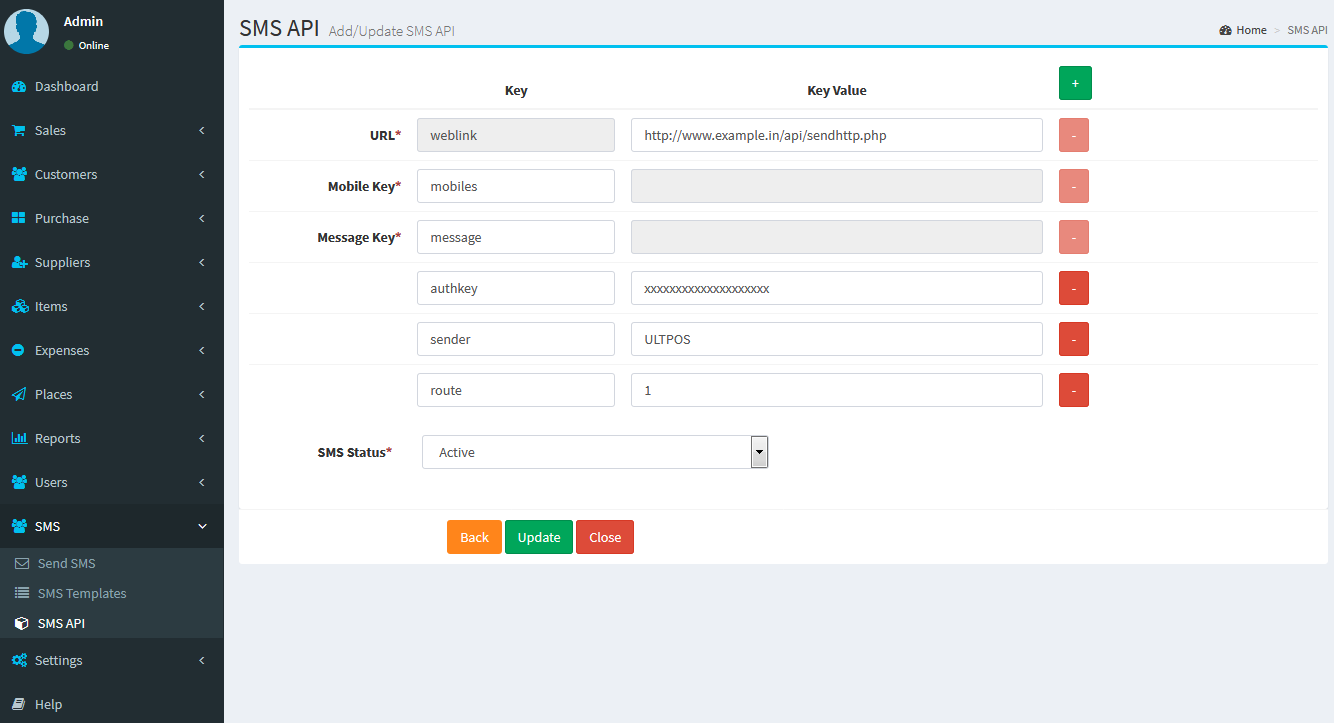 SMS Templates :
 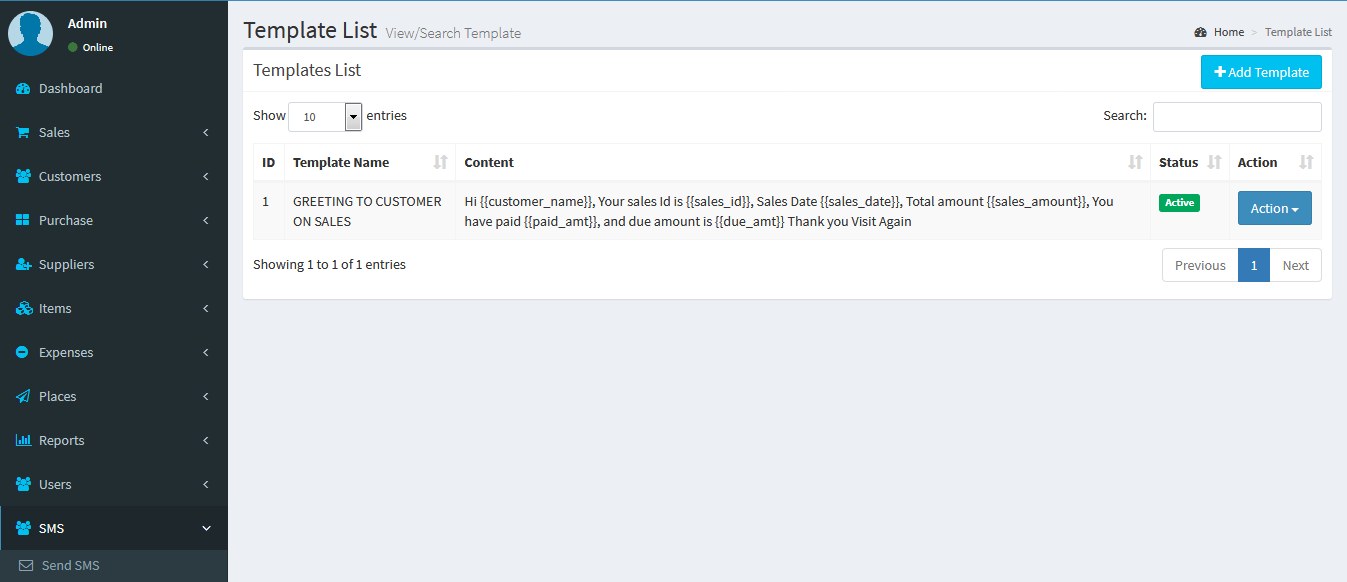 Send SMS :
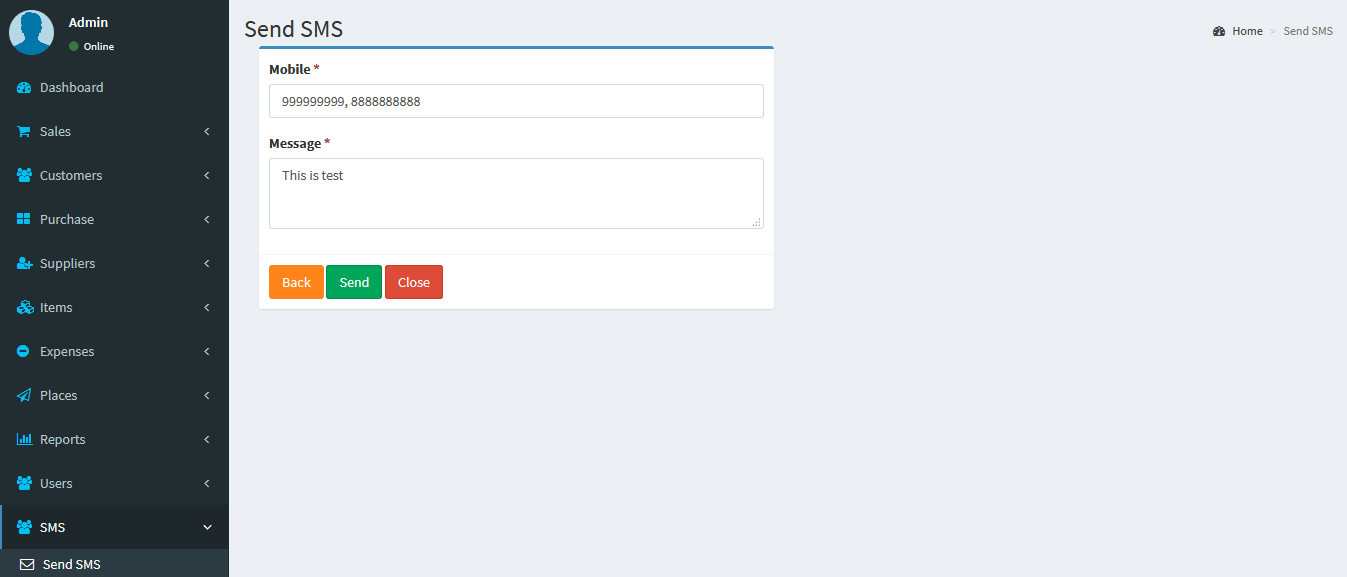
Settings
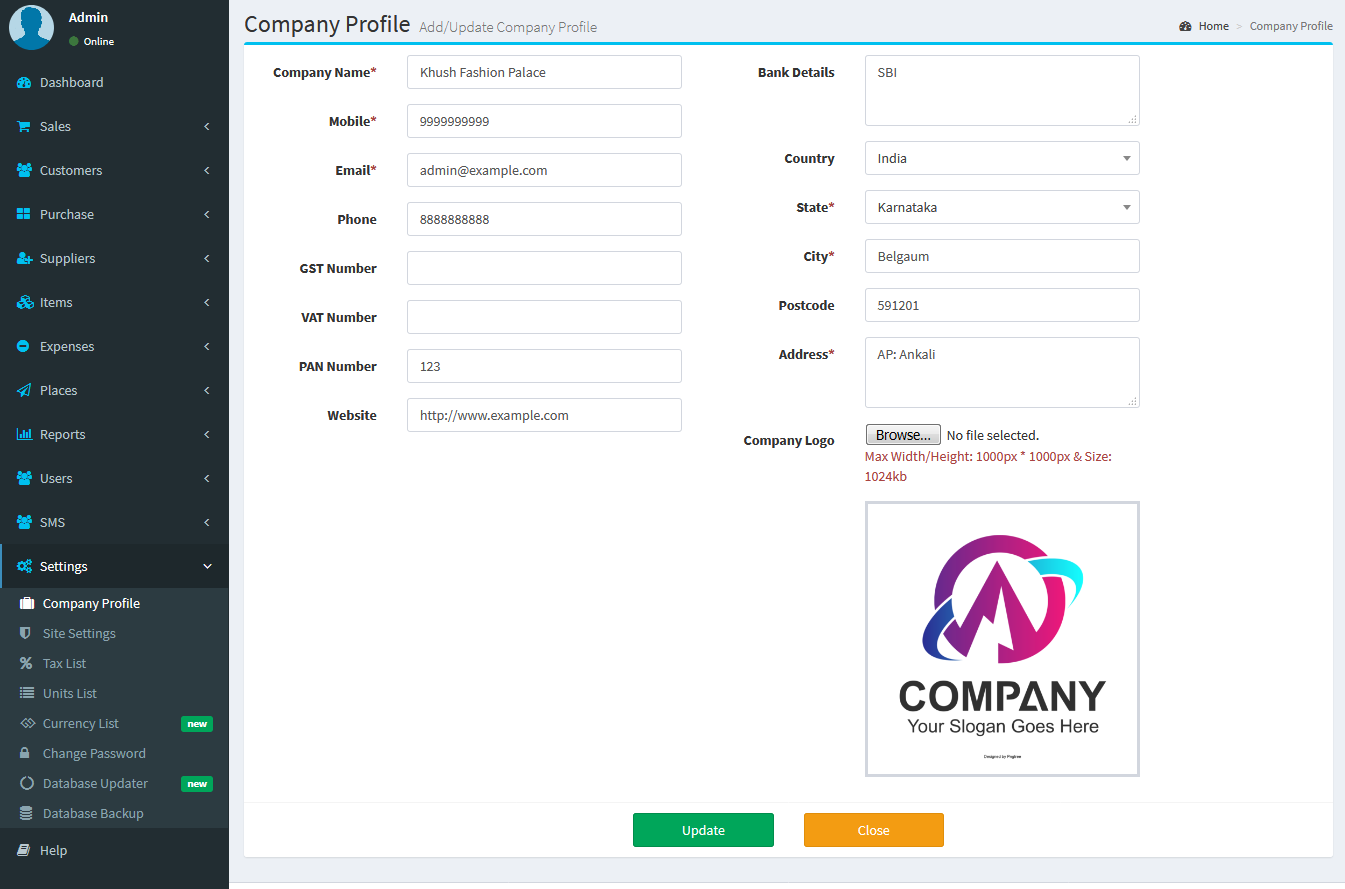
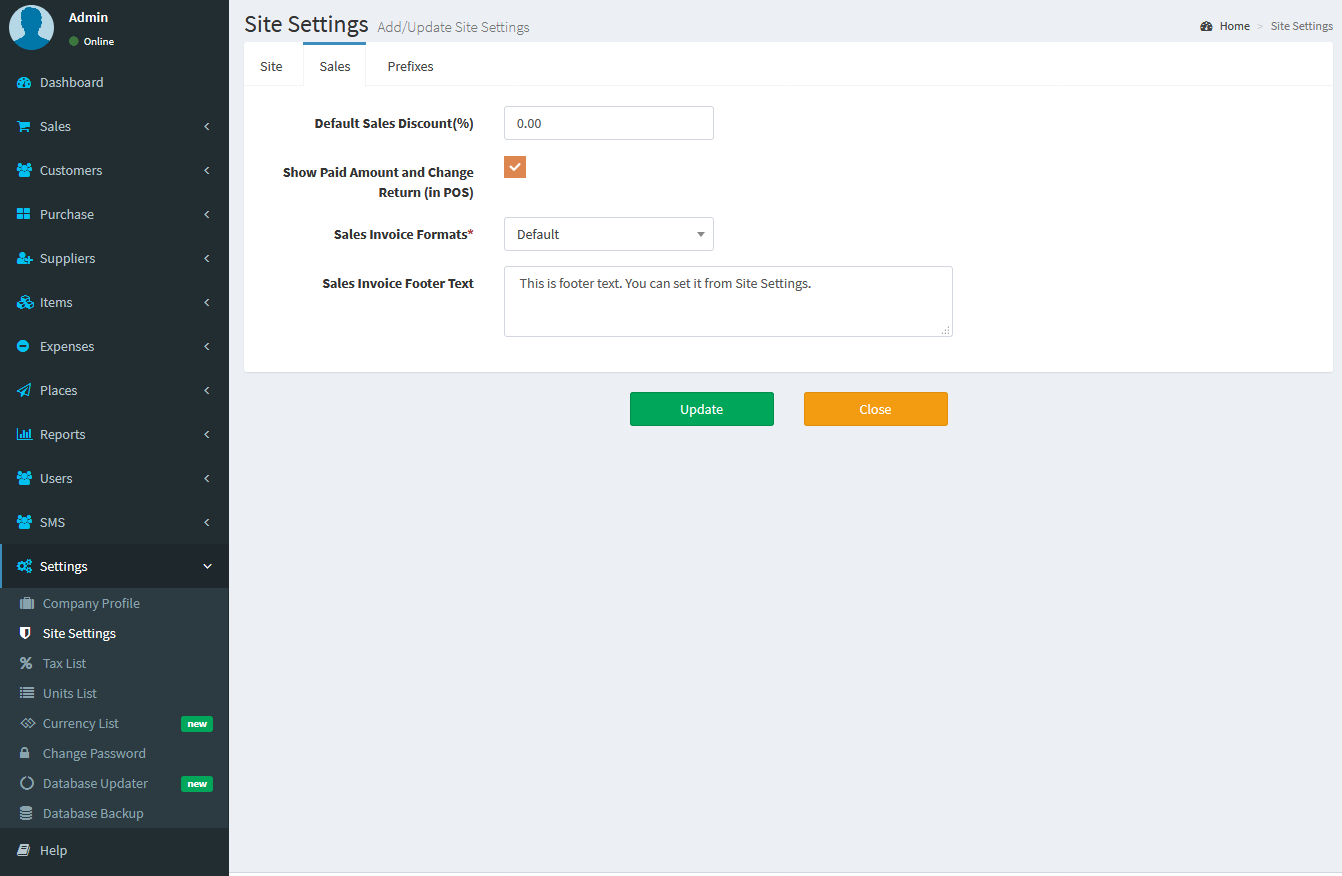
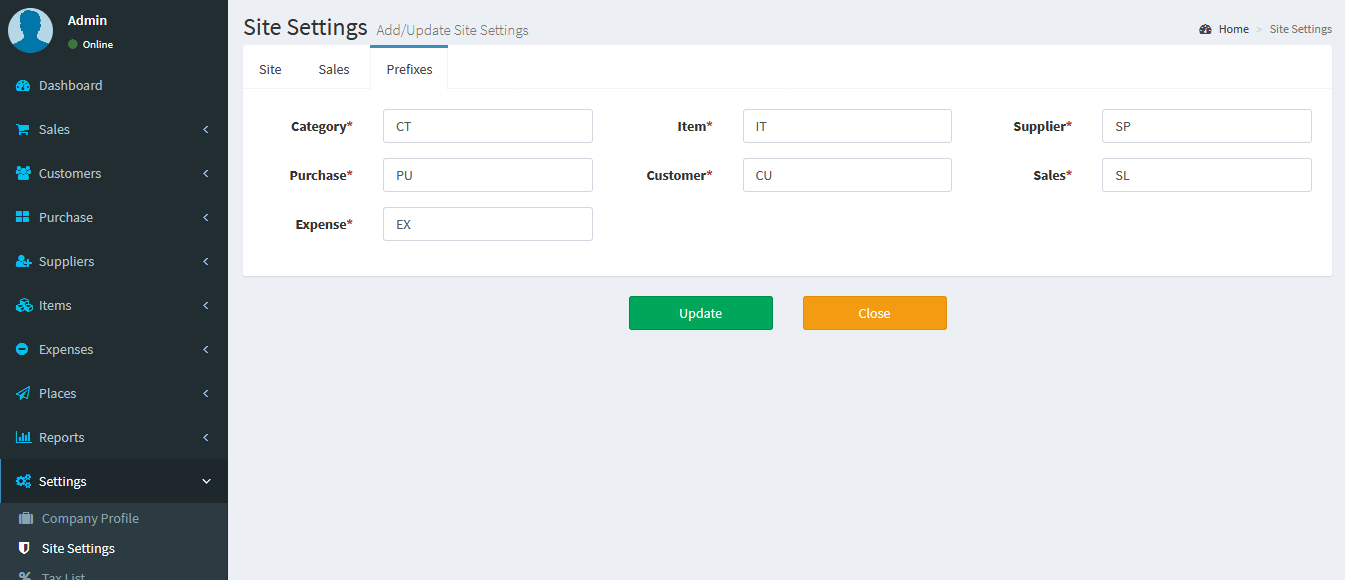
Company Profile: Settings -> Company Profile You can update the company profile information's like Company name, Phone, Mobile, Email, GST Number, VAT Number, PAN Number, Bank Details, Website link, Country, State, Postcode,Address and Invoice Logo. Site Settings: Settings -> Site Settings Site: Update Site Name, Timezone, Date Format, Time Format, Currency, Currency Symbol Placement & Site Logo. Sales:- Update Default Sales Discount
- Enable to Disable the Paid amount and refund amount in invoice, (this features matters only for POS Invoice)
- Select Sales Invoice Formats
- Enter the Footer details of the sales Invoice
 Site Settings :
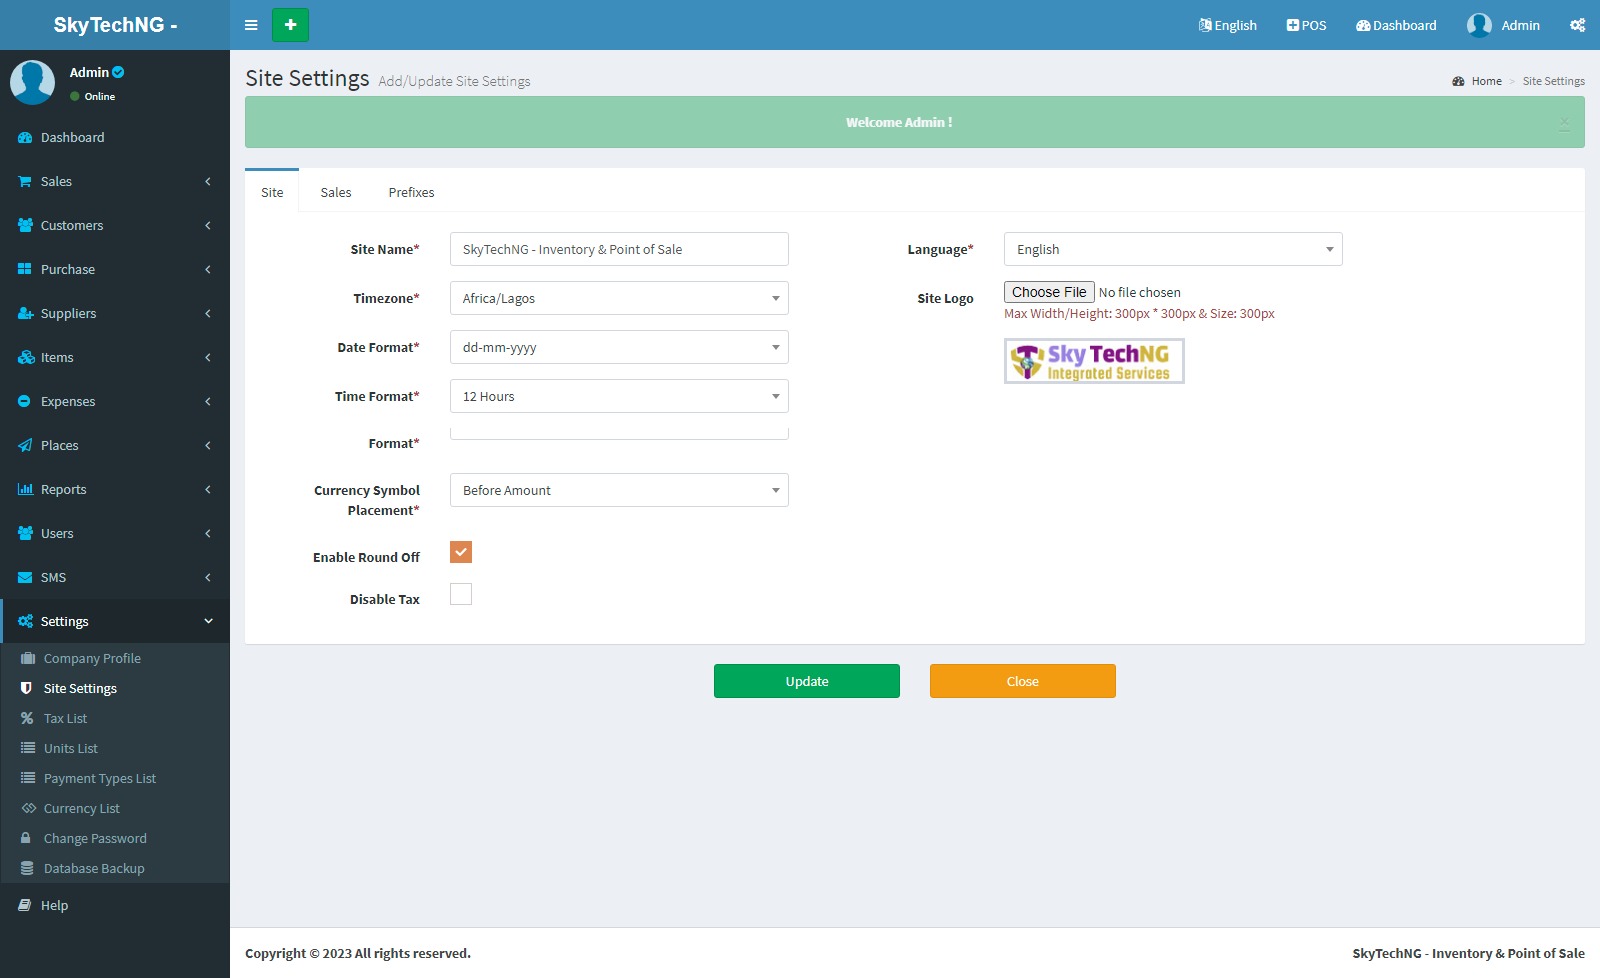
 Tax Add :
 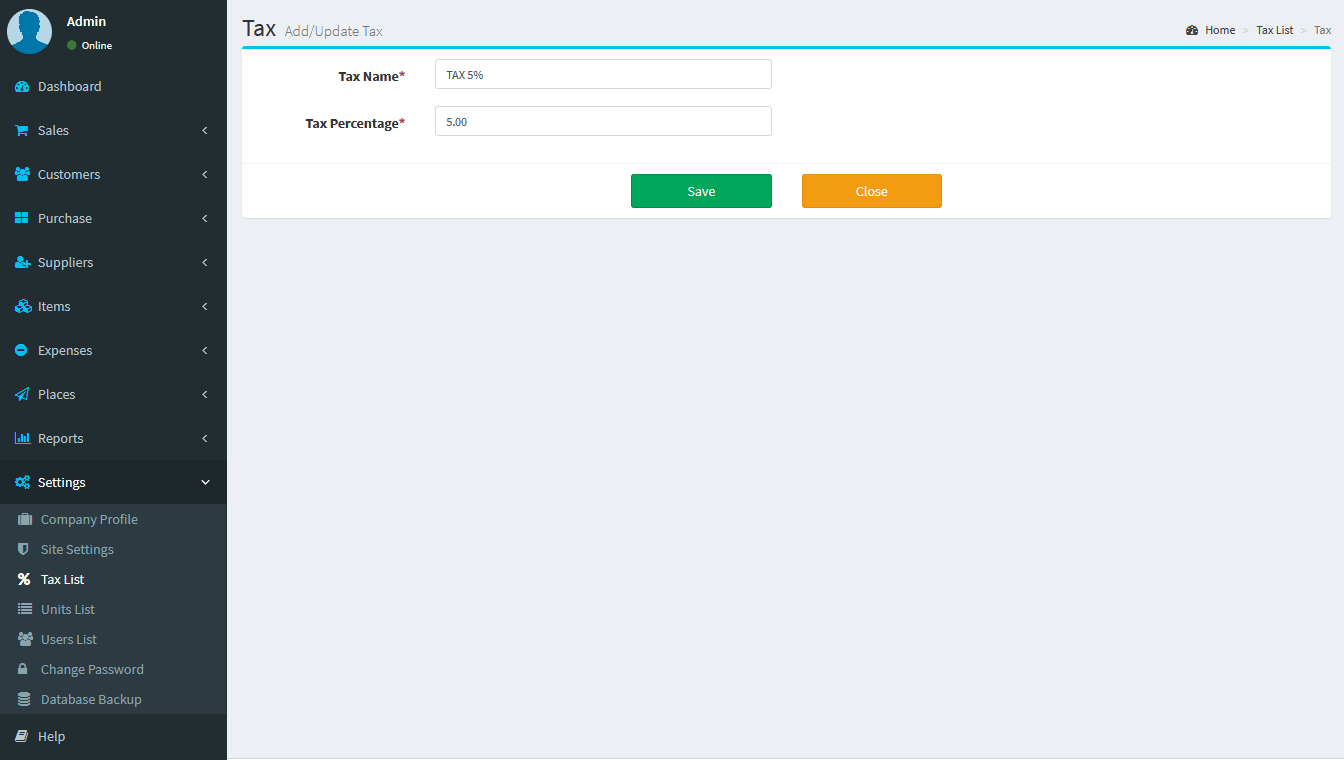 Tax List :
 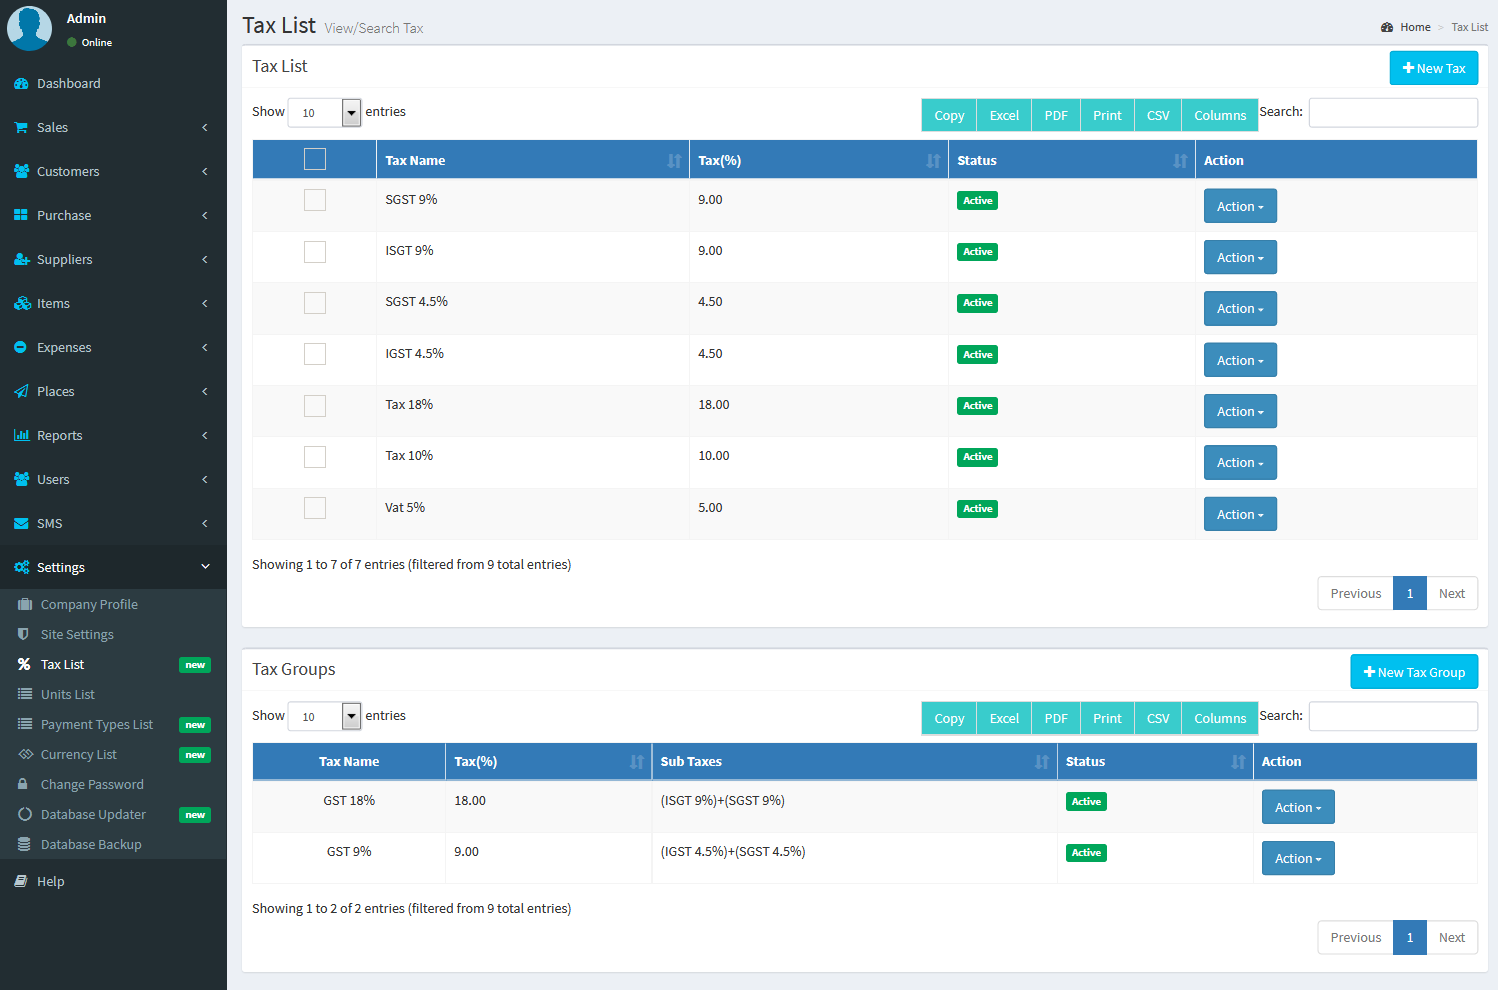 Unit Add :
 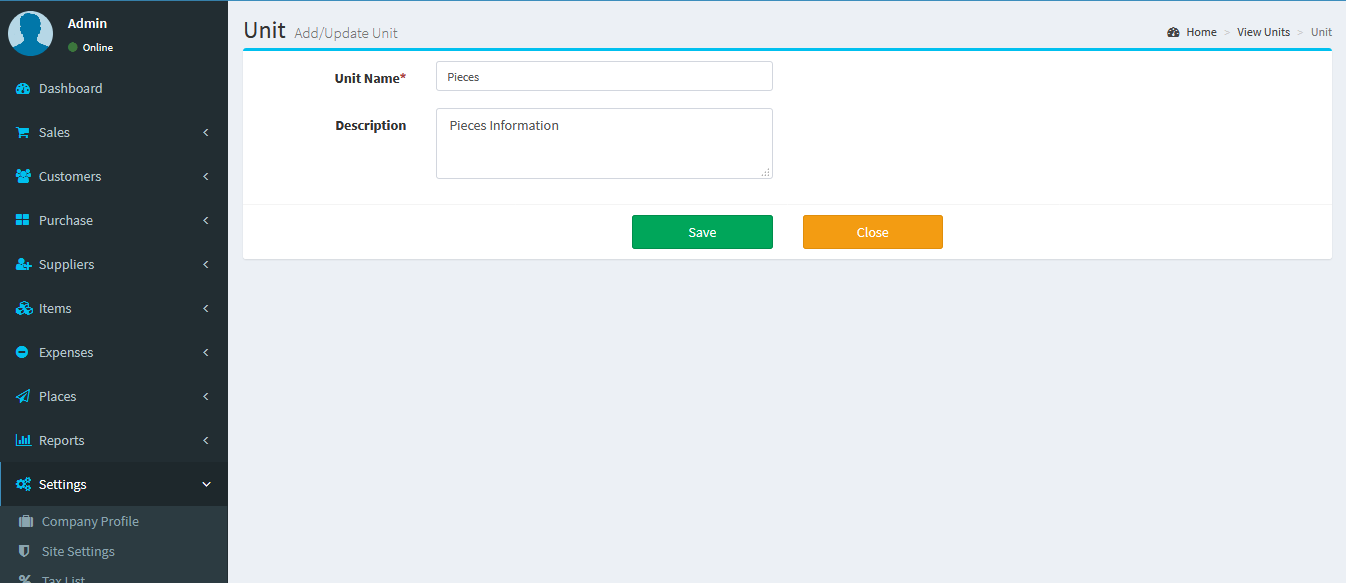 Units List :
 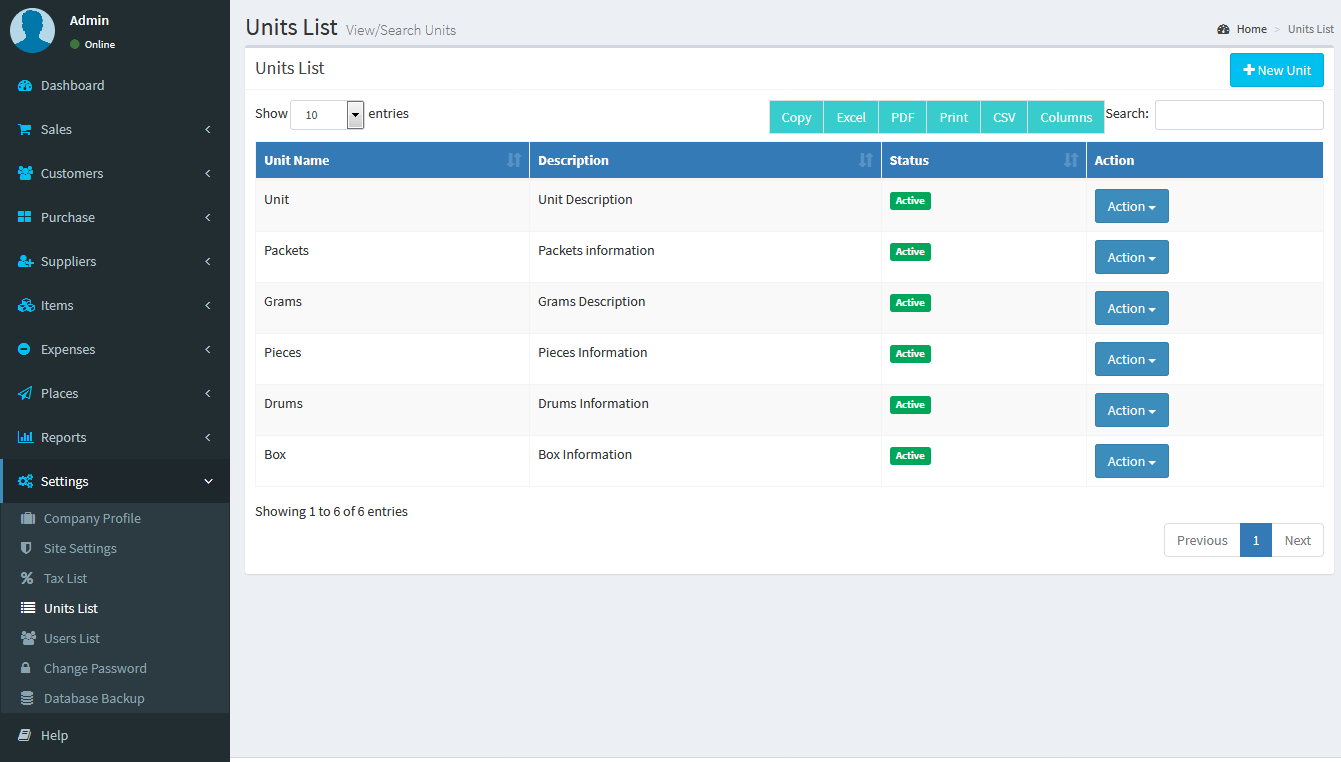 Payment Types Add :
 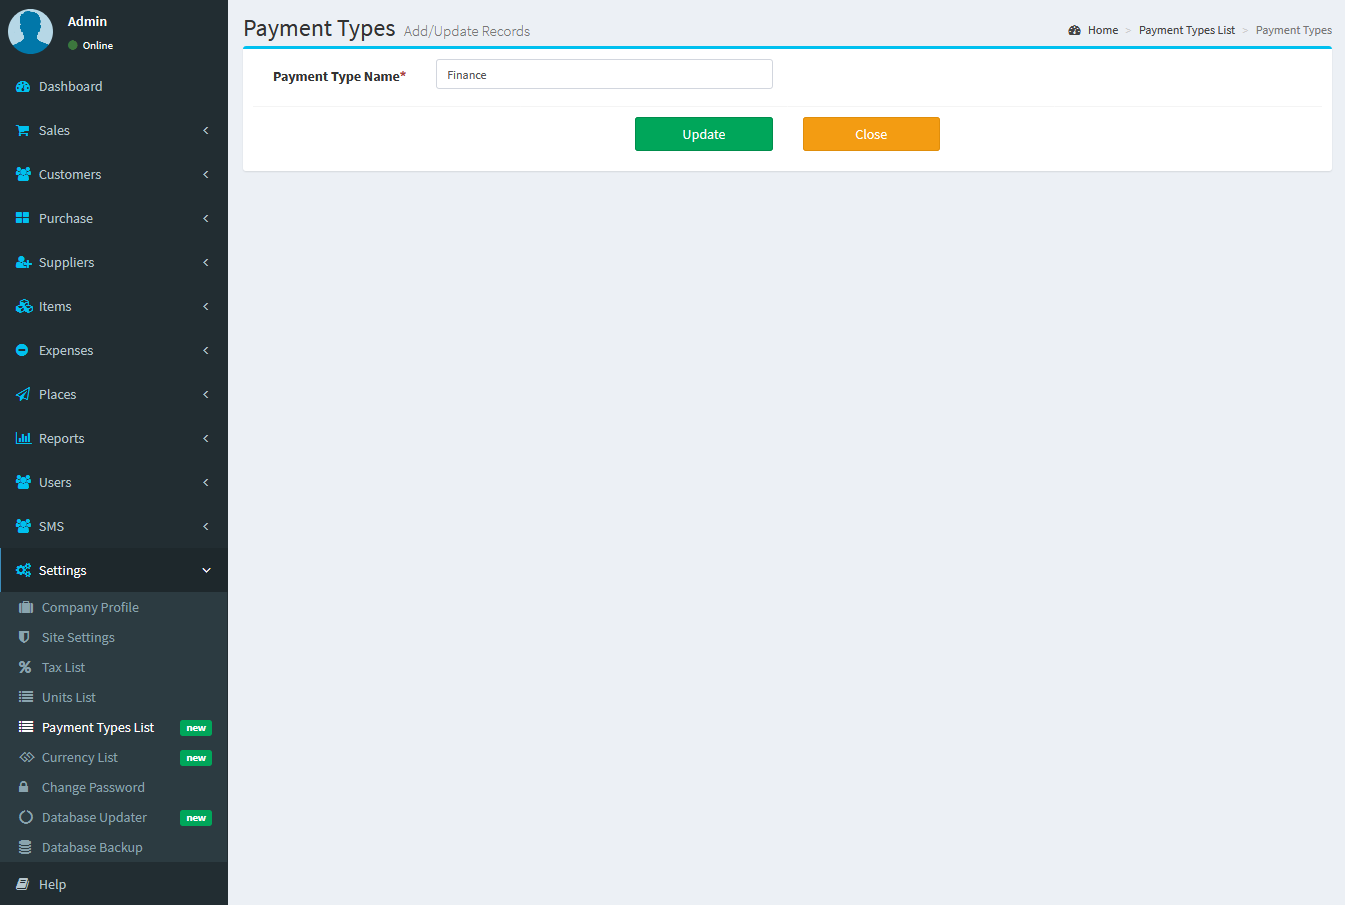 Payment Types List :
 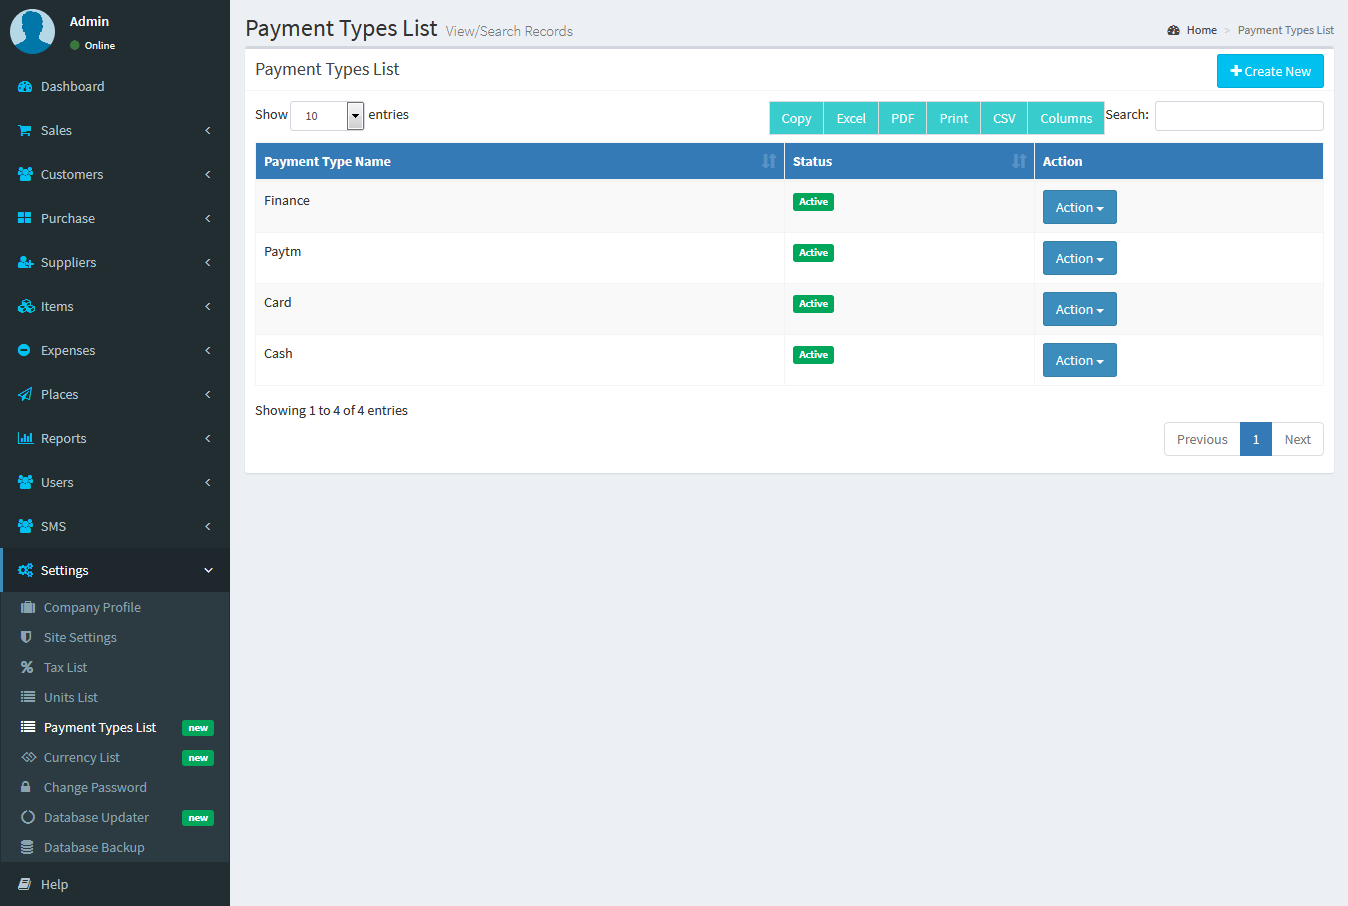 Currency Add :
 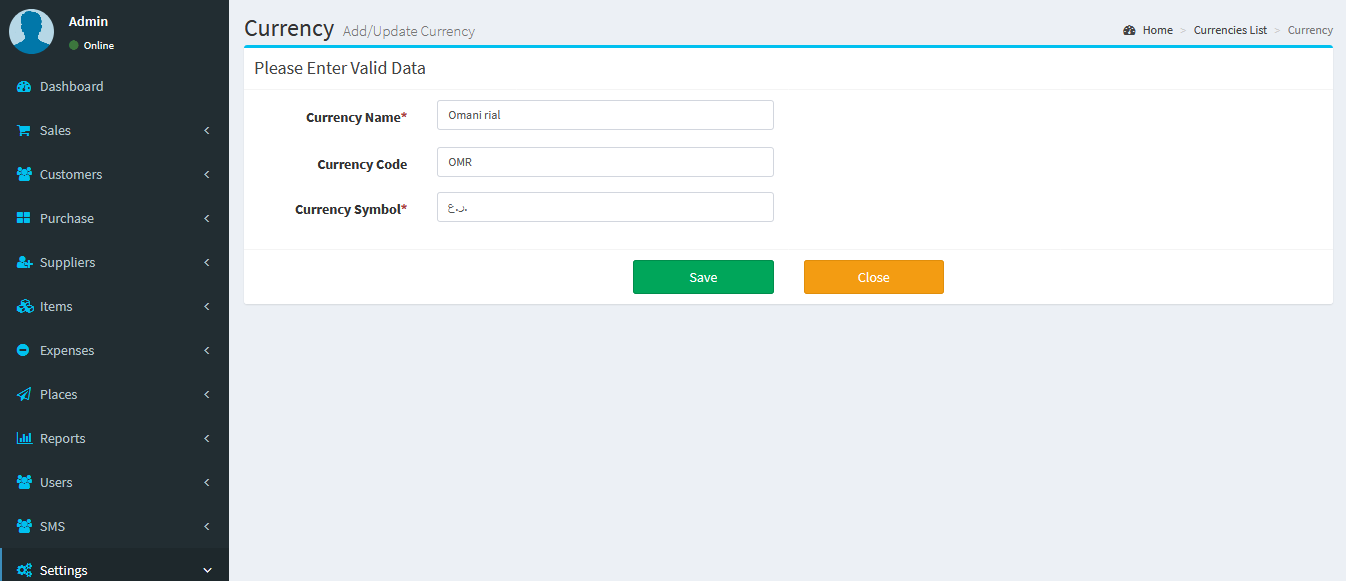 Currency List :
  Database Updater :
 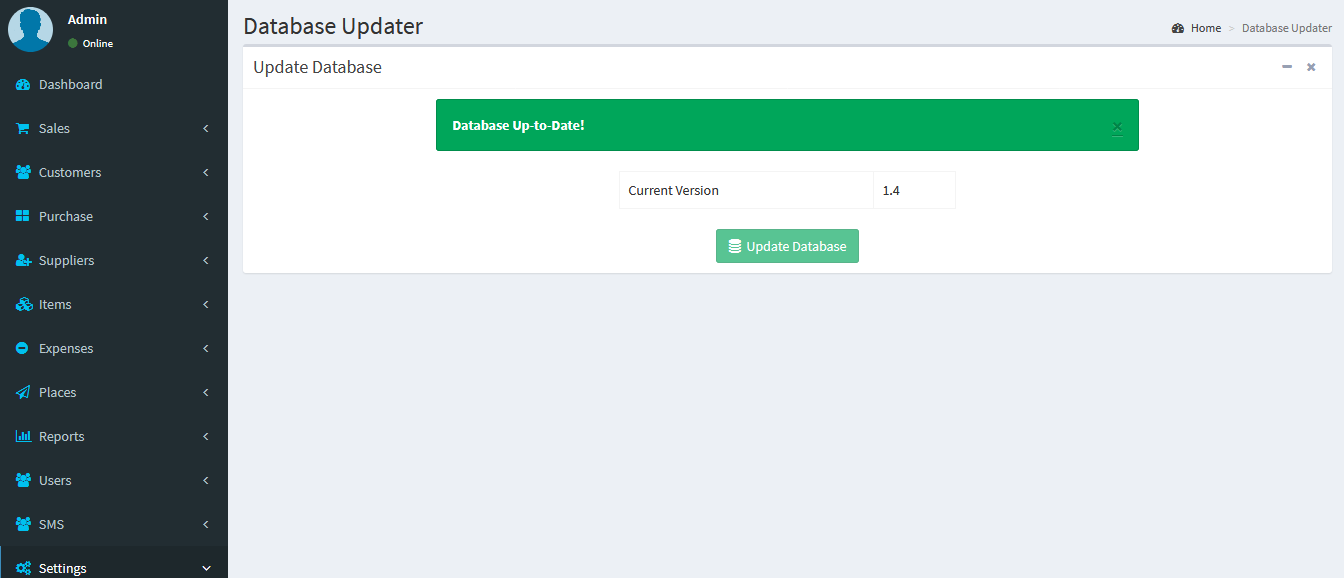 Change Password :
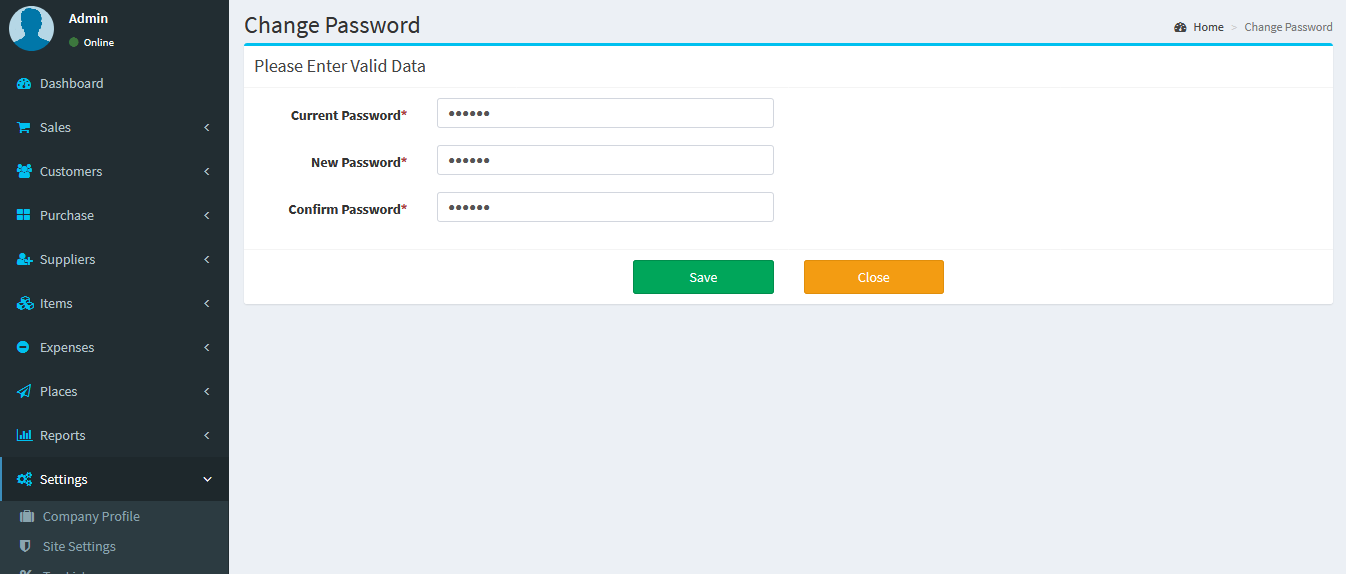
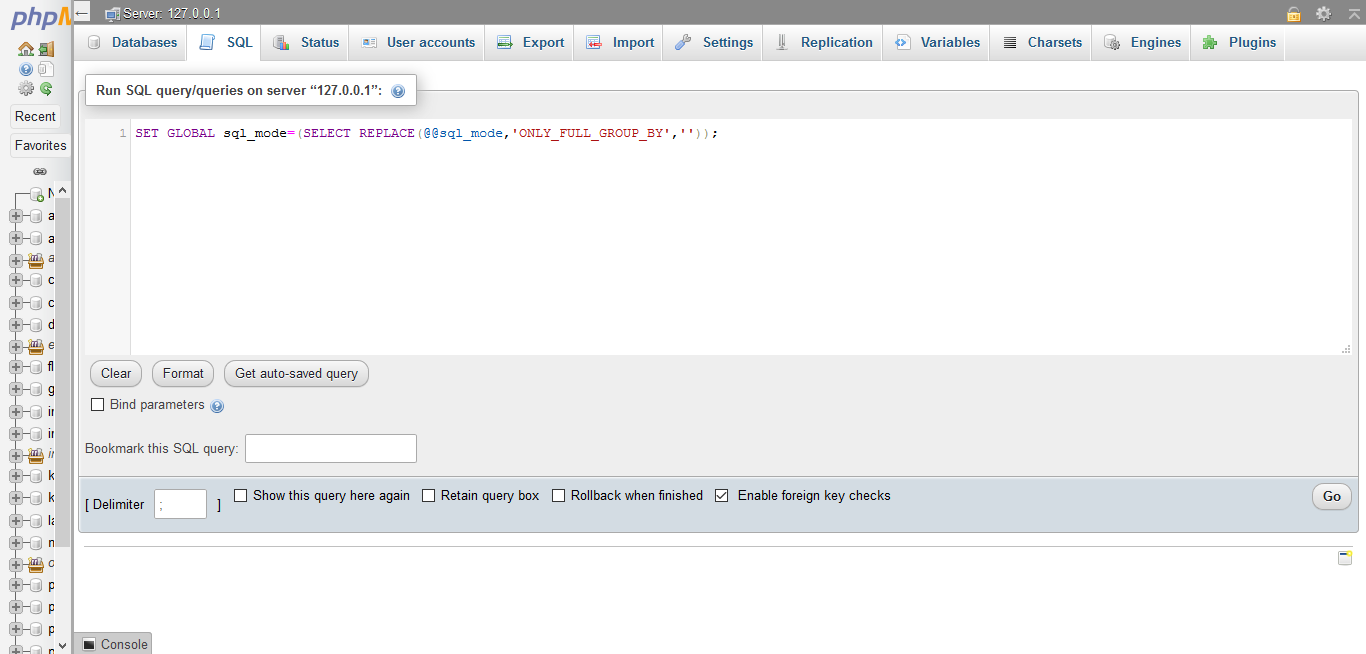
Full Group By
Correct way :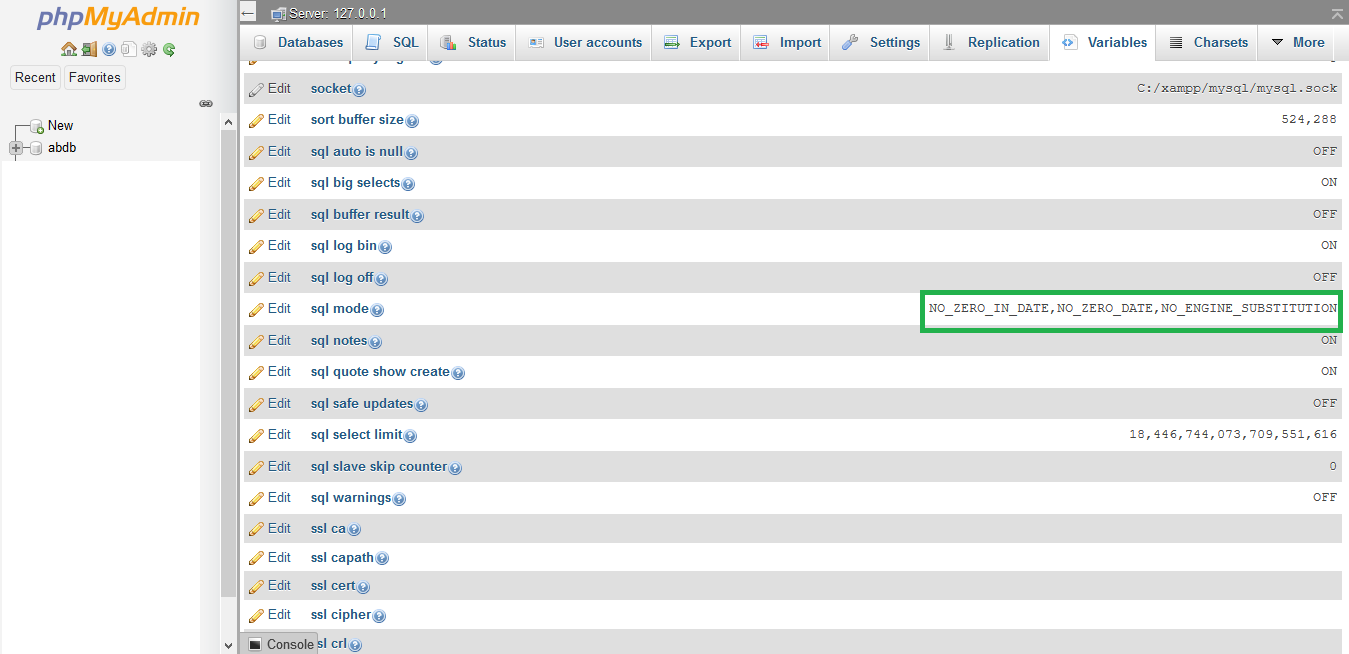 Invalid way :
 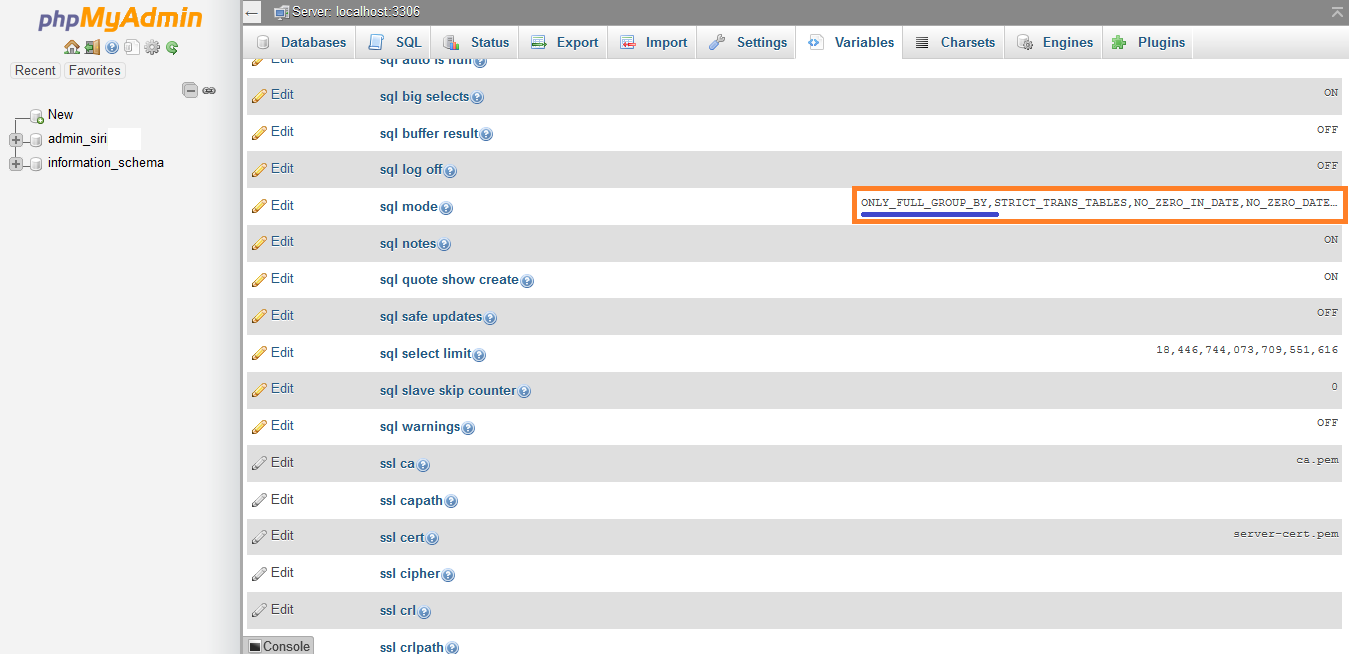 If it is FULL_GROUP_GROUP_BY exist, then we need to disable it: Please Enter the given command in SQL. SET GLOBAL sql_mode=(SELECT REPLACE(@@sql_mode,'ONLY_FULL_GROUP_BY','')); NOTE:
- If this command asking Permission of the Super Admin, then you should contact your hosting privider or Super admin of your server to execute this command.
- If you are on Local system, after entering command, you should restart your Server(Apache & MySQL).